5 Tips for Creating a Student Monthly Expense Sheet in Excel

Managing your finances as a student is not just about understanding how to save money or knowing how to spend less. It’s also about how well you can track your financial inflows and outflows. With tuition fees, textbooks, rent, groceries, transportation, and miscellaneous expenses, keeping an eye on where every dollar goes can significantly improve your financial health. Here are five detailed tips for creating an effective student monthly expense sheet using Microsoft Excel, a tool widely accessible and perfect for financial management.
Tip 1: Define Expense Categories

The first step in creating a student expense sheet is to define clear and relevant categories. Here’s how to approach it:
- Education - Tuition, textbooks, supplies.
- Housing - Rent, utilities, internet.
- Food - Groceries, dining out, coffee.
- Transportation - Public transport, fuel, car maintenance.
- Entertainment - Movies, events, hobbies.
- Health - Doctor visits, medications, gym membership.
- Miscellaneous - Clothing, personal care, unexpected costs.
📚 Note: Tailor these categories to your lifestyle. You might want to split 'food' into 'groceries' and 'eating out' if you frequently dine outside.
Tip 2: Use Formulas for Automation

Excel is powerful because of its ability to automate calculations, making your monthly expense tracking easier:
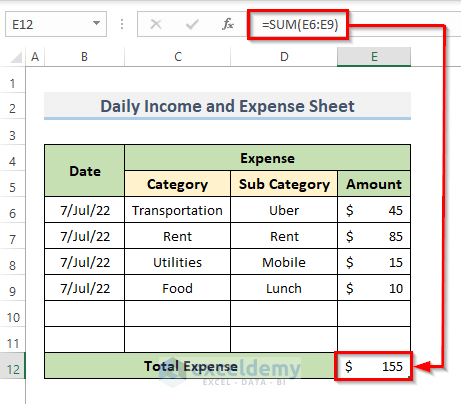
- Sum function - Use =SUM(cell range) to add up expenses within a category.
- Average function - Calculate your average monthly spend with =AVERAGE(cell range).
- AutoFill - Use AutoFill to replicate formulas across columns or rows to save time.
- Conditional Formatting - Highlight expenses that exceed your budget or savings goals.
🔧 Note: Experiment with formulas. Excel’s help center can guide you if you're stuck on how to use specific functions.
Tip 3: Include Visual Aids for Better Analysis

Visual representations can help you digest financial data quickly:
- Pie Charts - Show how much of your income is allocated to each category.
- Line Graphs - Track monthly trends in spending or saving.
- Bar Charts - Compare actual vs. budgeted expenses.
Create these charts with Excel’s “Insert” tab, selecting from various chart options.
| Chart Type | Use Case |
|---|---|
| Pie Chart | Proportion of expenses |
| Line Graph | Spending trends over time |
| Bar Chart | Comparison of budget vs. actual spend |

Tip 4: Set Up Budget Thresholds
Establishing budget limits for each category helps you control your spending:
- Set a realistic budget for each category based on your income and previous spending habits.
- Use conditional formatting to highlight when an expense exceeds the budget.
- Regularly review these thresholds to adjust them as necessary.
📊 Note: Remember, your budget should be a guide, not a strict rule. Life is unpredictable, so flexibility is key.
Tip 5: Track and Review Regularly

The power of your expense sheet is in its regular use. Here’s how to make it part of your routine:
- Update your expenses daily or weekly, not just at the end of the month.
- Review your data bi-weekly or monthly to spot trends, anomalies, or areas for saving.
- Use the “Data Validation” feature to ensure you’re entering data correctly.
- Analyze deviations between your budgeted and actual expenses to adjust your planning.
In wrapping up, creating an effective student monthly expense sheet in Excel involves setting clear categories, leveraging Excel’s automation capabilities, visual data representation, budgeting limits, and consistent review. This systematic approach not only helps you manage your finances better but also instills a sense of financial discipline and awareness that will serve you well beyond your student years. Whether you’re saving for a vacation, investing in personal growth, or simply trying to live within your means, a well-organized expense sheet is a fundamental tool in achieving financial peace.
Why is it important to categorize expenses in an Excel sheet?

+
Classifying your expenses helps in tracking where your money goes. This allows for better budgeting, identifying areas for potential savings, and ensuring you’re not overspending in any single category.
Can I customize the expense sheet for other non-student purposes?

+
Yes, the principles of tracking and categorizing expenses are universal. You can adjust the categories to fit personal, family, or business use, making it a versatile tool for any financial management scenario.
What if I have irregular or one-time expenses?

+
Create a separate section or tab for these. You might call it ‘Irregular Expenses’ or ‘One-Time Costs.’ Track these separately to get a full financial picture without skewing your monthly averages.
How do I keep my expense sheet up-to-date?

+
Incorporate it into your daily routine. Carry your phone or use an app to note expenses as they occur, then update your Excel sheet at least once a week to ensure accuracy.
What if I miss recording an expense?

+
If you miss an expense, add it as soon as you remember. Keeping receipts or tracking via bank/credit card statements can help in recalling missed expenses.