5 Simple Steps to Convert Excel to Google Sheets

In the modern digital world, collaboration and flexibility are essential in managing data. Excel, a long-standing standard in data manipulation, often needs to be transferred to Google Sheets for better collaboration. Google Sheets, part of Google's suite of productivity tools, provides a cloud-based environment where multiple users can edit, comment, and collaborate in real-time. Here's a detailed guide on how to convert Excel to Google Sheets using just a few simple steps, ensuring your data remains intact and easily accessible.
Step 1: Prepare Your Excel File

Before initiating the conversion process, take a moment to ensure your Excel workbook is clean and well-organized. Here’s what you need to do:
- Remove any data validation rules that might not transfer properly.
- Check for any macros or VBA scripts as these will not migrate to Google Sheets.
- Ensure your data is formatted correctly, especially date formats or special characters that could alter during conversion.
💡 Note: Google Sheets might not support all Excel features. Make sure to review the compatibility list on Google Support if you use advanced Excel functions.
Step 2: Upload Your File to Google Drive

Now, let’s move your file to Google Drive:
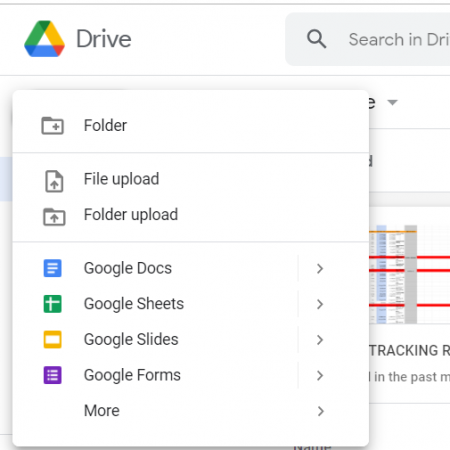
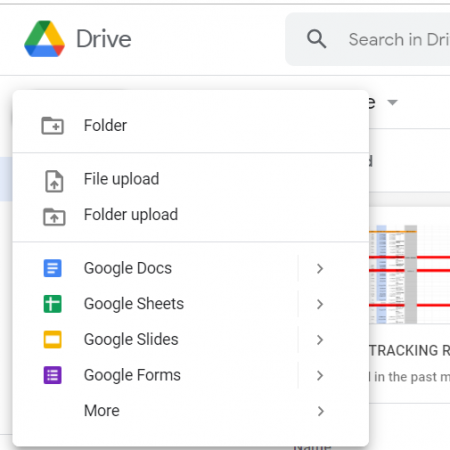
- Open Google Drive (drive.google.com) in your browser.
- Click on “New” > “File Upload” and select your Excel (.xlsx or .xls) file.
- Wait for the file to upload. Once completed, you will see the file in your Drive.
Step 3: Open the File with Google Sheets

Once the Excel file is in Google Drive:
- Right-click on the uploaded Excel file.
- Select “Open with” and then choose “Google Sheets.”
Google will begin the conversion process, opening your file in Google Sheets. Here, you can:
- Review if all the data has been imported correctly.
- Make any necessary adjustments, like formatting changes or fixing any data discrepancies.
Step 4: Save the Converted File

After reviewing and making any adjustments:
- Select "File" from the menu.
- Click "Save as Google Sheets." This will create a new Google Sheets file in your Drive.
- If desired, you can now delete the original Excel file from Google Drive to manage space.
Step 5: Share and Collaborate

Now your data is in Google Sheets, ready for collaboration:
- Click on the "Share" button at the top right of the Google Sheets interface.
- Enter the email addresses of collaborators or copy the shareable link to provide access.
- Set the appropriate permissions for viewing, commenting, or editing.
Your Excel data is now on Google Sheets, accessible from anywhere, with the power of real-time collaboration.
🔗 Note: Keep in mind that not all Excel features will work identically in Google Sheets, so it's beneficial to test the conversion thoroughly.
Having completed these steps, your Excel to Google Sheets conversion is now complete. By following this straightforward process, you can enjoy the benefits of cloud-based collaboration and data management, making it easier for teams to work together seamlessly, whether in the same room or around the globe.
Can I convert an Excel file with complex formulas to Google Sheets?

+
Yes, Google Sheets supports most Excel formulas, but some complex or custom functions might not translate perfectly. Always check the compatibility of your formulas during the conversion process.
Will formatting be preserved when converting from Excel to Google Sheets?

+
Google Sheets generally preserves basic formatting like font style, colors, and cell alignment, but more advanced formatting features might not be supported or might look different.
What happens if my Excel file contains macros?

+
Macros and VBA scripts are not supported in Google Sheets. You will need to recreate these functionalities using Google Apps Script or find alternative methods within Google Sheets.
Is it possible to revert back to an Excel file from Google Sheets?

+
Yes, you can download your Google Sheets file as an Excel (.xlsx) file by selecting “File” > “Download” > “Microsoft Excel (.xlsx)”.