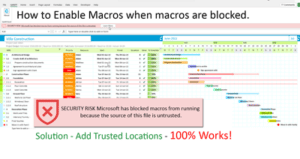
5 Simple Steps to Enable Macros in Excel Sheets

Introduction to Excel Macros

Excel macros are powerful tools designed to automate repetitive tasks, thereby saving time and minimizing errors. Essentially, a macro is a set of instructions that Excel follows to perform tasks automatically. Understanding how to enable macros is crucial for anyone looking to leverage the full capabilities of Microsoft Excel.
Step 1: Understanding Macro Security Settings

Before you can run macros in Excel, you must familiarize yourself with the macro security settings:
- Disable Macros with Notification: Macros are disabled, but you are notified when they are present, allowing you to enable them for specific documents.
- Disable Macros Without Notification: Macros are disabled without any notification, offering the highest level of security but preventing macro execution.
- Enable All Macros: This setting permits all macros to run, which can be risky if you work with untrusted sources.
- Trust Center Settings: You can adjust settings to trust files from certain locations or publishers.
How to Access Security Settings:

- Open Excel.
- Go to File > Options > Trust Center > Trust Center Settings.
- Navigate to Macro Settings.
📝 Note: Always consider the security implications before enabling macros from unknown sources.
Step 2: Enabling Developer Tab

To access macro-related features, you’ll need to enable the Developer tab:
- Access Excel Options: Go to File > Options > Customize Ribbon.
- Check Developer: On the right side, tick the box next to Developer.
- Save Changes: Click OK to apply and close the dialog box.
Now, the Developer tab should appear on your Excel ribbon, providing access to macros and other programming tools.

Step 3: Inserting and Running a Macro

With the Developer tab enabled, here’s how you can insert and run a macro:
Go to Developer Tab: Click on the Developer tab in the ribbon.
Record a Macro:
- Click Record Macro from the Code group.
- Give your macro a name, and optionally assign it to a button or keyboard shortcut.
- Perform the actions you want to automate.
- Click Stop Recording when finished.
Run a Macro:
- Click Macros in the Developer tab.
- Select the macro from the list and click Run.
| Step | Description |
|---|---|
| Record | Automates steps by capturing your actions. |
| Run | Executes the recorded or written macro code. |

Step 4: Editing Macros

You might need to edit macros:
- Open the Visual Basic Editor: Press Alt + F11 or click Visual Basic in the Developer tab.
- Modify Code: Navigate through the Project Explorer to find your macro, and edit the VBA code as needed.
Step 5: Saving a Workbook with Macros

Macros are saved differently in Excel:
- Save As: Go to File > Save As.
- Choose File Type: Select Excel Macro-Enabled Workbook (*.xlsm).
📝 Note: This file type is necessary to save macros as it enables the storage of VBA code.
By following these steps, you can unlock the power of macros, automate complex tasks, and streamline your workflow in Excel. Remember that careful management of macro security settings is vital to protect against potential security threats.
What are macros used for in Excel?

+
Macros are used in Excel to automate repetitive tasks, allowing users to perform complex sequences of commands with a single action. This can include data manipulation, formatting, calculations, and much more.
Is it safe to enable macros?

+
Enabling macros from unknown or untrusted sources can be risky. However, if you enable macros only from trusted sources and maintain strong security settings, the risk is significantly reduced.
Can I run a macro on someone else’s computer?

+
Yes, you can run macros on other computers if the macros are not password-protected and macro security settings on that computer allow for it. However, if macros are stored in an external file or location, ensure you have access to them.