How To Make An Excel Sheet Read Only

Excel spreadsheets are versatile tools widely used in businesses, academia, and personal finance. However, there are times when you need to distribute data without allowing for alterations by other users. Here's a comprehensive guide on how to make an Excel sheet read-only, ensuring your data's integrity.
Understanding the Purpose of Read-Only Mode

Before we dive into the how, let's understand why you might want to make your Excel sheet read-only:
- Data Integrity: To prevent accidental or unauthorized changes to critical data.
- Sharing: When distributing financial reports, project plans, or any sensitive information, you might want to ensure that the recipient can view but not alter the content.
- Security: To protect formulas or to maintain the accuracy of records.
The read-only mode doesn't alter the file but restricts editing rights, making it an excellent tool for data sharing without fear of alteration.
Methods to Make an Excel Sheet Read-Only

Using File Properties

This is the simplest way to restrict editing:
- Save your Excel workbook. Right-click on the file, then select Properties.
- In the Properties dialog box, navigate to the General tab and click on the Read-only recommended checkbox. Click OK.
- The next time the file is opened, users will get a prompt suggesting they open it in read-only mode. However, this isn’t a mandatory restriction, as users can still choose to edit.
Password Protection

For a more secure approach:
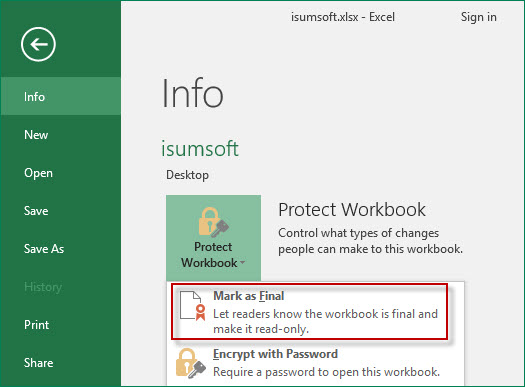
- Open your Excel workbook. Go to File > Info, then Protect Workbook and select Encrypt with Password.
- Enter a password and confirm it. This will encrypt the workbook, requiring a password to open and edit it.
- Users without the password will have read-only access.
Using Workbook Protection

Excel allows you to protect the structure of the workbook, preventing changes to the layout or worksheets:
- From the Review tab, click on Protect Workbook, then Protect Structure and Windows.
- Check the box for Structure to prevent worksheet or tab reorganization.
- Optionally, you can set a password to unprotect the workbook later. Note that while the workbook structure can’t be altered, individual sheet content can still be edited.
Sheet-Level Protection

For detailed control over specific cells:
- Select the worksheet you want to protect from the Home tab, under Format, choose Protect Sheet.
- Allow users to select locked cells but not edit, unlock cells that should remain editable, then set a password for unprotection.
💡 Note: Users can't bypass password protection without the password, but files can be moved or copied when only structure protection is used.
Tools and Utilities for Read-Only Control

If you’re dealing with numerous files or need more control, consider these tools:
- VBA Macros: Automate workbook opening in read-only mode.
- Third-Party Software: Tools like Adobe Acrobat can convert Excel files to PDFs, which are inherently read-only.
Managing Read-Only Files on Cloud Platforms

Cloud storage solutions like OneDrive or Dropbox can be configured to distribute read-only files:
- Set permissions when sharing files via cloud services to control whether users can edit, view only, or download.
Wrapping Up

By now, you should have a solid understanding of various methods to make an Excel sheet read-only. These strategies provide different levels of protection, from simple suggestions to strong security measures. Remember, while read-only settings can prevent changes, they don’t stop users from duplicating the file unless additional measures are taken.
How can I tell if an Excel sheet is read-only?

+
Look for a small lock icon in the title bar of Excel or receive a prompt when opening the file suggesting you open it in read-only mode.
Can users still print read-only Excel files?

+
Yes, read-only mode restricts editing, not printing. Users can still print the document unless you disable this feature separately.
What happens if I lose the password for an encrypted Excel file?

+
If you forget the password, you won’t be able to access or edit the Excel file. Always keep a safe record of your passwords.