5 Easy Ways to Create Excel Cover Sheets

Excel cover sheets are an essential part of any professional or personal spreadsheet. They provide a neat, organized summary or introduction to the data within the workbook, making it easier for users to navigate through the document efficiently. Whether you're preparing a business report, organizing event details, or managing personal finances, a well-designed cover sheet can significantly enhance the overall presentation and functionality of your Excel workbook.
Why Use Excel Cover Sheets?

- Organization: Helps in categorizing and summarizing data.
- Professionalism: Adds a level of sophistication and credibility to your work.
- Accessibility: Assists users in quickly understanding the workbook’s content and structure.
Now, let’s explore five straightforward methods to create an Excel cover sheet that not only looks good but is also practical for everyday use.
Method 1: Basic Text Layout

Start with the simplest form of a cover sheet:
- Open your Excel workbook where you want to insert the cover sheet.
- Right-click the first sheet tab and choose “Insert”.
- Select “Worksheet” and click “OK” to add a new blank sheet at the beginning.
- Rename this sheet to something like “Cover Sheet”.
- In cell A1, type in your workbook’s title using a large font size and bold formatting to emphasize the title.
- Below this, add key information such as the date, author’s name, or project details in smaller font sizes.
- Align the text to center or left-align for a professional look.
- Add borders or fill colors to sections for better visual separation.
🌟 Note: Use a clear, easy-to-read font like Calibri, Arial, or Times New Roman for better readability.
Method 2: Use Excel’s Table for Data Presentation

To add a touch of structure, incorporate Excel’s table feature:
- Follow the steps to create a basic text layout.
- Select the range where you want your table to appear, usually under the title.
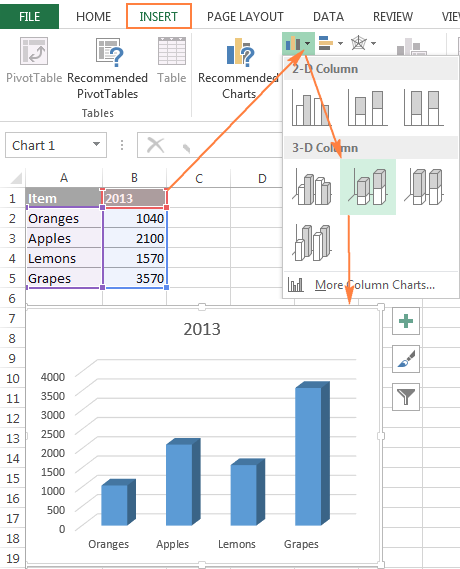
- Go to “Insert” tab > “Table” and hit OK in the dialog box.
- Fill this table with your key information using headers for clarity, like “Project Name”, “Prepared By”, “Date”, etc.
- Format the table by selecting it, right-clicking, and choosing “Format Cells” to customize the appearance.
Method 3: Leveraging Excel’s Design Tools

Enhance your cover sheet with built-in design tools:
- Use the “Themes” option from the “Page Layout” tab to apply predefined themes to your cover sheet for a consistent look.
- The “Shapes” feature under “Insert” can add visual elements like a rectangle or line to divide sections or highlight key points.
- Apply custom number formatting to dates or numbers for uniformity.
- Utilize the “Cell Styles” for headings or important text to make them stand out.
🌟 Note: Use subtle colors to maintain professionalism. Avoid overly bright or distracting colors unless the cover sheet's purpose demands it.
Method 4: Advanced Formatting with Conditional Formatting

For dynamic cover sheets:
- Set up your basic layout or table.
- Select the cells where you want to apply conditional formatting.
- Under the “Home” tab, click on “Conditional Formatting”.
- Choose options like “Data Bars”, “Color Scales”, or “Icon Sets” to visually highlight important data points.
Method 5: Custom Cover Sheets Using Excel’s Art Tools

If you’re looking for a more creative approach:
- Insert an image or logo using the “Insert” tab > “Pictures” for branding or thematic effect.
- Use “WordArt” for stylized text, available under “Insert” > “WordArt”.
- Incorporate “SmartArt” graphics to illustrate processes or hierarchies related to your document’s content.
Creating a cover sheet for your Excel workbook is not just about making it look pretty; it's about enhancing functionality, navigation, and professionalism. With these five methods, you can produce a cover sheet that serves its purpose effectively. Whether you're opting for simplicity with the basic text layout or enhancing visual appeal with Excel's art tools, remember that the key is to keep your audience in mind and tailor the cover sheet to their needs.
To round off your Excel experience, here are a few key points to remember:
- Keep the design simple and functional.
- Ensure readability is never compromised for design.
- Use visual elements judiciously to guide users through the workbook.
By implementing these techniques, you'll not only make your Excel workbooks more professional but also more user-friendly, ensuring that anyone who uses your spreadsheets can find what they need quickly and efficiently.
Can I protect my cover sheet from being edited?

+
Yes, you can protect the entire workbook or individual sheets, including the cover sheet, using Excel’s “Protect Sheet” or “Protect Workbook” features. This can prevent unauthorized changes but still allows viewing.
How do I link data from other sheets to the cover sheet?

+
You can link data by using formulas like ‘=Sheet2!A1’ to reference cell A1 from Sheet2 in your cover sheet. Ensure the linked cells are named for clarity, and use absolute cell references if needed.
Is there a way to automate the updating of the cover sheet?

+
Yes, you can use Excel’s VBA (Visual Basic for Applications) to create macros that automate certain tasks, including updating your cover sheet with dynamic data or changing its appearance based on specific conditions.
What’s the best practice for keeping a cover sheet consistent across multiple workbooks?

+
Create a template cover sheet and save it as an Excel template (.xltx). When creating new workbooks, use this template to ensure consistency across your documents.