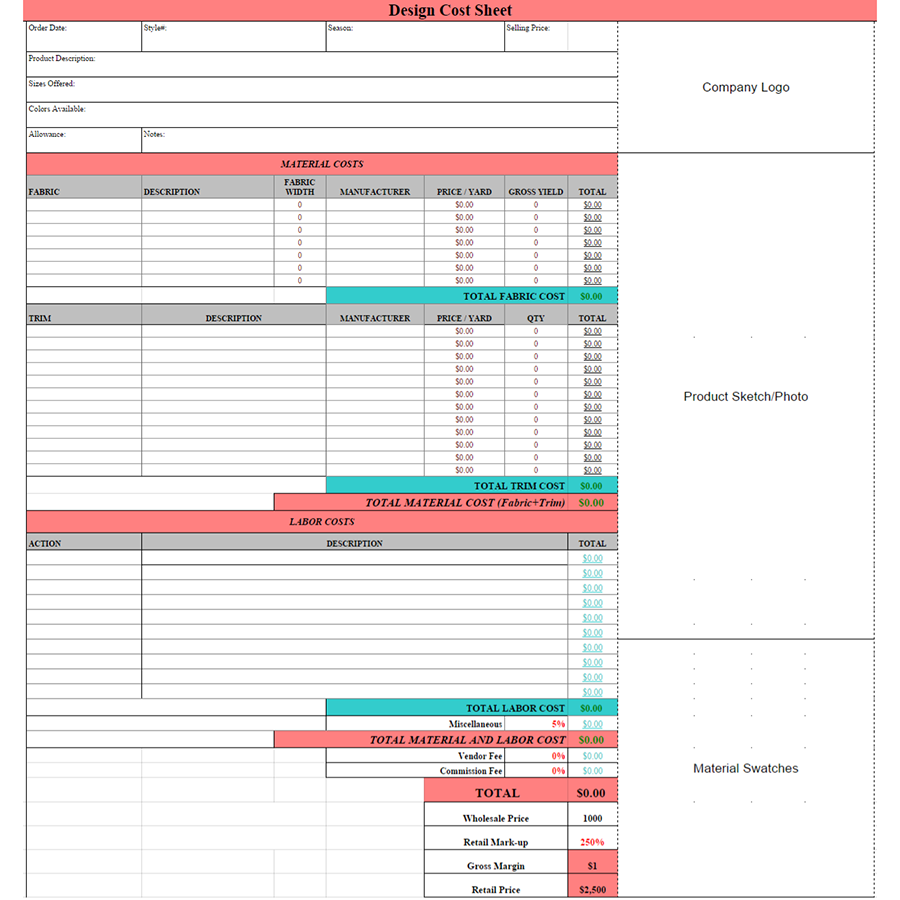
Create a Cost Sheet in Excel: Simple Guide

In today's fast-paced business environment, meticulous financial management is not just a practice; it's a necessity. One crucial tool in a company's financial toolkit is the cost sheet, a document that provides an itemized breakdown of the costs involved in the production of goods or services. This guide dives into the simple process of creating a cost sheet in Microsoft Excel, ensuring you can track and manage expenses effectively.
Why Use a Cost Sheet?

Before we dive into the creation of a cost sheet, let's touch on why this document is vital:
- Visibility: It gives you a clear picture of where your money is going.
- Decision Making: Helps in pricing products or services accurately to ensure profitability.
- Budget Control: Assists in keeping your spending within budgetary limits.
Step-by-Step Guide to Creating a Cost Sheet in Excel

1. Open a New Workbook

Start by launching Microsoft Excel and opening a new workbook. This will be your blank canvas to build your cost sheet.
2. Set Up Your Headers

At the top of your spreadsheet, set up your headers. Here’s a simple format you could follow:
| Category | Item | Unit Cost | Quantity |
|---|---|---|---|
| Direct Materials | |||
| Direct Labor | |||
| Manufacturing Overheads | |||
| Total Production Costs |

✏️ Note: Ensure you have enough rows for all the items you'll list under each category.
3. Fill in the Details

- Direct Materials: Enter all raw materials or components required to produce your product.
- Direct Labor: Include wages or labor costs associated directly with the production.
- Manufacturing Overheads: This can cover indirect materials, factory utilities, indirect labor, etc.
- Total Production Costs: This row will sum up all the costs to give you the total.
4. Enter Formulas for Calculations

Use Excel formulas to calculate the totals automatically. Here’s how you might set it up:
- For ‘Total Production Costs’, use the formula
=SUM(B2:B5)assuming your costs start from row 2. - For item-specific totals, you can use a formula like
=D2*C2for the cost of each item, where D2 is quantity and C2 is unit cost.
5. Formatting for Clarity

Make your cost sheet easy to read with proper formatting:
- Use bold for category headers.
- Color-code different sections for visual distinction.
- Apply borders around cells to separate data.
6. Review and Analysis

Once your data is input and formulas are working, take time to review your cost sheet:
- Ensure all costs are accounted for.
- Check for any discrepancies or errors in the calculations.
- Analyze where cost savings might be implemented.
The creation of a cost sheet in Excel can revolutionize how businesses manage their finances. It's not just about entering numbers; it's about understanding your business operations at a granular level, making informed decisions, and optimizing for profitability. Through this guide, we've outlined a basic setup that can be expanded and customized as your business grows. Remember, the clarity and detail of your cost sheet can significantly impact your company's bottom line, making it an indispensable tool for success.
What should I do if my cost sheet exceeds one page?

+
Consider grouping items into categories and summarizing totals on one page. You can then expand these categories into separate sheets for detailed analysis.
How often should I update my cost sheet?

+
Update your cost sheet at least monthly or whenever there are significant changes in production costs, pricing, or volume of goods/services produced.
Can I use Excel formulas for more complex cost analysis?

+
Yes, Excel can handle complex analyses. You can use functions like VLOOKUP for looking up costs, pivot tables for summarizing data, and various financial functions for deeper analysis.
What should I do if my costs are coming in higher than expected?

+
Analyze your cost sheet to identify areas where costs are higher than anticipated. Look for opportunities to reduce expenses or increase efficiency. Sometimes, a simple redesign or change in supplier can make a big difference.