How to Lock Your Excel Sheet Effectively

Ensuring the security and integrity of your data in Microsoft Excel is crucial, particularly when sharing spreadsheets with others. Whether you're a business owner, educator, accountant, or researcher, securing your Excel files against unauthorized changes is essential to prevent data tampering or accidental modifications. This guide will take you through various methods to lock your Excel sheet effectively.
Understanding Excel Protection Features

Excel provides several built-in features to help you secure your spreadsheets:
- Workbook Protection: Prevents users from adding, moving, or deleting sheets within the workbook.
- Sheet Protection: Allows you to control which cells can be edited, which can be selected, and which commands can be used.
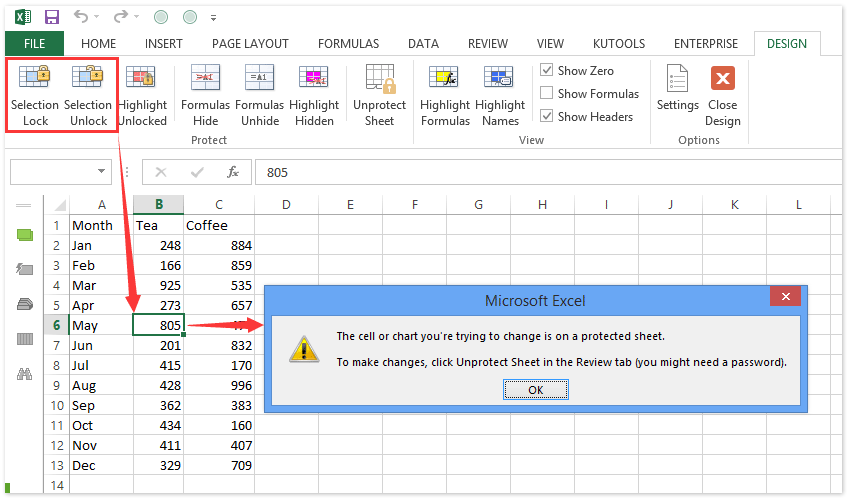
- Cell Locking: By default, all cells are locked, but this only takes effect when the sheet protection is enabled.
- Formula Hiding: Hides the formulas in cells so they can't be seen or copied.
- Password Protection: Requires a password to open or modify the Excel file.

Step-by-Step Guide to Lock an Excel Sheet

1. Preparing Your Excel Sheet

Before locking your sheet, it's essential to decide which cells should be editable and which should be protected:
- Identify which cells should remain unlocked for user input or edits.
- Ensure that your formulas or sensitive data are in the cells you want to lock.
🔑 Note: Locking cells does not take effect unless you protect the worksheet. By default, all cells are locked, but this won't restrict users until the sheet protection is turned on.
2. Locking Specific Cells

To lock cells:
- Select the cells you wish to keep editable by unlocking them. Right-click, choose "Format Cells", navigate to the "Protection" tab, and uncheck "Locked".
- For cells containing sensitive information or formulas, you can hide the formulas under the same "Protection" tab by checking "Hidden".
| Action | Path |
|---|---|
| Unlock Cells | Right-click > Format Cells > Protection > Uncheck 'Locked' |
| Hide Formulas | Right-click > Format Cells > Protection > Check 'Hidden' |

3. Protecting the Worksheet

Once you have set up your cell protection:
- Go to the "Review" tab.
- Click on "Protect Sheet".
- In the dialog box that appears, you can:
- Set a password for sheet protection.
- Choose what users are allowed to do (e.g., select locked or unlocked cells, insert rows or columns, format cells, etc.).
🔒 Note: Remember to write down the password if you set one, as Excel won't recover or reset lost passwords.
4. Protecting the Workbook

To prevent users from adding, moving, or deleting sheets:
- Go to the "Review" tab.
- Choose "Protect Workbook".
- Set a password if desired to modify the structure.
5. Password Protecting the Excel File

For an additional layer of security:
- Go to "File" > "Info" > "Protect Workbook" > "Encrypt with Password".
- Enter a strong password twice to confirm.
Additional Security Considerations

While Excel's built-in features provide good protection:
- Consider encrypting the entire file for better protection against unauthorized access.
- If your data is highly sensitive, use VBA macros for custom protection, but remember this increases the file size and requires enabling macros on the user's end.
- Avoid using very simple passwords for file or sheet protection; use complex combinations for better security.
In an interconnected world where data sharing is frequent, securing your Excel sheets is not just a good practice; it’s essential for maintaining the integrity of your information. By applying cell locking, sheet protection, and encrypting your files, you significantly reduce the risk of unauthorized modifications, ensuring your data remains secure whether you’re working individually or in a team environment. Excel’s array of protection options empowers users to share data confidently while maintaining control over its manipulation and access.
Can I lock certain parts of my Excel sheet while allowing edits elsewhere?

+
Yes, by selectively unlocking cells before applying sheet protection, you can allow specific users to edit designated areas while keeping the rest of the sheet secure.
What should I do if I forget the password to a protected sheet?

+
Unfortunately, Microsoft Excel does not provide a built-in method to recover or reset lost passwords. You would need to use third-party software or re-enter the file manually if you remember any of the data or keep backup copies.
How do I protect my Excel formulas from being viewed or copied?

+
To protect formulas, hide them before locking the cells containing these formulas. This way, even if someone accesses the protected sheet, they won’t see the formulas.