Lock Excel Sheets with Password on Mac Easily

If you're using Excel on a Mac and need to secure your spreadsheets from unauthorized access or changes, locking your Excel sheets with a password is a simple yet effective solution. This guide will walk you through the process of password-protecting your Excel documents on a Mac, ensuring your data remains secure and confidential.
Why Password-Protect Excel Sheets?

Before diving into how to lock an Excel sheet, let’s quickly explore why it might be beneficial:
- Confidentiality: Protect sensitive data from unauthorized viewing.
- Data Integrity: Prevent accidental or intentional changes to data.
- Compliance: Meet regulatory requirements where data protection is mandatory.
How to Password Protect an Excel Sheet on Mac

Here are the step-by-step instructions to lock your Excel worksheet with a password:
Step 1: Open Your Excel Document

Start by opening the Excel file you want to protect. Make sure you have the latest version of Excel installed on your Mac for the best compatibility.
Step 2: Select the Worksheet

Go to the specific worksheet within your workbook that you want to protect. Remember, each sheet can be password-protected individually.
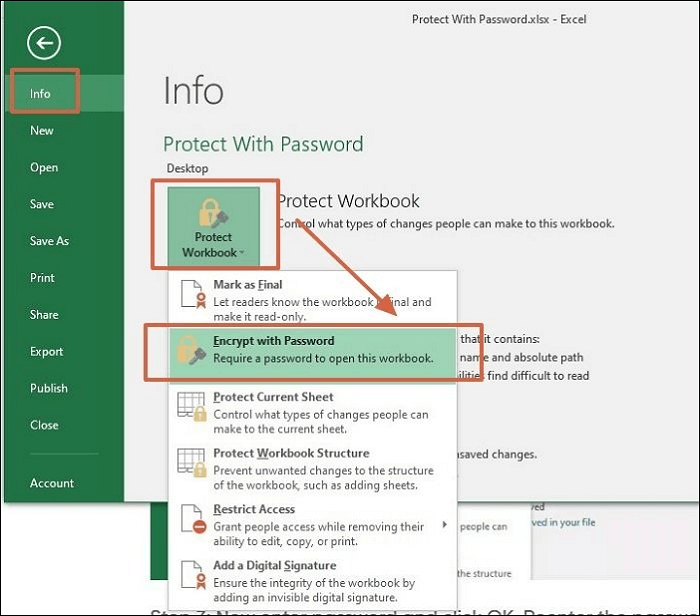
Step 3: Access the Protection Features

- Click on the ‘Review’ tab in the Excel ribbon.
- Look for the ‘Protect Sheet’ option and click on it.

Step 4: Set Up Password Protection

- Once you click ‘Protect Sheet’, a dialog box will appear.
- Enter the password you want to use in the ‘Password’ field. Remember, this password will be required to unprotect the sheet.
- Optionally, select what actions are allowed when the sheet is protected. By default, all actions are restricted.
📌 Note: Make sure to choose a strong password and avoid using common words. A mix of uppercase, lowercase, numbers, and symbols is recommended for enhanced security.
Step 5: Save Your Changes

After setting the protection, save your workbook. It’s good practice to save an unprotected copy of your file as well, in case you need to make changes later.
Step 6: Verify the Protection

To ensure the protection is working, close and reopen the file. You should be prompted to enter the password when trying to edit the protected sheet.
Unlocking or Removing Password from Excel Sheet

If you ever need to remove or change the password:
- Go back to the ‘Review’ tab.
- Select ‘Unprotect Sheet’ or ‘Unprotect Workbook’, depending on where you applied the protection.
- Enter the password when prompted.
- After unlocking, you can either leave the sheet unprotected or apply a new password.
In summary, password-protecting Excel sheets on a Mac is straightforward and can significantly enhance the security of your data. Whether you’re protecting financial reports, personal budgets, or any sensitive information, taking these steps will ensure that only authorized users can modify or view the protected content. Keep in mind to choose strong passwords and, if possible, store an unprotected version of the file for emergency access.
Can I recover a forgotten password on Excel?

+
Unfortunately, if you forget the password, there is no direct way to recover it. You would either need to remember it or potentially lose access to the protected data. Always keep a backup of the original unprotected file or use a password manager.
Is there a limit to how many Excel sheets I can protect?

+
No, there’s no limit. You can protect as many sheets as you need within one workbook or across multiple workbooks.
How do I know if a sheet is protected?

+
You can tell if a sheet is protected if you see the ‘Unprotect Sheet’ option greyed out or if there’s a lock icon on the status bar at the bottom of Excel.
Can I still use formulas in a protected sheet?

+
Yes, you can choose which cells allow formula entry when setting up sheet protection. By default, no changes are allowed, but you can unlock specific cells for users to interact with formulas.


