5 Ways to Lock Your Excel Sheet Completely

Microsoft Excel is one of the most widely used tools for data manipulation and analysis. Protecting your data and preventing accidental or unauthorized changes can be crucial. Here's how you can lock your Excel sheet completely, ensuring your data stays secure.
1. Using Workbook Protection

The first layer of protection you can apply to your Excel file is workbook protection. This stops users from adding, moving, or deleting sheets within the workbook.
- Open your Excel workbook.
- Navigate to the File menu, then choose Info.
- Click on Protect Workbook and then select Encrypt with Password.
- Enter a strong password twice to confirm, and click OK.
🔒 Note: Remember to write down your password in a safe place, as there's no way to recover it if you forget it.
2. Sheet Protection

Sheet protection is essential for locking individual sheets within your workbook. Here’s how you can do it:
- Select the sheet you want to protect.
- Go to the Review tab, and click on Protect Sheet.
- In the Protect Sheet dialog box, you can customize what actions users are allowed to perform. Deselect everything if you want to lock the sheet completely.
- Set a password if desired, and click OK.
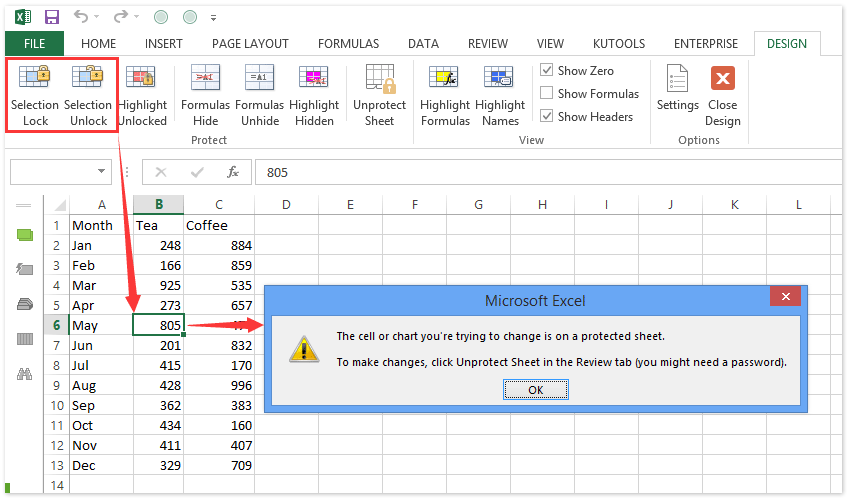
3. Cell Protection

By default, all cells are locked in Excel, but this feature only takes effect when the worksheet is protected:
- Select the cells or range you want to lock.
- Right-click and choose Format Cells.
- Go to the Protection tab.
- Check the Locked box.
- Protect the sheet as described in step 2.
🔐 Note: Unlocked cells will still allow editing even when the sheet is protected, so make sure to lock all cells if you want a fully secured sheet.
4. Password Protection

Besides workbook and sheet protection, you can add an additional layer of security with file encryption:
- Go to File > Save As.
- In the dialog box, click on Tools next to the Save button, then General Options.
- Enter a password to open the document and optionally, a password to modify it. Click OK.
- Save the file.
5. Restricting Access

If your workbook contains sensitive information, you might want to restrict access to only specific users:
- In the File menu, click Protect Workbook, then Restrict Access.
- Choose Restrict Access if you're using Microsoft's information rights management service.
- Select users who can access or edit the file, and define their permissions.
By following these methods, you can lock your Excel sheet with varying degrees of security, ensuring your data remains confidential and safe from unauthorized access.
Can I still print my Excel sheet if it is protected?

+
Yes, you can print a protected Excel sheet if the print option has not been restricted by the sheet’s protection settings.
What happens if I forget the password to my Excel file?

+
If you forget the password, there is no way to recover it. You would need to use a password recovery tool or recreate the file.
How do I know if my Excel sheet is protected?

+
Check the Review tab. If the options to protect or unprotect are disabled or you can’t edit cells, the sheet is likely protected.
Can I protect specific cells instead of the entire sheet?

+
Yes, you can protect specific cells by locking them and then protecting the worksheet. Only the locked cells will be restricted.
Is it possible to remove password protection from an Excel file?

+
If you know the password, you can simply unprotect the file. Without the password, specialized software can sometimes bypass protection, but this might not be legal or ethical.