Link Excel Sheets Easily: Quick Guide

Have you ever been neck-deep in data, flitting between different Excel workbooks, wishing there was a magical button to bring it all together? Well, while magic buttons are a bit beyond our technological capabilities, linking Excel sheets is as close as we can get. In this quick guide, we will walk through the straightforward steps to link Excel sheets, making your data analysis and reporting tasks a breeze.
Understanding Why to Link Excel Sheets

Linking Excel sheets can be your ticket to efficiency:
- Consolidation: Bring together data scattered across different sheets for a consolidated view.
- Real-time Updates: When the source data changes, your linked sheets will reflect these changes instantly.
- Automation: Automate data updates, reducing manual entry errors and time.
- Enhanced Collaboration: Share workbooks with your team while maintaining the accuracy of data sources.
Linking your Excel sheets allows for the seamless transfer of data, enhancing your ability to manage, analyze, and visualize information from multiple sources at a glance.
How to Link Excel Sheets

Here’s how to start linking your Excel sheets like a pro:
Open the Source Workbook

Begin by opening the workbook that contains the data you want to link from.
Open the Destination Workbook

Now open the workbook where you want to display the linked data. If you are linking within the same workbook, this step is not necessary.
Select the Destination Cell

In your destination workbook (or sheet), click on the cell where you want the linked data to appear.
Create the Link

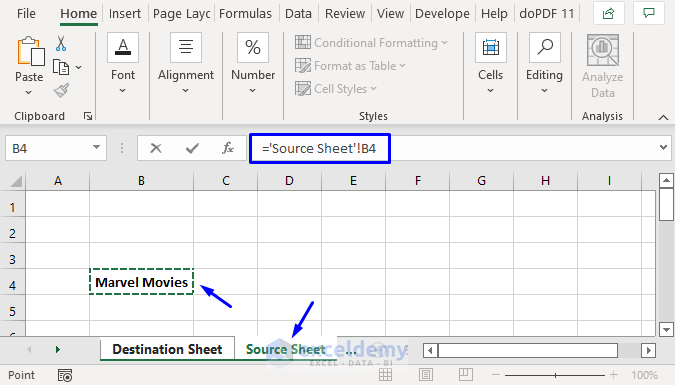
With the destination cell active, type in the equals sign (=) followed by the file path in square brackets, sheet name, exclamation mark, and cell reference:
=[SourceWorkbook.xlsx]SheetName!CellReference
Or, for a more user-friendly approach:
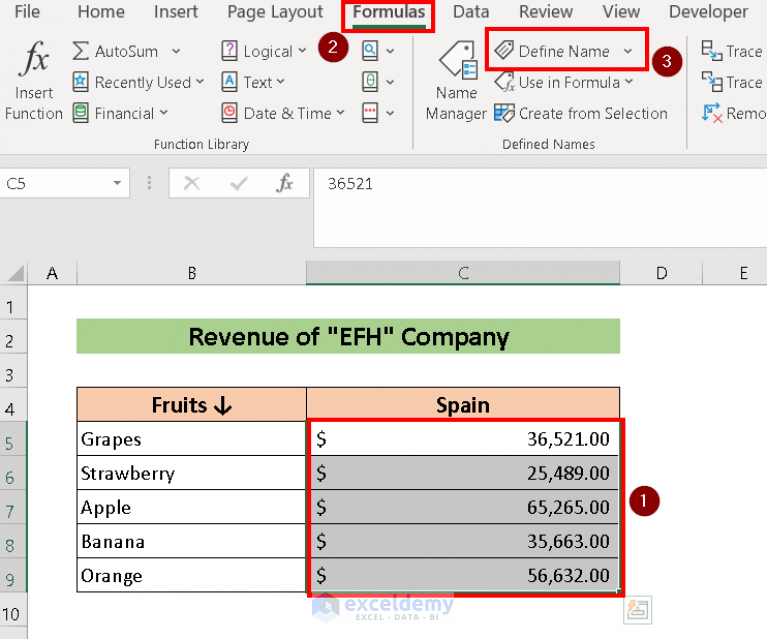
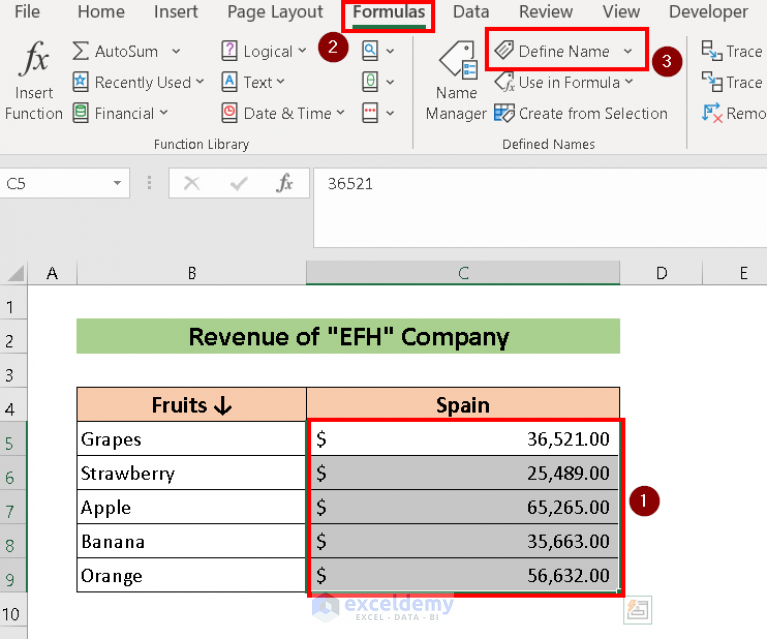
- Navigate to the 'Formulas' tab.
- Click on 'Name Manager', then 'New'.
- Enter a name for the link (e.g., "Link1").
- In the 'Refers to' box, enter the above formula.
- Click 'OK', and then use the named link in your formulas like so: =Link1
⚠️ Note: Ensure both the source and destination workbooks are in the same directory to avoid reference errors.
Test the Link

After setting up the link, save both workbooks and test the link to ensure it works:
- Make a change in the source cell and watch for the destination cell to update.
- Close the source workbook and check if the data remains unchanged in the destination workbook.
Advanced Linking Techniques

As you become more comfortable with basic links, here are some advanced techniques to enhance your linking skills:
Dynamic Link Creation

Use Excel’s OFFSET, INDEX, or INDIRECT functions to create dynamic links that automatically update when data is inserted or deleted in your source sheets:
- OFFSET: This function can move or resize the source data range dynamically.
- INDEX: Retrieve data from a specific cell within a table.
- INDIRECT: Allows you to refer to another cell’s value to determine the range or cell reference for your link.
External Data Linking

You can also link to external databases or web data using tools like:
- Power Query to import and shape data from various sources.
- Web scraping tools like Power BI or VBScript to bring in data from websites directly into Excel.
Managing Large Scale Data

When dealing with large datasets:
- Consider using SQL queries within Excel to manage large-scale data sets efficiently.
- Utilize PowerPivot or Data Model to handle complex relationships and larger data volumes.
🔧 Note: Linking external sources often requires some form of authorization or access rights to ensure secure data transfer.
By mastering these advanced techniques, you transform Excel from a simple spreadsheet tool into a robust platform for data management and analysis.
Linking Best Practices

To ensure that your linking experience remains smooth and error-free, here are some best practices:
- Consistent File Paths: Always keep your workbooks in a consistent directory structure to prevent broken links.
- Naming Conventions: Use clear, consistent naming for your workbooks, sheets, and named ranges to avoid confusion.
- Documentation: Document your linking strategy, especially for larger projects, to aid in troubleshooting and understanding by other team members.
- Error Checking: Use Excel's built-in error-checking tools to identify and resolve broken links or errors in formulas.
- Security: Protect sensitive data in your linked workbooks with passwords or limited access rights.
- Regular Updates: Ensure that linked files are updated regularly to keep your data accurate.
Following these practices helps maintain the integrity of your linked Excel workbooks, reducing the chances of errors and streamlining your work.
In this guide, we've covered the essentials of linking Excel sheets. From basic linking techniques to more advanced methods and best practices, you now have a robust toolkit to manage your data effectively. By linking your sheets, you're not just organizing data; you're setting up a system for ongoing analysis, automation, and collaborative work. Embrace the power of linking, and watch as your productivity and data handling capabilities soar to new heights.
What happens if I change the name of a linked file?

+
If you change the name of a linked file, Excel will no longer recognize the link, and you’ll see #REF! errors in your linked cells. You need to update the references manually to match the new file name.
Can I link to a specific range in a different workbook?

+
Yes, you can link to any specific range using the same formula structure but extending it to include the range:
=[SourceWorkbook.xlsx]SheetName!RangeReference
How do I update links if I move the source file?
+Go to ‘Data’ > ‘Edit Links’ in Excel, then update the location of the source file. If the file has moved directories, you’ll need to do this for all linked files to refresh the connections.