Link Excel Tables: Simple Steps to Connect Sheets

In the world of data management and analysis, Excel stands out as a versatile tool, especially when it comes to handling large sets of data across multiple tables. Understanding how to link Excel tables is crucial for efficient data organization and streamlining workflows. This guide will walk you through the simple steps to connect sheets within Excel, ensuring your data remains synchronized and easy to manage.
Why Link Excel Tables?

Before we delve into the how, let's quickly go over the why:
- Data consistency: Linking ensures changes in one table automatically reflect in related sheets.
- Efficiency: Saves time by avoiding manual data entry and reducing errors.
- Real-time updates: Keep your team members or different parts of your analysis up-to-date without exporting or sharing files separately.
- Scalability: As your data grows, linking helps manage it more effectively.
Steps to Link Excel Tables

Step 1: Preparation

- Ensure all workbooks are saved in a location easily accessible by all involved parties.
- Check for any data that might already exist in the sheets you want to link to prevent overwriting.
Step 2: Using External References

Here’s how you can link tables:
- Open the destination workbook where you want to insert the link.
- Select the cell where you want the linked data to appear.
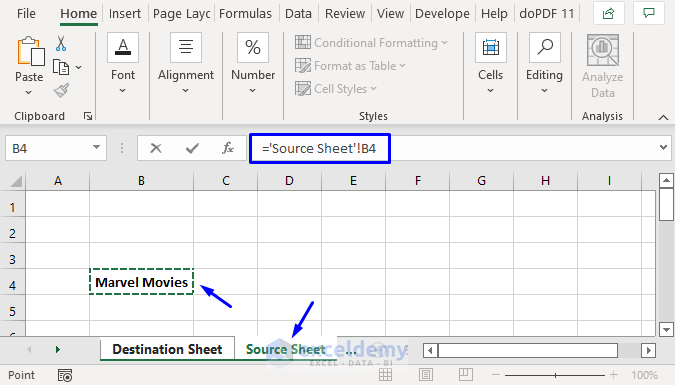
- Enter this formula:
=SourceWorkbookName!SheetName!CellReference
💡 Note: Replace SourceWorkbookName with the name of the source workbook, SheetName with the sheet containing the data, and CellReference with the specific cell you’re linking to.
Step 3: Using Excel’s Power Query

- Go to the Data tab.
- Select New Query > From File > From Workbook.
- Choose the source workbook and navigate to the desired table.
- Click Load to bring the data into the current workbook.
Here’s an example of what your Power Query setup might look like:
| Step | Description |
|---|---|
| Connect to File | Select your source workbook |
| Choose Sheet/Table | Select the worksheet or table within the workbook |
| Load | Bring data into your current workbook |

Step 4: Creating Linked Cells

- Right-click on the source cell or range.
- Choose Copy.
- Go to the destination sheet, right-click, and choose Paste Link.
Step 5: Updating and Managing Links

- When you open a workbook with links, Excel prompts to update values if the source has changed. Click Update or Don’t Update as needed.
- To check or edit links, go to the Data tab, click Edit Links, and manage your links from there.
To summarize, we’ve covered how linking Excel tables can improve your data management process: - You learned how to set up links using external references or Power Query. - Practical examples and steps were provided to enhance your workflow. - Tips for managing these links were shared to ensure accuracy and efficiency.
By linking your Excel tables, you’re not only saving time but also ensuring the integrity of your data across multiple sheets, which can significantly boost your productivity and accuracy in data analysis.
Can I link tables from different Excel workbooks?

+
Yes, you can link tables from different Excel workbooks using external references or Power Query, which are both covered in this guide.
What happens if the source workbook is moved or renamed?

+
If the source workbook is moved or renamed, Excel will not automatically update the links. You’ll need to manually update the source location or use Power Query’s ability to refresh connections.
Is there a limit to how many cells or sheets I can link?

+
Excel doesn’t set a specific limit on linked cells or sheets, but performance might degrade with very large numbers of links due to processing time and memory constraints.