Easily Insert Tables into Excel: Quick Guide

Excel's robust features for data analysis and organization can seem daunting at first. However, the ability to insert tables simplifies data management significantly. In this guide, we'll walk through how to easily insert tables into Excel, tailoring data presentation, and enhancing your productivity in spreadsheets. Let's dive in!
Understanding Excel Tables

Excel tables are not just regular ranges of cells; they are dynamic objects that offer several advantages:
- Data Organization: Tables automatically adjust rows and columns, making adding or deleting records straightforward.
- Data Entry: With structured references, entering data becomes more intuitive and less error-prone.
- Visual Management: Filters, sort, and formatting options make managing data visually appealing and manageable.
Steps to Insert a Table
Here’s a step-by-step guide on how to insert tables into Excel:
- Select Your Data: Highlight the cells you want to convert into a table. This could be existing data or an empty range for future data entry.
- Go to the Insert Tab: At the top of Excel, find and click on the “Insert” tab.
- Choose Table: Within the Insert tab, look for the “Table” option in the “Tables” group. Click on it.
- Confirm the Table Range: A dialog box will appear. Ensure the correct range is selected, and if your data includes headers, check the box that says “My table has headers.”
- Apply: Click “OK” to create the table.
Customizing Your Table
After inserting the table, you might want to tweak its appearance or functionality:
- Table Design: Click anywhere within the table to reveal the “Table Tools Design” tab. Here, you can customize:
- Table Style
- Table Elements
- Style Options
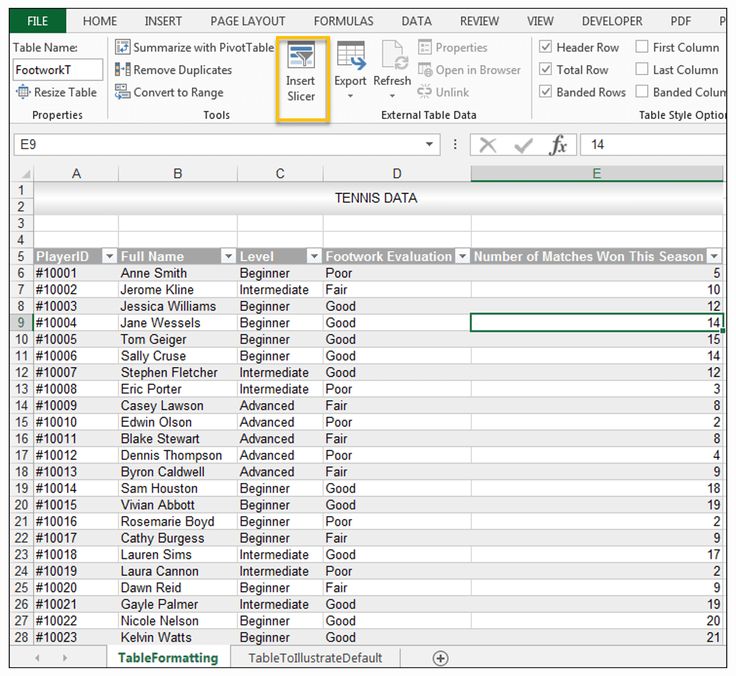
- Data Slicers: If your table contains pivot data, slicers can help filter data visually.
- Formulas: Use structured references for cleaner, more understandable formulas.
Let’s look at a basic example of how to use tables in Excel:
| Item | Price | Quantity |
|---|---|---|
| Pens | 1.99 | 50 |
| Paper | 4.50 | 15 |
| Pencils | 0.75 | 100 |
📌 Note: When using structured references, your formulas will automatically adjust as the table grows or shrinks, making your calculations robust against data changes.
Benefits of Using Tables

Embracing tables in Excel can significantly boost your data handling capabilities:
- Easy Data Navigation: Scroll bars within tables help navigate through large datasets.
- Auto-Fit Data: Adding or deleting rows/columns automatically resizes your table, keeping everything organized.
- Automatic Formulas: Formulas in tables can be set to automatically expand when new data is added.
- Data Integrity: With filters, you can quickly analyze parts of your data, promoting data accuracy.
Tips for Advanced Table Use

To truly harness the power of Excel tables, consider these advanced techniques:
- Dynamic Named Ranges: Tables can serve as the basis for dynamic named ranges, which are useful in data validation or complex calculations.
- Table Formulas: Use functions like [
ROW,SUBTOTAL,AGGREGATE] for in-table calculations that are resilient to row insertions or deletions. - Data Slicers and Timelines: For pivot tables connected to your data, slicers and timelines offer an interactive way to filter data.
By now, you should be well-versed in how to easily insert tables into Excel, customize them for your needs, and understand the myriad of benefits they bring to your data management tasks. Remember, while tables offer numerous advantages, they aren't always the best solution for every dataset. Assess your data needs to decide if a table is the right tool for the job.
Can I turn an existing Excel range into a table?

+
Absolutely! You can convert any selected range in Excel into a table by following the steps outlined in the guide above. Just highlight your data, go to the “Insert” tab, and click “Table.”
What if my data doesn’t have headers?

+
Even if your data doesn’t have headers, you can still create a table. Excel will insert generic column names like Column1, Column2, which you can rename as needed.
How do I resize a table in Excel?
+
To resize a table, select any cell within the table, then drag the sizing handle (the small triangle at the bottom-right corner of the table) to include or exclude cells.