How to Easily Insert Sheet Columns in Excel

Managing data in Microsoft Excel often involves manipulating the structure of your spreadsheets. One common task is inserting new columns into your Excel sheets, which can be done in several ways to fit different scenarios. In this post, we'll explore various methods to insert columns, ensuring you can adapt your data structure as needed, improving readability and organization.
Method 1: Using the Right-Click Context Menu

The most straightforward way to insert a new column is by using the right-click context menu:
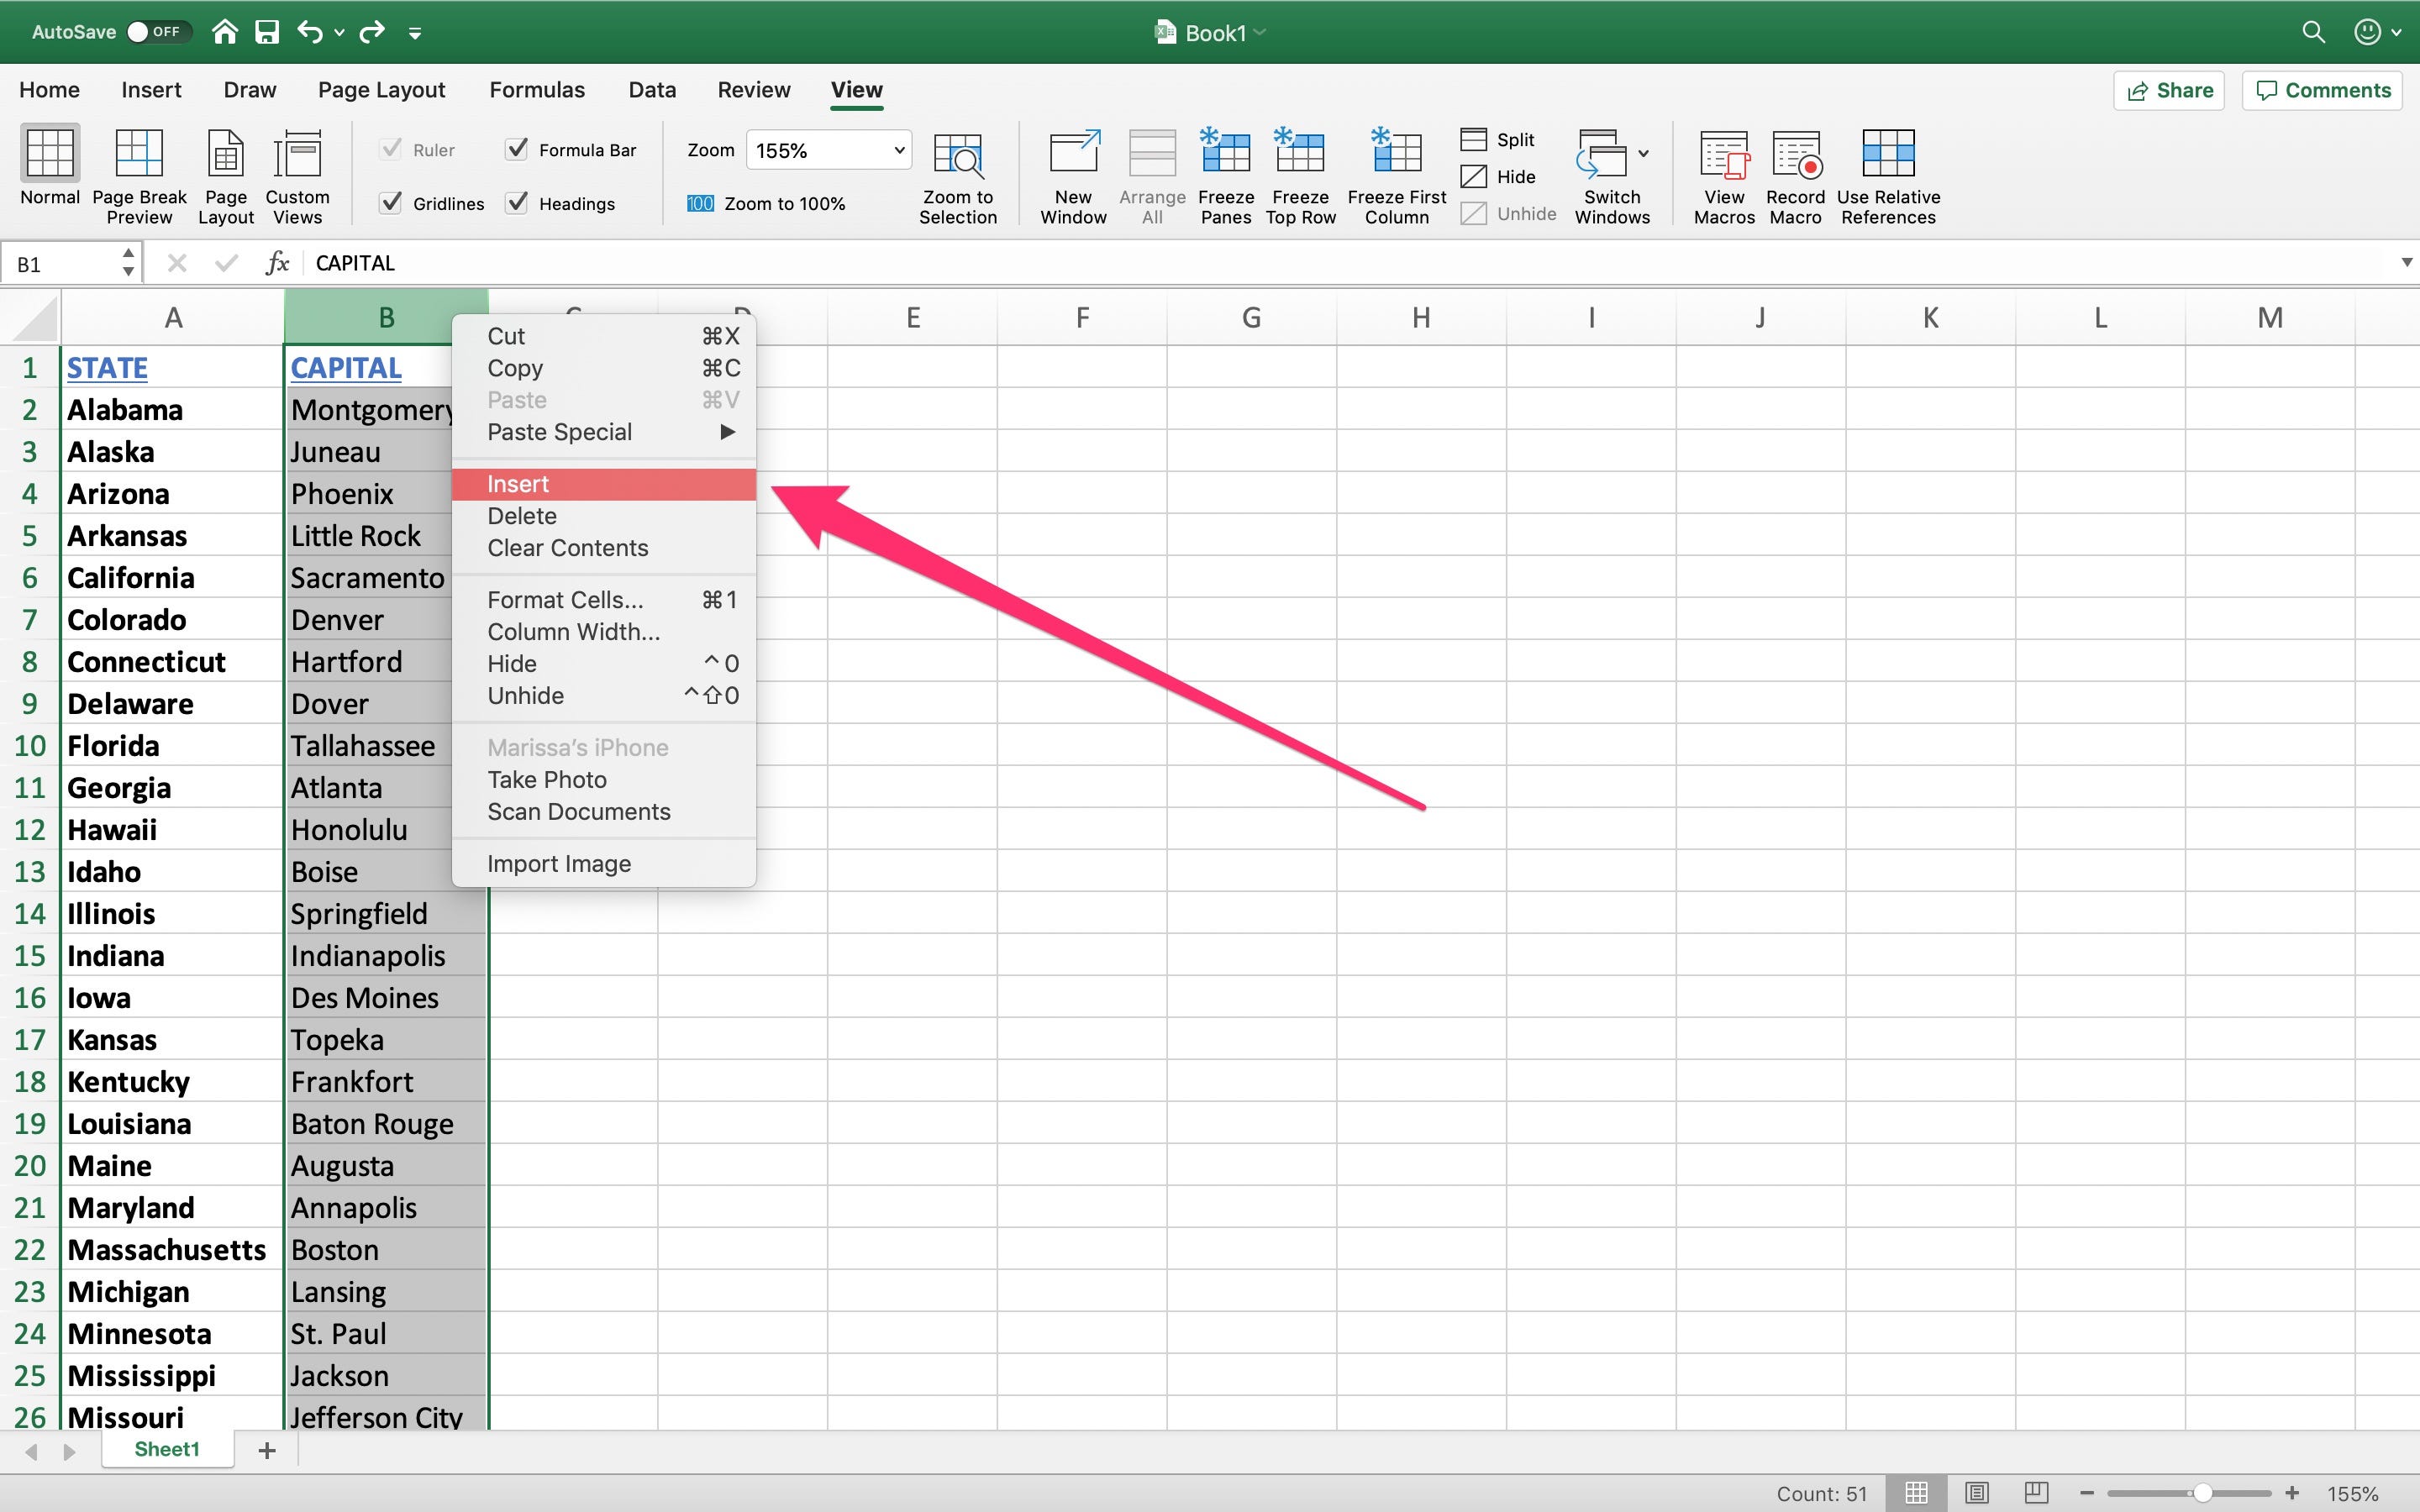
- Click on the column heading (e.g., Column C) to select the entire column where you want the new column to appear.
- Right-click the selected column to open the context menu.
- Choose "Insert" from the list of options, and Excel will insert a new column to the left of your selected column.
⚠️ Note: This method is great for quick insertions but can be limiting if you need to insert multiple columns at once.
Method 2: Using the Insert Command on Ribbon

For those who prefer using the Excel ribbon, here's how to insert a column:
- Select the column by clicking on its heading.
- Navigate to the Home tab on the Excel ribbon.
- Click the "Insert" button within the Cells group. A dropdown menu will appear where you can select "Insert Sheet Columns".
Method 3: Using Keyboard Shortcuts

Keyboard shortcuts are a time-saver for frequent Excel users:
- Click on the column to the right of where you want the new column to appear.
- Press Ctrl + Shift + + (plus sign) to open the Insert dialog.
- Select "Insert Sheet Columns" and press Enter.
🎯 Note: Use this method when you need to insert columns without removing your hands from the keyboard.
Method 4: Drag and Drop for Column Insertion

If you need to insert a column by dragging:
- Select an existing column by clicking its header.
- Hover over the edge of the column until the cursor changes to a four-headed arrow.
- Drag the column to where you want the new column inserted, and Excel will shift the data accordingly.
Understanding these methods allows you to choose the most suitable way to manage your data effectively.
Formatting Considerations After Inserting Columns

Once you've inserted new columns, several formatting considerations come into play:
- Cell Formatting: New columns might not inherit the cell formatting of surrounding cells. You might need to reapply number formats, conditional formatting, or alignment.
- Formulas: Ensure any formulas referencing columns adjust correctly. Use absolute references ($A$1) if you don't want them to shift.
- Data Validation: If the original column had data validation rules, you might need to copy these to the new column.
- Sorting and Filtering: Check if the new column requires sorting or filtering attributes.
To summarize, inserting new columns in Excel is a fundamental task that can greatly enhance your spreadsheet's organization and functionality. Whether you use the context menu, ribbon commands, keyboard shortcuts, or drag and drop, each method has its advantages. Remember to consider the impact on existing data, formulas, and formatting when you insert columns, and adjust accordingly for optimal data management.
Will inserting a column shift my existing formulas?

+
Yes, inserting columns will shift relative cell references in formulas. If your formulas use absolute references (e.g., A1), they will remain fixed on the original cells.
How can I insert multiple columns at once?

+
Select multiple columns by holding Shift or Ctrl and clicking on their headers. Then, right-click and choose “Insert”. This action will insert the same number of columns to the left of your selection.
What happens if I insert a column in a filtered range?

+
Inserting columns within a filtered range can be tricky. It might not show the inserted columns until you clear the filter or refilter the data. Always check the range you’re working with to ensure correct data manipulation.