5 Easy Steps to Add Watermark in Excel

Adding a watermark to your Excel spreadsheets can elevate their professionalism, improve data presentation, and protect proprietary information. Whether you're an accountant, a data analyst, or simply organizing personal documents, a watermark can ensure that your work is both distinctive and safeguarded. Let's delve into how you can add a watermark in Excel with ease, even if you're not a tech wizard.
Step 1: Prepare Your Excel Sheet

Before you add a watermark, ensure your Excel workbook is prepared:
- Save your current work to avoid data loss.
- Determine the worksheet where you want to insert the watermark.
💡 Note: A watermark is usually a faint, semi-transparent image or text that doesn’t interfere with the readability of the underlying data.
Step 2: Creating a Watermark Image

While Excel does not have a built-in feature to insert watermarks directly, you can work around this by creating your watermark using an external tool:
- Use image editing software like Microsoft Paint or Photoshop to create your watermark. Ensure it’s semi-transparent for better visibility of data.
- Alternatively, utilize online watermark generators for quick and easy creation.
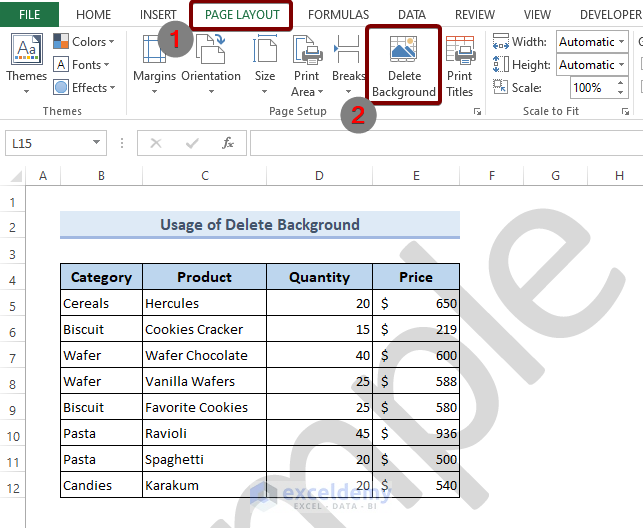
Step 3: Insert the Watermark into Excel

Follow these steps to insert your watermark into Excel:
- Go to the “Insert” tab in your Excel ribbon.
- Click on “Picture” to browse and select your watermark image from your computer.
- Once inserted, resize and position the image to cover your worksheet:
- Click on the image to reveal the “Picture Tools” Format tab.
- Adjust the image size and placement so it fits your worksheet.
- Set the image to semi-transparent:
- Click on “Picture Styles.”
- Select “Picture Transparency” and adjust to around 50-70%.
Step 4: Positioning the Watermark

Here’s how to ensure your watermark is positioned correctly:
- Right-click the image and choose “Send to Back.” This will make your watermark appear behind the data.
- If your watermark needs adjustment, use the “Picture Format” options to modify its placement.
🔍 Note: To make your watermark non-editable, consider grouping it with another object and then locking the group.
Step 5: Locking the Watermark (Optional)

If you want to lock your watermark to prevent accidental edits or ensure it’s always visible, here’s how:
- Select the watermark and click on “Format Picture” in the “Format” tab.
- Choose the “Properties” tab and uncheck “Move and size with cells” to prevent resizing and movement.
- If you wish to protect the entire sheet, use Excel’s protection features:
- Go to “Review” > “Protect Sheet.”
- Set a password and select what users can or cannot edit.
To wrap up, adding a watermark in Excel can significantly enhance your document's appearance and security. By following these easy steps, you ensure that your work stands out with a professional touch while maintaining data integrity. Remember to adjust the transparency for better visibility of your data and consider locking the watermark if necessary. This small addition can make a big difference in how your work is perceived and valued.
Can I change the watermark’s color in Excel?

+
Yes, you can change the color of your watermark after inserting it. Use the “Picture Format” options in Excel to access color settings for your image.
Will adding a watermark slow down Excel?

+
Not significantly, but larger or more complex images might marginally impact performance on older systems or when working with very large datasets.
How can I remove a watermark in Excel?

+
Simply select the watermark image and press the “Delete” key on your keyboard. If the image is grouped or locked, unlock or ungroup it first.
Can I use text as a watermark in Excel?

+
Yes, while Excel doesn’t have a native watermark text feature, you can insert a text box, adjust its transparency, and send it to the back of the document to mimic a watermark effect.