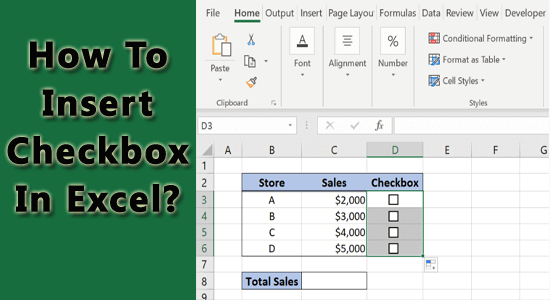
5 Simple Steps to Add Checkboxes in Excel

In today's data-driven world, Excel remains an indispensable tool for organizing, analyzing, and visualizing data. Whether you're managing a project, tracking inventory, or preparing for a presentation, Excel's versatility helps streamline numerous tasks. One of the lesser-known but highly useful features in Excel is the ability to add checkboxes. This functionality can enhance user interaction with your spreadsheets, making it easier to mark items as complete, track attendance, or categorize data visually. In this blog post, we'll guide you through five simple steps to add checkboxes in Excel, transforming your static spreadsheets into dynamic, interactive tools.
Step 1: Enable Developer Tab

Before you can add checkboxes, you must ensure that the Developer tab is enabled in your Excel ribbon. Here’s how to do it:
- Go to File > Options.
- Select Customize Ribbon from the sidebar.
- In the list on the right, check the box for Developer.
- Click OK to save changes.
Step 2: Inserting Checkboxes

Now that the Developer tab is visible, follow these steps to add checkboxes to your worksheet:
- Click the Developer tab on the ribbon.
- Select Insert in the Controls group.
- Choose Form Controls and then click the Checkbox (it looks like a small square with a checkmark).
- Click on the spreadsheet where you want to place the checkbox. Excel will insert a default checkbox.
To add multiple checkboxes, hold down the Ctrl key while clicking to place each checkbox.
Step 3: Customizing Checkboxes

Customizing your checkboxes can make them more user-friendly and integrated into your spreadsheet’s design:
- Right-click on the checkbox and select Edit Text to change the checkbox label if needed.
- To resize, click and drag one of the corners or edges of the checkbox.
- Move the checkbox by clicking and dragging it to a new location.
- To link the checkbox to a cell:
- Right-click the checkbox, choose Format Control.
- Under the Control tab, select Cell link and enter the cell address where you want to store the checkbox’s status (e.g., TRUE for checked, FALSE for unchecked).
Step 4: Using Checkboxes for Data Entry

Checkboxes can be utilized for various data entry and analysis purposes:
- Task Completion: Check off tasks as they are completed.
- Filtering Data: Use checkboxes to filter or categorize data dynamically.
- Survey Responses: Collect responses in surveys or questionnaires.
Step 5: Automating Actions with VBA

Excel’s VBA (Visual Basic for Applications) allows you to automate tasks related to checkboxes. Here’s a simple example:
- Double-click the sheet tab containing your checkboxes.
- Click Insert > Module to add a new module for VBA code.
- Enter your VBA code to manage checkbox events. For instance:
Sub CheckBox_Change()
    If CheckBox1.Value = True Then
        MsgBox “Item checked!”
    Else
        MsgBox “Item unchecked!”
    End If
End Sub
This VBA code will display a message box when the checkbox is toggled.
📘 Note: Remember to rename the checkbox as needed in the VBA code. For example, if you name your checkbox "CheckBox1", adjust the code accordingly.
After integrating these checkboxes into your spreadsheets, you’ll find that your data management tasks become significantly more intuitive and visually engaging. Whether for personal projects or professional reporting, understanding how to use checkboxes can elevate your Excel skills. Moreover, linking checkboxes to cells for dynamic data filtering or using VBA for advanced functionalities provides a deeper level of customization, making your spreadsheets not just functional but also interactive.
In summary, by following these five simple steps, you can easily add checkboxes to your Excel spreadsheets, enhancing their functionality and interactivity:
What are the benefits of using checkboxes in Excel?

+
Checkboxes in Excel enhance user interaction, making data entry easier, allowing for visual tracking of tasks, and simplifying data filtering and sorting. They transform static spreadsheets into interactive tools, reducing errors and increasing productivity.
Can I use VBA with checkboxes in Excel?

+
Yes, VBA can be used to automate checkbox functionality in Excel. It allows for custom responses to checkbox interactions, like triggering macros when a checkbox is checked or unchecked.
How do I remove checkboxes once they are added to Excel?

+
To remove checkboxes, simply click on the checkbox, and press the Delete key. If you need to remove many at once, go to the Developer tab, click on Design Mode, and then select and delete the checkboxes as needed.