Excel Sheet Filtering Made Simple: A Step-by-Step Guide

Filtering data in Microsoft Excel is an essential skill for anyone who regularly works with large datasets. This guide will walk you through the process of filtering an Excel sheet to manage and analyze data more effectively. Whether you're a business analyst, a data scientist, or just someone looking to organize personal finances, mastering Excel's filtering capabilities can save you a significant amount of time and effort.
Getting Started with Filtering

Excel provides multiple ways to filter data, each serving different purposes. Here’s how you can start:
- Basic Filter: Use this for simple data filtering.
- Advanced Filter: More complex conditions can be applied here.
- AutoFilter: A tool that allows for quick filters on each column.
Let's delve into each of these methods:
Using AutoFilter for Quick Sorting

AutoFilter is perhaps the easiest way to filter data:
- Select any cell within your data range.
- Go to the Data tab and click on Filter.
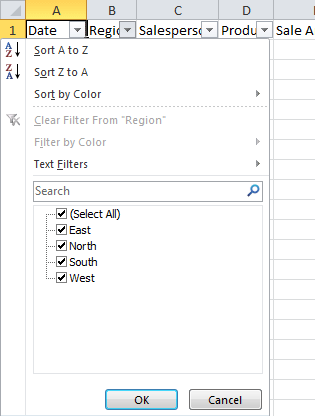
- Dropdown arrows will appear in your headers. Click one to filter based on:
- Text
- Numbers
- Dates
- Cell color
- After choosing your criteria, Excel will show only rows that meet these conditions.
💡 Note: Remember, AutoFilter affects entire rows, not just individual cells. If you need more granular control, consider using advanced filters.
Advanced Filter for Complex Data Analysis

When your analysis requires more sophisticated filtering:
- Navigate to Data > Advanced.
- Choose the range to filter or select an external criteria range.
- Set up your filter criteria. Here are some examples:
- Press OK to apply the filter.
| Criteria | Example |
|---|---|
| Single Condition | = “>5000” in Sales column |
| Multiple Conditions | “OR” and “AND” conditions with different columns |
| Wildcard Search | ”*” to represent any characters in a text string |

Custom Sorting with Filters

Excel allows for custom sorting within filtered data:
- Select your filtered data or the entire dataset.
- Go to Data > Sort.
- Add levels to sort by multiple columns.
- Ensure your sort settings are correct before applying.
Managing Filtered Data

After filtering, managing your data is just as crucial:
- Clear Filters: Click the filter dropdown and choose Clear Filter or use Data > Clear > Clear Filters.
- Extract Data: Use advanced filters to extract filtered data to another location in your worksheet.
- Freeze Panes: To keep headers visible when scrolling through long lists, use View > Freeze Panes.
⚠️ Note: Be cautious when deleting filtered data, as you might inadvertently remove unfiltered rows as well.
In summary, Excel’s filtering tools are incredibly versatile. From basic filtering with AutoFilter to intricate data analysis with advanced filters, these features allow you to slice through data with ease. Remember, the key to mastering Excel filtering is understanding when and how to apply each method for maximum efficiency. Whether you're cleaning data, performing financial analyses, or managing inventory, these filtering techniques can significantly enhance your productivity and accuracy in handling datasets.
Can I filter data from multiple columns simultaneously?

+
Yes, with both AutoFilter and Advanced Filter, you can apply filters on multiple columns by selecting criteria for each one. This can help narrow down your data based on various parameters.
How do I remove filters to see all data again?

+
Click the filter dropdown arrow and select Clear Filter, or go to Data > Clear > Clear Filters. This will remove all current filters and show all rows in your data set.
Can filters be saved for future use in Excel?

+
Unfortunately, Excel does not have a built-in feature to save filters directly. However, you can record a macro or save your workbook with the applied filters, then use or modify them later.