How to Properly Close an Excel Spreadsheet Session

Understanding Excel’s Role in Data Management

Excel has become synonymous with data management and analysis. Its popularity stems from the ease with which users can perform various tasks, from simple calculations to complex data analysis. Closing an Excel session correctly is as crucial as using the application, ensuring data integrity and smooth future interactions.

Why Proper Session Closure Matters
Before delving into the steps of closing Excel properly, let’s understand why it matters:
- Data Security: Properly closing Excel ensures your data is saved securely.
- Performance: Unsaved changes or improperly closed files can lead to file corruption.
- System Stability: Closing applications correctly maintains your computer’s performance.
Steps to Close Excel Efficiently
Here are the steps you should follow to ensure an Excel spreadsheet session ends correctly:
1. Save Your Work
Before you start the process of closing Excel, always save your work:
- Click on the File menu and select Save (Ctrl + S).
- If you want to save as a different file or in a different location, use Save As.
- Ensure all opened workbooks are saved if you have multiple files open.
2. Close Open Workbooks
After saving, it’s time to close all open workbooks:
- Go to File > Close or press Ctrl + W to close the active workbook.
- If you have several workbooks open, repeat this step for each workbook.
3. Close Excel Application

With all workbooks closed, you can now close Excel:
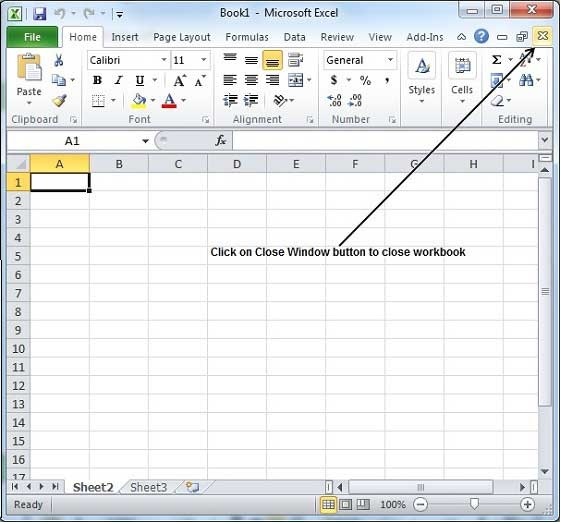
- Click on the X in the top-right corner or choose File > Exit.
- Excel will prompt you if there are any unsaved changes in any open workbooks.
4. Check for Autosaved or Recovery Files

If Excel closed unexpectedly, check for autosaved or recovery files:
- Open Excel.
- If there are recovery files, Excel will show a Document Recovery task pane.
- Save the recovered files by selecting them and clicking Save As.
📝 Note: Regularly saving your work is crucial to avoid data loss, especially when dealing with large datasets.
Advanced Tips for Managing Excel Sessions
Here are some advanced tips to manage your Excel sessions more effectively:
Autosave and AutoRecover
Enable and configure autosave and autorecover options:
- Go to File > Options > Save.
- Check “Save AutoRecover information every” and set a time interval (e.g., 10 minutes).
- Also, enable “AutoSave OneDrive and SharePoint Online files by default in Excel.”
Keyboard Shortcuts
Learn and use these keyboard shortcuts to streamline your workflow:
| Action | Shortcut |
|---|---|
| Save | Ctrl + S |
| Save As | F12 |
| Close Workbook | Ctrl + W |
| Exit Excel | Alt + F4 |

💡 Note: Keyboard shortcuts not only save time but also reduce wear and tear on your mouse.
Summing Up
Excel is more than just a tool; it’s a companion for many in their daily tasks. Ensuring you close it properly is not only about efficiency but also about safeguarding your work. By following the steps outlined above, including saving your work regularly, closing workbooks individually, and checking for autosave or recovery files, you’re setting the stage for a seamless and productive experience in your next session with Excel. Keep your system’s stability in mind, and consider enabling autosave features to safeguard your efforts further. These simple practices will help maintain the integrity of your data and keep Excel running smoothly for all your future analyses and tasks.
What happens if I close Excel without saving?
+
Any unsaved changes will be lost, which could result in loss of work or data corruption. Excel will prompt you to save if there are unsaved changes.
Can I recover data if Excel crashes?

+
Yes, if autosave or autorecover is enabled, Excel will attempt to recover any unsaved files upon restarting.
What are the benefits of using keyboard shortcuts in Excel?
+
Keyboard shortcuts save time, reduce reliance on the mouse, and can prevent repetitive strain injuries. They also make your workflow more efficient, especially when navigating through Excel’s various menus and commands.