3 Easy Ways to Remove Duplicate Rows in Excel

Duplicate data in Excel spreadsheets can be a nuisance, potentially skewing your analysis or making reports unnecessarily cluttered. Here are three straightforward techniques to remove duplicate rows in Excel, ensuring your data remains accurate and clean for effective decision-making.
Method 1: Using the Built-in Remove Duplicates Feature

The simplest way to delete duplicate rows in Excel involves using the in-built functionality of Excel:
- Select the range of cells or the entire worksheet where you want to remove duplicates.
- Go to the Data tab on the Ribbon.
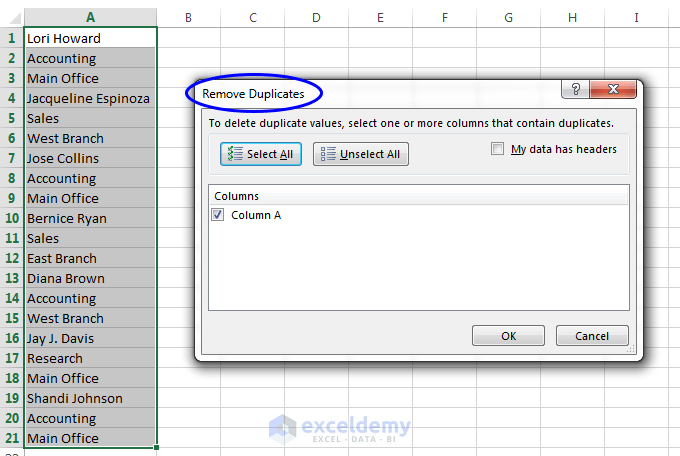
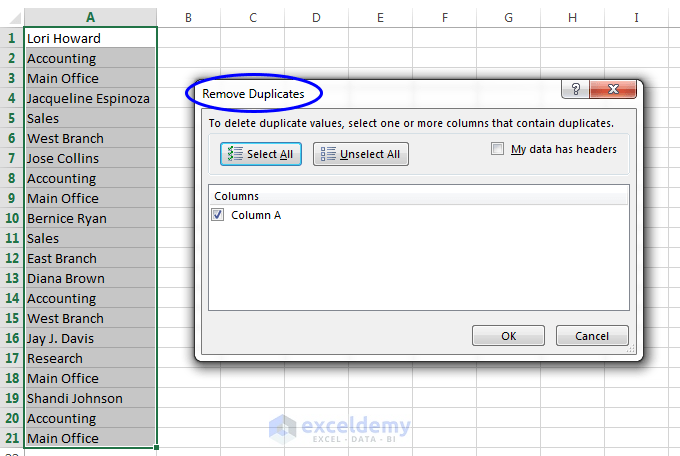
- Click on Remove Duplicates. A dialog box will appear.
- Choose which columns to check for duplicates. By default, all columns are selected.
- Click OK to confirm and remove the duplicate entries.
⚠️ Note: Make sure you have backed up your data before proceeding with this operation as it cannot be undone.
Method 2: Conditional Formatting for Highlighting Duplicates

If you want to identify duplicates before deleting them, follow these steps:
- Select the range of cells where you want to highlight duplicates.
- Go to the Home tab, click on Conditional Formatting, and then choose Highlight Cells Rules > Duplicate Values.
- Select a formatting option to highlight the duplicates, and click OK.
- Now that the duplicates are highlighted, you can manually delete the rows you don't need.
| Color Option | Description |
|---|---|
| Light Red Fill with Dark Red Text | Default setting for highlighting duplicates. |
| Yellow Fill with Dark Yellow Text | Alternative for highlighting. |
| Custom Format | Choose your own format for highlighting. |

📝 Note: You can also use conditional formatting to highlight duplicates, then filter and delete these rows for a visual approach to removing duplicates.
Method 3: Using Formulas to Filter and Remove Duplicates

For more control over how duplicates are handled, you can use Excel formulas:
- CONCATENATE Function: Combine columns to create a unique identifier:
=CONCATENATE(A2,"|",B2,"|",C2) - Use a Helper Column: Add this concatenated value in an empty column to the right of your data.
- Filter for Unique Values: Use the Advanced Filter to filter for unique values based on the helper column:
- Go to the Data tab, select Advanced in the Sort & Filter group.
- Choose Copy to another location.
- Set the range to filter from and the column to use as criteria.
- Copy the unique records to a new location, then delete the old data.
By applying these formulas, you'll be able to isolate and delete duplicate rows from your dataset.
Frequently Asked Questions

Can I undo the removal of duplicates in Excel?

+
No, the “Remove Duplicates” function does not have an undo feature. Always back up your data before performing this operation.
Is it possible to remove duplicates based on specific columns?

+
Yes, when using the “Remove Duplicates” feature, you can select which columns to consider for finding duplicates.
How can I identify and remove duplicates in a large dataset?

+
For large datasets, use conditional formatting to highlight duplicates visually, or apply advanced filters or formulas to efficiently remove duplicates.
In the digital world where Excel is a go-to tool for data management, knowing how to remove duplicate rows can save time and enhance data integrity. The three methods outlined provide a practical solution for handling duplicates in various contexts, whether it’s through quick built-in features, visual aids for manual deletion, or precise filtering with formulas. Remember, while these methods simplify the task, always ensure you have a backup of your data before removing duplicates. By keeping your spreadsheets clean and accurate, you’ll ensure that your data analysis and decision-making processes are based on reliable information.