Creating Drop-Down Lists in Excel from Another Sheet Easily

Working with Excel often involves organizing and managing large sets of data. One powerful feature that can help in data management is the creation of drop-down lists from data residing on another sheet. This guide will walk you through the steps to create a dynamic and user-friendly spreadsheet by utilizing Excel drop-down lists from another sheet, enhancing both efficiency and accuracy in data entry.
Setting Up Your Data

The first step in creating a drop-down list in Excel from another sheet is preparing your source data. Here's how:
- Go to the sheet where your list items are located. Name this sheet something descriptive like "Source."
- List your items vertically in a column or horizontally in a row. Ensure each item is unique to avoid redundancy.
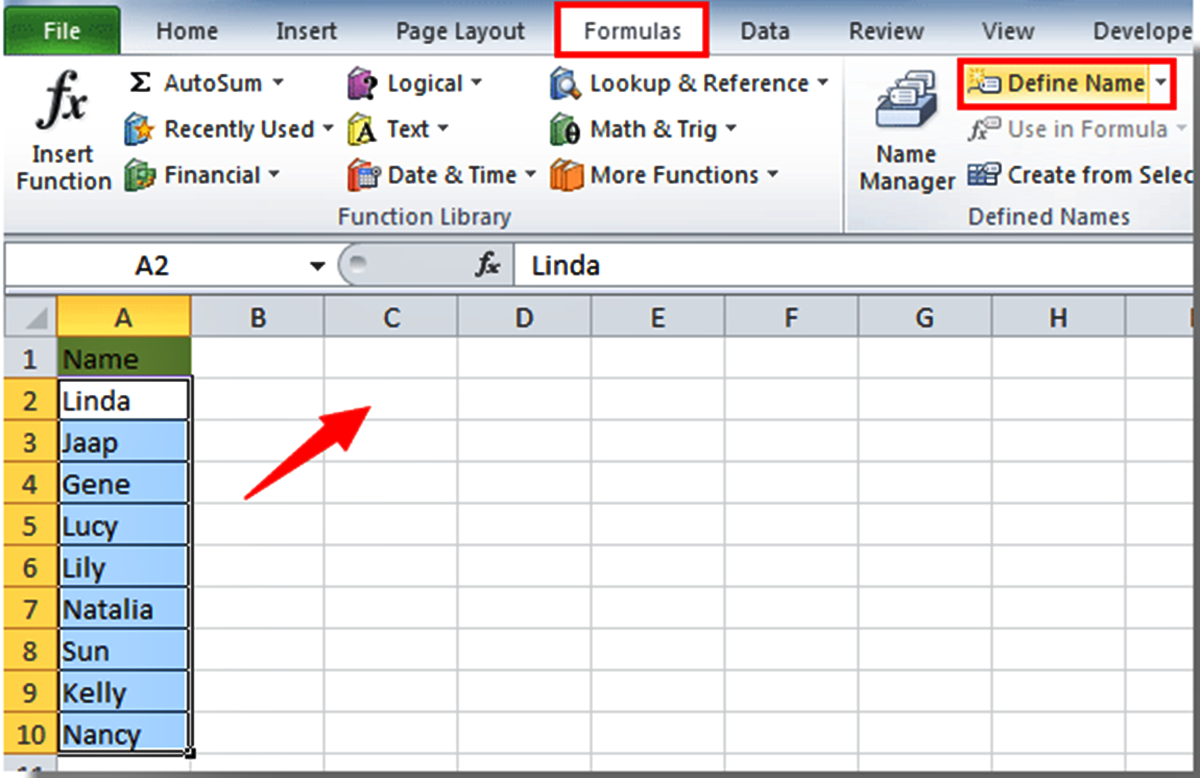
- Define the range of cells containing these items. For example, if your items are in cells A2 to A10 on the Source sheet, highlight this range.
- Give this range a name by going to Formulas > Name Manager, clicking "New," and typing a name (e.g., "Item_List").
💡 Note: Naming your range aids in maintaining your spreadsheet's organization and makes referencing easier.
Creating the Drop-Down List

Now that your data is organized, let's dive into creating the drop-down list:
- Go to the sheet where you want your drop-down list to appear. This could be your main data entry sheet.
- Select the cell or range of cells where you want the drop-down to appear.
- Go to the Data tab on the ribbon and click Data Validation.
- In the Data Validation dialog, under "Allow," choose "List."
- In the "Source" field, type
=Source!Item_List, assuming your source range is named "Item_List" on the "Source" sheet. - Click OK, and your drop-down list will appear in the selected cells when you click into them.
Advanced Options for Drop-Down Lists

Here are some advanced features you can apply to your drop-down lists for better functionality:
Filtering Items in the Drop-Down List

You can filter the items in your drop-down list dynamically using Excel's FILTER function:
- In your Source sheet, create additional columns to categorize your items (e.g., Product Type).
- Use the
FILTER()function in a new range to filter your list based on criteria. - Reference this new filtered range in your Data Validation source.
💡 Note: Using FILTER ensures your drop-down reflects changes in source data without manual updates.
Expanding the List Automatically

As your source list grows, Excel can automatically accommodate new items without redefining the range:
- Use
OFFSET()withCOUNTA()to define a dynamic named range:
=OFFSET(Source!$A$2,0,0,COUNTA(Source!$A$2:$A$100),1)
This formula references column A starting from cell A2 and expands to include all non-empty cells up to A100.
Error Handling and User Feedback

Implement error handling to guide users:
- In the Data Validation settings, go to the "Error Alert" tab.
- Choose to show a "Warning" or "Stop" message when an invalid entry is attempted.
- Enter a clear, informative message like "Please select an item from the drop-down list."
This ensures users know what to do when entering data, reducing errors.
Wrapping Up

Utilizing drop-down lists from another sheet in Excel provides a robust tool for managing data entry, ensuring consistency, and reducing input errors. This guide covers the basic and advanced techniques for setting up dynamic and filtered drop-down lists, offering solutions for various data management needs in Excel. By organizing your data sources and applying the advanced options detailed here, you can significantly enhance your spreadsheet's usability and maintainability.
Can I create multiple drop-down lists from different ranges on the same sheet?

+
Yes, you can create multiple drop-down lists, each referencing different named ranges on the Source sheet or any other sheet in your workbook.
How do I make my drop-down list update automatically when source data changes?

+
Use dynamic named ranges with Excel functions like OFFSET or TABLE to ensure your list updates automatically as you add or remove items from the source data.
What can I do if I need to include spaces or special characters in my named range?

+
Excel will automatically ignore spaces and special characters in named ranges. However, to ensure clarity, consider replacing spaces with underscores or using camel case naming conventions (e.g., ItemList).
Can I use a drop-down list to input data that will be reflected in the Source sheet?

+
While the drop-down list itself doesn’t automatically update the Source sheet, you can set up formulas or macros to achieve this functionality. You would typically use VBA (Visual Basic for Applications) for real-time updates.