3 Ways to Disable Delete Sheet Option in Excel

Introduction to Sheet Protection

Excel, the widely-used spreadsheet software, comes with an array of features that allow users to manage data efficiently. One crucial aspect of data management involves securing the data against accidental modifications or deletions. Among these modifications, deleting a sheet can be particularly disastrous if it contains vital information. Therefore, knowing how to disable the delete sheet option in Excel is essential for many users. This post delves into three effective methods to ensure sheets remain intact, offering not only protection but also peace of mind.
Method 1: Using Workbook Protection

Excel provides an in-built feature called Workbook Protection, which allows you to protect the structure of the workbook. Here's how to use it to disable the delete sheet option:
- Open Your Workbook: Launch Excel and open the workbook you wish to protect.
- Navigate to Review Tab: Click on the "Review" tab at the top of the Excel window.
- Protect Workbook: In the Protect group, click on "Protect Workbook."
- Enable Structure Protection: Select the option to "Protect Structure and Windows." A dialog box might appear asking for a password; if you want an additional layer of security, enter one.
- Confirm: Click "OK" to apply the protection.
Table: Workbook Protection Settings

| Option | Description |
|---|---|
| Structure | Prevents changes to the sheets like adding, deleting, hiding, or unhiding sheets. |
| Windows | Prevents changes to window settings like size or position. |

💡 Note: When you protect the workbook, users can still open, view, and edit cell content in the sheets, but they cannot make structural changes like deleting sheets.
Method 2: VBA for Advanced Protection

If you require more granular control over the delete sheet option, VBA (Visual Basic for Applications) can be your tool. Here’s how you can disable the delete sheet feature with VBA:
- Open Excel VBA Editor: Press Alt + F11 to open the VBA editor.
- Insert New Module: Right-click on your workbook's name in the Project Explorer, choose "Insert," then "Module."
- Add VBA Code: Paste the following code into the module window: ```vba Private Sub Workbook_SheetBeforeDelete(ByVal Sh As Object, Cancel As Boolean) Cancel = True MsgBox "You cannot delete this sheet." End Sub ```
- Save Your Workbook: Remember to save your workbook as a Macro-Enabled Workbook (.xlsm).
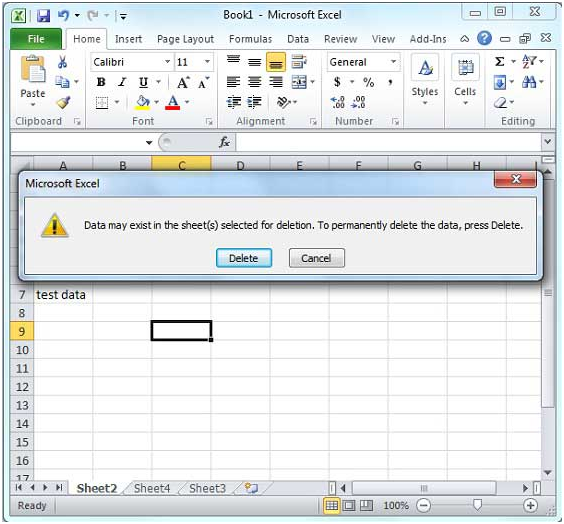
🔐 Note: This VBA code works at the workbook level; however, users with sufficient VBA knowledge can bypass this protection.
Method 3: Sheet-Level Protection

Another way to prevent sheet deletion indirectly is by protecting each sheet individually. Here's how you do it:
- Select the Sheet: Click on the sheet tab you want to protect.
- Protect Sheet: Go to the "Review" tab, then click on "Protect Sheet."
- Set Password and Options: Enter a password if desired, and ensure that options like "Delete rows" and "Delete columns" are unchecked to prevent structural modifications within the sheet.
- Confirm Protection: Click "OK" to apply the protection.
While this method doesn't directly disable the delete sheet option, it indirectly protects the workbook structure by locking individual sheets against alterations.
🛡️ Note: Sheet-level protection can be combined with workbook-level protection for maximum security.
In summary, Excel offers various methods to protect against the accidental or unauthorized deletion of sheets. From using built-in workbook protection features to employing VBA for advanced customization, or securing each sheet individually, users can ensure their critical data remains intact. Each method has its strengths, allowing for flexibility in how security is implemented. By utilizing these techniques, you not only safeguard your data but also enhance your Excel skills, contributing to better document management and data protection strategies.
Can I still edit the sheet after I protect it against deletion?

+
Yes, you can continue to edit cell contents, but you cannot make structural changes like deleting or renaming sheets unless you unprotect the workbook or the specific sheet first.
What happens if someone forgets the password to the protected workbook?

+
If the password is forgotten, you will need to use third-party software to unlock the workbook or recreate the sheet. Excel does not offer a built-in recovery option for lost passwords.
Is there a way to protect only certain sheets within a workbook?

+
Yes, you can protect individual sheets. Using the “Protect Sheet” option allows you to set protection on a per-sheet basis, allowing different levels of protection for different sheets within the same workbook.
Can VBA protection be circumvented?

+
While VBA can provide an additional layer of security, users with advanced Excel or VBA knowledge might be able to disable or bypass VBA protection by accessing or modifying the code directly.