5 Easy Methods to Delete Rows in Excel Quickly

Managing data in Excel can sometimes feel like navigating a maze. Whether you're cleaning up datasets, restructuring spreadsheets, or simply trying to make your work more efficient, knowing how to quickly delete rows in Excel is a fundamental skill. Here, we'll explore five straightforward methods to delete rows in Excel with speed and precision, ensuring that your workflow becomes as efficient as possible.
Method 1: Manual Selection

The most basic way to delete rows in Excel involves:
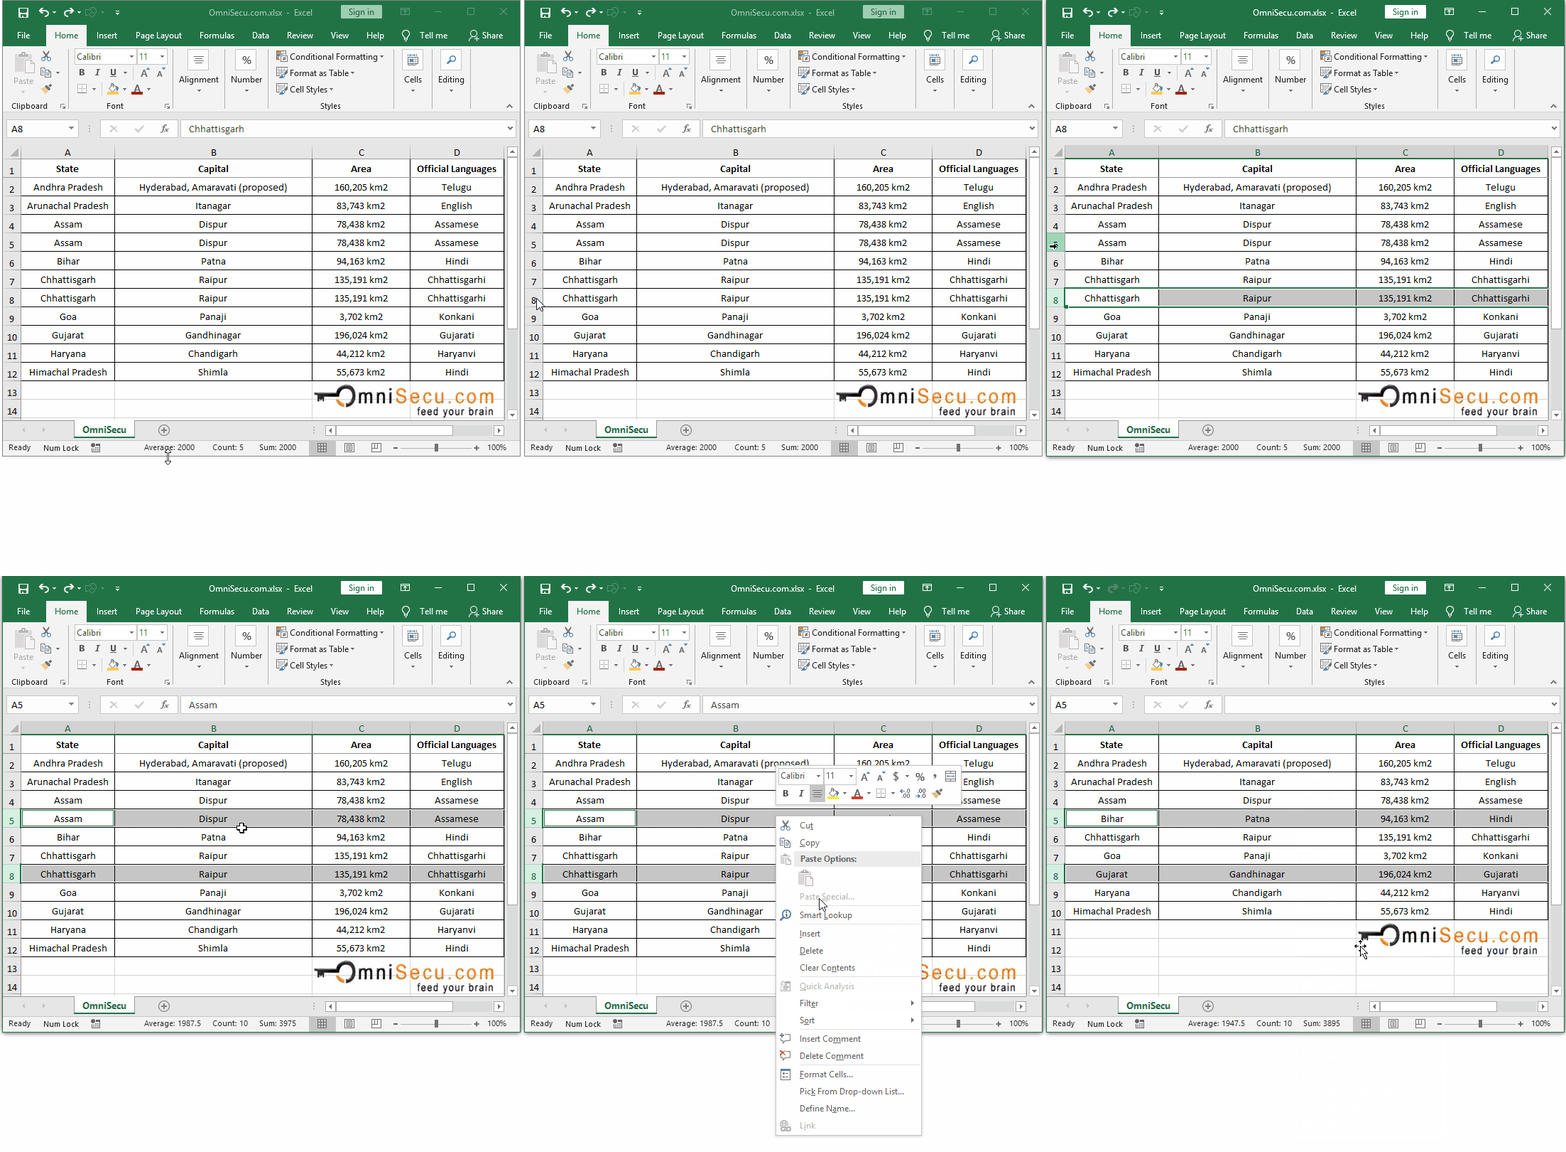
- Selecting the row number on the left-hand side of the worksheet.
- Right-clicking to open the context menu, then choosing Delete.

💡 Note: This method is best for deleting a few rows at a time. For bulk deletions, consider other methods listed below.
Method 2: Keyboard Shortcut

Speed up your row deletion with this simple keyboard shortcut:
- Highlight the rows by pressing Ctrl+Spacebar to select the entire row.
- Press Ctrl+Minus (-) to open the delete dialog, and then press ’D’ for delete.

Method 3: Using Excel’s Go To Feature

For those rows scattered across your spreadsheet:
- Open the ‘Find & Select’ tool from the ‘Home’ tab.
- Select ‘Go To Special’.
- Choose ‘Blanks’ to select all empty cells, which could be rows without data.
- Right-click and choose ‘Delete’, selecting ‘Entire row’ if you only want to delete rows with blank cells.

✍️ Note: This method is particularly useful for cleaning datasets with intermittent empty rows.
Method 4: Filter and Delete

When dealing with large datasets where you need to remove rows based on specific criteria:
- Apply a filter to your data range (from the ‘Data’ tab).
- Select the criteria by which you want to filter rows.
- Select the rows you want to delete with Ctrl+Click or Shift+Click.
- Right-click on any selected row number and choose ‘Delete Row’.

Method 5: VBA Macro

For repetitive tasks or when deleting rows based on complex conditions:
- Press Alt+F11 to open the VBA Editor.
- Insert a new module and write or paste the following code:
Sub DeleteRowsBasedOnCriteria()
    Dim rng As Range
    Dim lastRow As Long
    Dim ws As Worksheet
    Set ws = ThisWorkbook.Sheets(“Sheet1”) ‘Change as per your sheet name
    lastRow = ws.Cells(ws.Rows.Count, 1).End(xlUp).Row
    Set rng = ws.Range(“A1:A” & lastRow) ‘Change the column reference as per your condition
    rng.AutoFilter Field:=1, Criteria1:=“=Criteria” ‘Change to your criteria
    rng.Offset(1, 0).SpecialCells(xlCellTypeVisible).EntireRow.Delete
    ws.ShowAllData
End Sub
Run the macro when needed by clicking the ‘Run’ button or F5.

⚙️ Note: Macros require VBA knowledge. Always backup your data before running macros to avoid unintentional data loss.
In the fast-paced environment of data management, mastering these methods to delete rows in Excel quickly can significantly boost productivity. From the simplicity of manual selection and keyboard shortcuts to the power of Excel's filter capabilities and VBA macros, these techniques offer solutions for all kinds of Excel users. Remember to use these tools judiciously to keep your spreadsheets tidy and your data accurate. Whether you're cleaning up, organizing, or preparing for analysis, these methods provide you with the flexibility to manage your data effectively.
Can I undo the deletion of rows in Excel?

+
Yes, you can undo the deletion of rows in Excel by using the ‘Undo’ function. Press Ctrl+Z or click the ‘Undo’ button on the Quick Access Toolbar immediately after deleting rows.
What happens to formulas when rows are deleted?

+
When you delete rows, any formulas referencing cells in those rows will adjust automatically. However, if you have formulas that reference entire columns or rows, they will not be impacted. Always double-check your formulas after making structural changes.
How can I delete rows that contain specific text or values?

+
Use the ‘Filter’ method described above. Once you filter for the specific text or value, select those rows and delete them. You can also use conditional formatting or VBA for more complex scenarios.