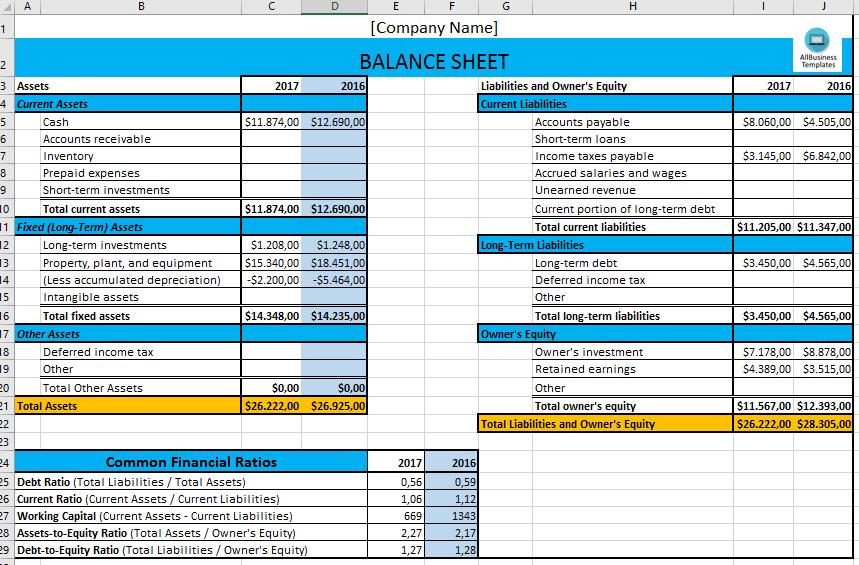
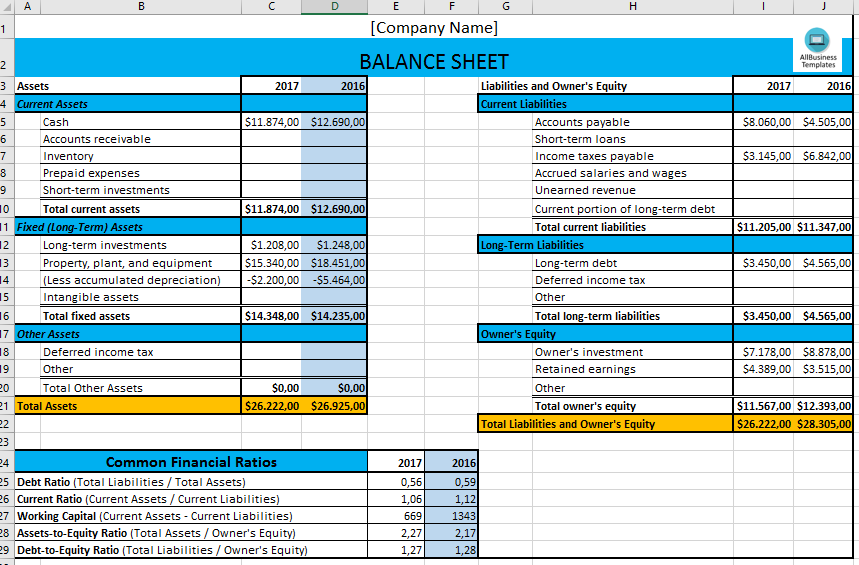
5 Steps to Create a Balance Sheet in Excel

Understanding the financial health of a business is crucial for making informed decisions, securing investments, or even for internal analysis. One of the key tools in financial reporting is the balance sheet, which provides a snapshot of a company's assets, liabilities, and equity at a particular point in time. Creating a balance sheet in Excel is straightforward once you understand the basic steps. Here's how you can do it in five simple steps:
Step 1: Setting Up Your Spreadsheet

Begin by opening Microsoft Excel. Here are the initial steps to prepare your worksheet:
- Create a new workbook or sheet.
- In cell A1, type “Balance Sheet” to label your sheet.
- In cell A3, enter “Date” and then the date for which the balance sheet is prepared in A4.
- In cells A6 to A8, input the headings “Assets”, “Liabilities”, and “Equity” respectively. Use the “Merge & Center” tool from the ‘Home’ tab to make these headers span across multiple columns for clarity.

Step 2: List Assets

The assets section is typically divided into:
- Current Assets: This includes cash, accounts receivable, inventory, and other short-term assets that can be liquidated within a year.
- Fixed or Long-Term Assets: These are long-term investments like property, equipment, or intangible assets like patents.
Here is how to enter them:
- In column A, list all the types of current assets starting from A9. Below the current assets, from row A14 or so, list the fixed assets.
- Next to each asset, input the corresponding dollar amount in column B.
- Sum the current and fixed assets separately at the bottom of each section.
| Current Assets | Amount |
|---|---|
| Cash | 25,000</td></tr> <tr><td>Accounts Receivable</td><td>45,000 |
| Inventory | 30,000</td></tr> <tr><td>Total Current Assets</td><td>=SUM(B9:B11)</td></tr> <tr><th>Fixed Assets</th><th>Amount</th></tr> <tr><td>Property, Plant & Equipment</td><td>100,000 |
| Intangible Assets | $20,000 |
| Total Fixed Assets | =SUM(B14:B15) |
| Total Assets | =B12+B17 |

💡 Note: Ensure all dollar amounts are in the same currency for consistency.
Step 3: List Liabilities and Equity

Now, turn to the liabilities and equity section:
- Liabilities: Start listing current liabilities like accounts payable or short-term loans in row A21, followed by long-term liabilities from A26.
- Equity: Below the liabilities, list items like owner’s equity, retained earnings, or stock issued from A31 onwards.
| Current Liabilities | Amount |
|---|---|
| Accounts Payable | 15,000</td></tr> <tr><td>Short-term Debt</td><td>20,000 |
| Total Current Liabilities | =SUM(B21:B22) |
| Long-Term Liabilities | Amount |
| Long-term Debt | 50,000</td></tr> <tr><td>Total Long-Term Liabilities</td><td>=SUM(B26:B26)</td></tr> <tr><th>Equity</th><th>Amount</th></tr> <tr><td>Owner's Equity</td><td>50,000 |
| Retained Earnings | $80,000 |
| Total Equity | =SUM(B31:B32) |
| Total Liabilities & Equity | =B23+B27+B33 |
Step 4: Balance the Sheet

The key principle of a balance sheet is that Assets = Liabilities + Equity. Here’s what you need to do:
- Total all your assets in one cell.
- Total all liabilities and equity in another cell.
- Use Excel formulas to check if these sums are equal. If not, review your entries for errors.
Here’s an example:
=B18 (total assets) should equal =B34 (total liabilities and equity).
🔍 Note: If your balance sheet does not balance, you might have errors in data entry or calculation formulas.
Step 5: Format and Finalize

To make your balance sheet more presentable:
- Use formatting tools to emphasize headers and totals with bold, larger fonts, or different colors.
- Apply borders or conditional formatting to distinguish sections or highlight key figures.
- Add comments to cells where additional explanations might be helpful.
- If you plan to print the balance sheet, consider setting up print areas or adjusting margins for clarity.
Through these five steps, you've created a basic yet functional balance sheet in Excel. This document not only helps in visualizing the financial structure of your business but also aids in strategic planning, loan applications, and investor pitches.
In wrapping up, a balance sheet in Excel provides a dynamic platform for monitoring your company's financial health. It's not just about listing numbers; it's about understanding where your business stands at any given moment. Whether you're a small business owner or a financial analyst for a large corporation, mastering the creation of a balance sheet in Excel is an invaluable skill that supports sound financial management and decision-making.
What is the main purpose of a balance sheet?

+
The primary purpose of a balance sheet is to provide a summary of the financial position of a business at a specific point in time, showing what the company owns (assets), what it owes (liabilities), and the shareholders’ stake in the company (equity).
Can Excel automatically balance the sheet?

+
Excel does not automatically balance the sheet for you; you must ensure that your assets equal your liabilities plus equity. However, Excel can use formulas to alert you if these numbers don’t match, helping you identify any errors in your entries.
How often should I update my balance sheet?

+
For most businesses, updating the balance sheet monthly is common practice, although this can vary depending on the needs of the business, regulatory requirements, or internal reporting cycles.