Excel Inventory Sheet Guide: Simple and Effective Creation

Mastering the creation of an Excel inventory sheet can streamline your business operations, save time, and reduce errors. An effective inventory management system allows you to keep track of your stock levels, manage orders, and ensure that your business runs smoothly. In this comprehensive guide, we'll walk you through the steps to create a simple yet highly functional Excel inventory sheet.
Setting Up Your Inventory Sheet

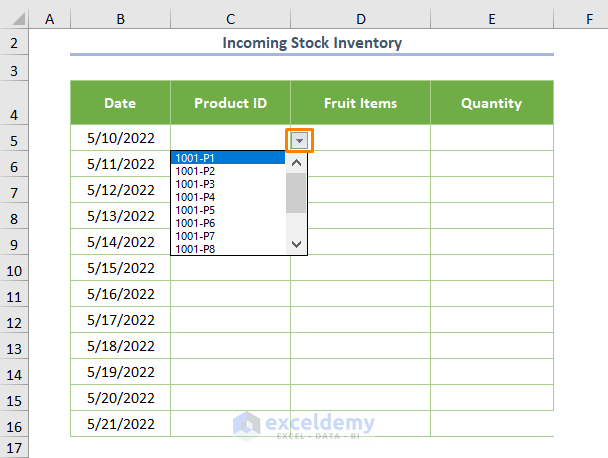
To start, you’ll need to set up the basic structure of your inventory sheet. Here’s how:
- Open Microsoft Excel: Start with a blank workbook or choose a template if you’re new to Excel.
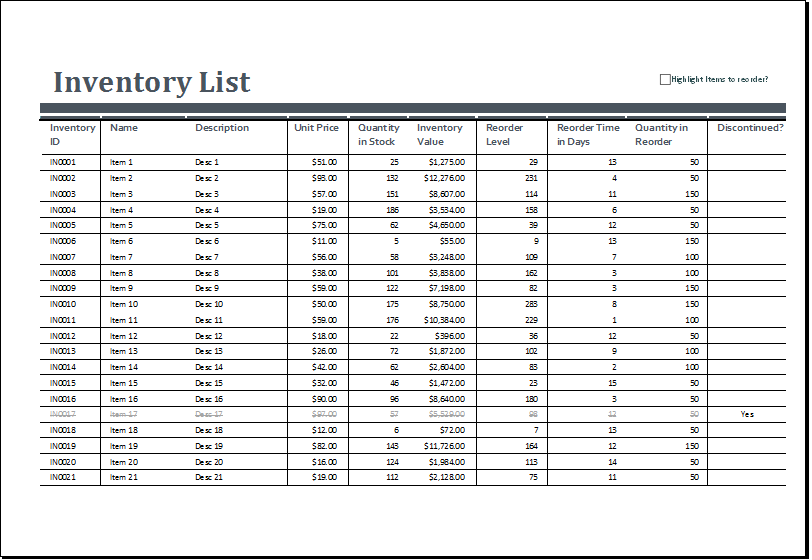
- Create Columns: Label your columns with headers such as:
- Item Number
- Item Name
- Category
- Quantity in Stock
- Price per Unit
- Supplier Name
- Reorder Level
Here's how you can format your inventory sheet:
| Column Name | Description |
|---|---|
| Item Number | Unique identifier for each item. |
| Item Name | Description of the product. |
| Category | Grouping items by type or department. |
| Quantity in Stock | Current inventory count. |
| Price per Unit | Selling price of the product. |
| Supplier Name | The company you source the item from. |
| Reorder Level | When to restock this item. |

📌 Note: Adjust the columns according to your business requirements. Not all columns might be necessary for everyone.
Adding Data to Your Inventory Sheet

Once you have your structure, begin entering your inventory data:
- Input Item Details: Start by filling in the details for each item one by one. Be as precise as possible.
- Format for Clarity: Use cell formatting to distinguish different types of data, like:
- Text for item names and categories.
- Numbers for quantities and prices with appropriate formatting.
📝 Note: Consistency in data entry is key to avoiding errors in calculations later on.
Advanced Features

To make your inventory sheet more functional:
- Using Formulas: Integrate basic arithmetic formulas to keep track of:
- Total Value of Stock:
= Quantity in Stock * Price per Unit - Reorder Alert: Use
=IF([Quantity in Stock] < [Reorder Level], “Reorder”, “OK”)to flag when to reorder. - Sorting and Filtering: Implement data tools to organize and analyze your inventory:
- Sort items by category, name, or stock levels.
- Filter to view items with low stock or expensive items.
- Conditional Formatting: Highlight cells that meet certain conditions:
- Low stock items in red.
- Items that need to be reordered in a different color.
Regular Maintenance and Updates

Keeping your inventory sheet up-to-date is crucial for effective inventory management:
- Daily/Weekly Updates: Update stock levels regularly as you sell or receive items.
- Periodic Audits: Perform physical counts to verify data accuracy against your sheet.
- Review and Adjust: Reevaluate your inventory thresholds and pricing periodically.
📌 Note: Regular audits help catch discrepancies early, preventing stockouts or overstocking.
In summary, creating an Excel inventory sheet involves setting up a clear structure, inputting accurate data, and utilizing Excel’s features to manage your stock effectively. This process not only ensures that you always know what you have in stock but also when and what to order. It minimizes errors and streamlines your inventory control, leading to more efficient business operations.
How often should I update my inventory sheet?

+
Update your inventory sheet daily if possible, or at least weekly to keep it accurate and useful for decision-making.
Can I use Excel templates for inventory?

+
Yes, Excel offers several templates designed for inventory management which can be customized to fit your needs.
What if I have multiple locations?

+
Use a single workbook with multiple sheets, one for each location. Consolidate data using formulas or Power Query if necessary.