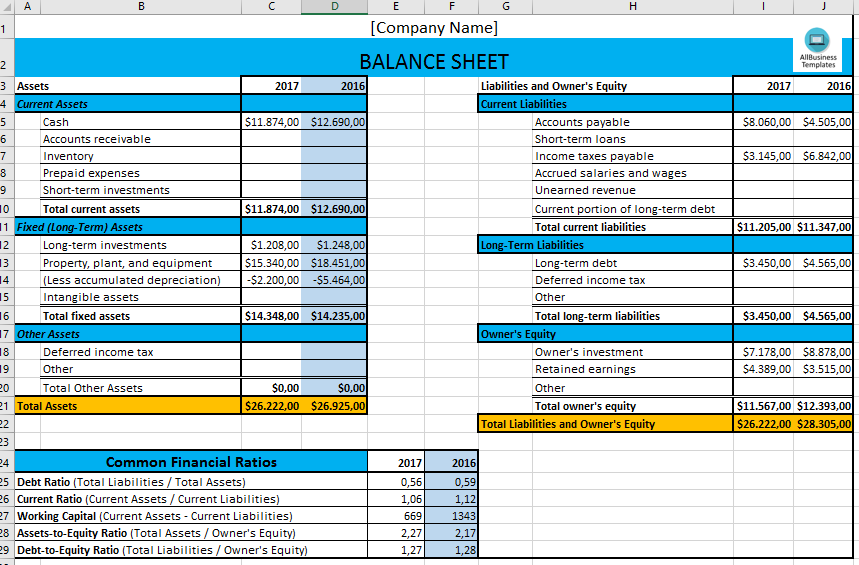
5 Easy Steps to Create a Balance Sheet in Excel

The balance sheet is one of the fundamental financial statements used by businesses and individuals to assess their financial health. It provides a snapshot of an entity's financial position at a specific point in time, detailing assets, liabilities, and equity. Excel, with its versatile functionalities, is an excellent tool for creating a balance sheet. Here's how you can create a professional balance sheet in 5 easy steps.
Step 1: Plan Your Balance Sheet Layout

Before you dive into Excel, it’s essential to outline the structure of your balance sheet:
- Assets: List current assets, long-term investments, property, plant, and equipment, intangible assets, and other assets.
- Liabilities: Include current liabilities, long-term liabilities, and deferred liabilities.
- Equity: Detail owner’s or shareholder’s equity, retained earnings, and other equity components.
Consider using a standard template or creating a custom one based on your needs. This initial planning ensures clarity and accuracy in your final document.
Step 2: Set Up Excel Workbook

Open a new Excel workbook:
- Go to ‘File’ > ‘New Workbook’.
- Format your worksheet to reflect your planned layout:
- A1: Insert the company name or personal name.
- A2: Type “Balance Sheet”.
- A3: Add the date or period the balance sheet represents.
- From A5 downwards, start listing your assets, liabilities, and equity with their respective titles.
Step 3: Input Financial Data

Now, fill in the financial figures:
- Assets: Enter values for each asset category, ensuring to group and categorize properly.
- Liabilities: Follow suit by listing and categorizing liabilities.
- Equity: Add the equity components like common stock, retained earnings, etc.
Remember to use formulas for calculations:
- Use the SUM function to total individual asset, liability, and equity sections.
- Subtotal each category (current assets, long-term assets, etc.) before adding the grand total.
💡 Note: Ensure to double-check your figures against accounting records to prevent errors.
Step 4: Format for Clarity and Presentation

Excel formatting enhances the readability of your balance sheet:
- Use Merge & Center for titles and subtitles.
- Apply bold, italics, and different fonts to distinguish between asset, liability, and equity sections.
- Create borders around cells to clearly outline sections.
- Use conditional formatting to highlight important totals or negative numbers.
💼 Note: Keep the formatting consistent with standard accounting practices for professional presentation.
Step 5: Review and Verify

Accuracy is critical for financial statements:
- Check the balance sheet equation: Assets = Liabilities + Equity must always hold true.
- Review each figure for correctness, ensuring no transposition errors or misclassifications.
- Print a draft to visualize the layout; sometimes issues are more visible on paper.
Here’s a simple table to check the balance sheet equation:
| Assets | Liabilities + Equity | Difference |
|---|---|---|
| =SUM(C5:C20) | =SUM(G5:G20) | =C21-G21 |

🔍 Note: If the difference is not zero, re-examine your data entry and formulas.
By following these 5 steps, you can create a balance sheet that not only serves as an essential financial tool but also looks professional and is easy to understand. Remember, the accuracy of your balance sheet is crucial for decision-making and financial reporting, ensuring your business or personal finances are correctly represented. Now, go ahead and leverage Excel to manage your financial status effectively.
What is the importance of a balance sheet?

+
A balance sheet provides a clear picture of your financial standing, allowing for assessment of liquidity, solvency, and efficiency in asset utilization. It is vital for stakeholders, investors, and creditors for decision-making.
Can I customize the balance sheet template in Excel?

+
Yes, Excel allows you to tailor templates to fit specific business needs, changing categories, formatting, and adding custom formulas as required.
How do I ensure my balance sheet balances?

+
The key is to verify the accounting equation: Assets = Liabilities + Equity. Use Excel’s SUM function to tally up each section and compare totals. Any discrepancy should be thoroughly checked and corrected.


