Effortless Ways to Copy Excel Sheets with Headers Intact

Understanding the Importance of Headers in Excel

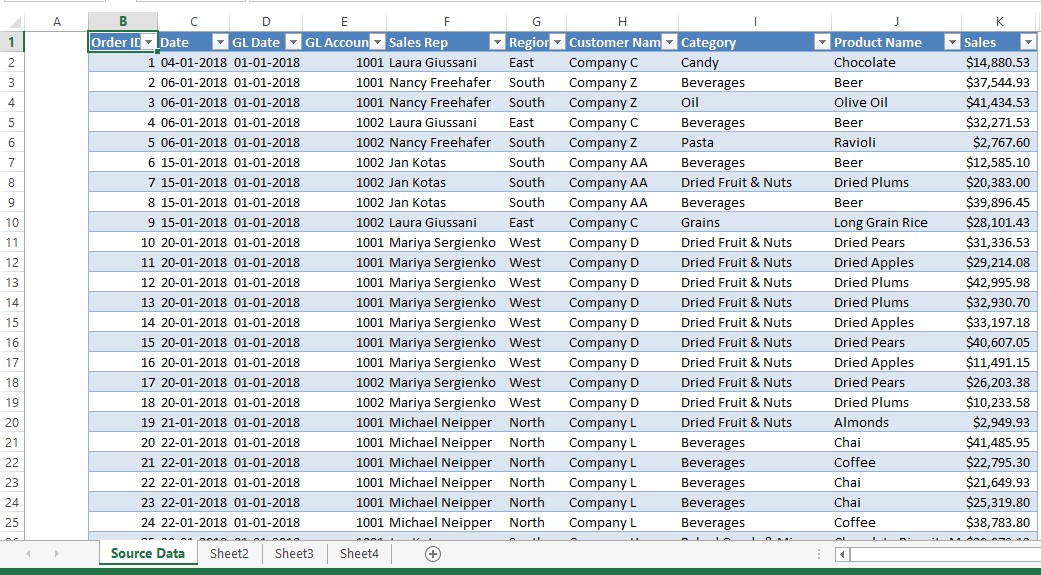
Excel headers are not just stylistic choices; they play a pivotal role in organizing data, enhancing readability, and ensuring accuracy in data processing. Here are some reasons why preserving headers during Excel operations is crucial:
- Data Identification: Headers help identify what each column represents, making it easier for users to understand the dataset at a glance.
- Sorting and Filtering: With headers, sorting and filtering become more intuitive, as Excel can distinguish between data and metadata.
- Formula Efficiency: In spreadsheets with numerous formulas, headers provide context, reducing the risk of errors.
- Table Recognition: When copying data into different applications or databases, headers ensure that tables are correctly structured.

The Significance of Preserving Headers When Copying Sheets

Preserving headers when copying Excel sheets ensures:
- Consistency: Maintaining the same headers across different sheets or workbooks aids in consistent data handling.
- Data Integrity: Preserving headers reduces errors caused by incorrectly identifying data, especially when sheets are moved to different environments or used for different purposes.
- Professional Presentation: Workbooks with consistent headers look more professional, particularly when shared with clients or colleagues.
How to Copy Excel Sheets with Headers

Here are several methods to copy Excel sheets, ensuring headers are preserved:
1. Using ‘Move or Copy’ Feature

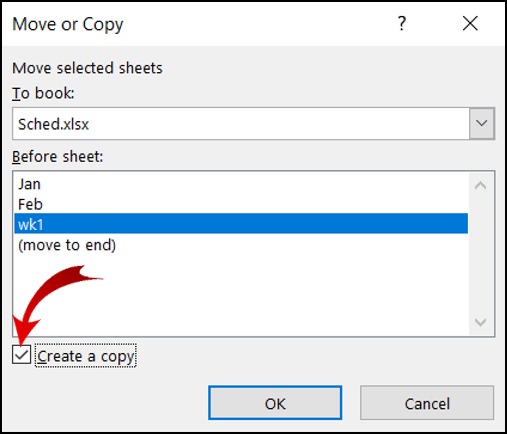
The ‘Move or Copy’ feature in Excel allows you to duplicate a sheet within the same workbook or to another workbook:
- Right-click the sheet tab you want to copy.
- Select ‘Move or Copy…’ from the context menu.
- Choose where to move or copy the sheet by selecting from the list of open workbooks.
- Check the ‘Create a copy’ checkbox to duplicate instead of moving.
- Click ‘OK’ to copy the sheet, which will include all headers.
💡 Note: If ‘Create a copy’ is not checked, the sheet will be moved, not copied, and the original will be removed from its current location.
2. Manual Copy-Paste Technique

Although less precise than automated methods, manual copy-pasting can be used effectively:
- Select the range of cells you want to copy, including headers.
- Press
Ctrl+C(or right-click and select ‘Copy’). - Navigate to the destination sheet, select the top-left cell where you want to paste.
- Press
Ctrl+V(or right-click and select ‘Paste’ from the context menu).- For best results, use ‘Paste Special’ to keep formatting, values, or formulas intact.
3. VBA Macro for Sheet Copying

For repetitive tasks, VBA macros can be used to automate copying sheets:
Sub CopySheetWithHeaders() Dim wsSource As Worksheet Dim wsDestination As Worksheet Set wsSource = ThisWorkbook.Worksheets(“SheetName”) Set wsDestination = Workbooks.Add(1).Worksheets(1)With wsSource .Range("A1:AZ1").Copy Destination:=wsDestination.Range("A1") .Range("A2:AZ" & .UsedRange.Rows.Count).Copy Destination:=wsDestination.Range("A2") End With wsDestination.Name = wsSource.Name & "_Copy"
End Sub
This macro copies the first row (headers) separately to ensure it is not part of the main data range, preserving all formatting and formulas.
4. Using Power Query

Power Query is part of Excel’s business intelligence tools, offering sophisticated data manipulation capabilities:
- From the ‘Data’ tab, select ‘Get Data’ and choose your data source (e.g., ‘From File’ > ‘Excel Workbook’).
- Load the data into Power Query Editor.
- Ensure to promote the first row to headers.
- Then, use the ‘Copy’ option to duplicate the query, which will automatically preserve the headers.
Finalizing the copy process in Power Query involves loading the modified query back into Excel as a new sheet or table.
💡 Note: Power Query can be a powerful tool for data transformation, but it requires some initial setup time to ensure accuracy.
Tips for Maintaining Headers While Copying Sheets

To make the copying process smoother and ensure headers remain intact, consider these tips:
- Freeze Panes: Use the ‘Freeze Panes’ feature to lock the header row so it remains visible while scrolling through large datasets.
- Use Named Ranges: Define named ranges for your headers and data; this will make referencing during copying easier.
- Ensure Consistent Formatting: Maintain consistent formatting across sheets to avoid confusion or misalignment when copying.
- Automate Repetitive Tasks: For frequent copying operations, macros can save time and reduce errors.
Now that you’ve mastered the art of copying Excel sheets with headers, let’s address some common questions users might have:
How can I ensure that formatting is also copied along with the headers?

+
When using the ‘Move or Copy’ feature or manual copy-paste, choose ‘Paste Special’ and select ‘Formats’ to copy formatting as well.
What if my headers span multiple rows or are not in the first row?

+
When using VBA or Power Query, you can modify the macro or query to include all rows necessary to capture complex headers. In manual copy-paste, select all header rows to ensure they are copied together.
Can I copy headers without copying the underlying data?

+
Yes, with VBA or Power Query, you can set the range to only copy the header row without the data below it.
How do I copy sheets with headers from one workbook to another?

+
Using the ‘Move or Copy’ feature, you can choose to copy the sheet to any open workbook, automatically preserving the headers.