Convert Excel to Google Sheets: Easy Steps

If you've ever needed to share a spreadsheet with colleagues or access it from anywhere, you've probably considered moving your work from Microsoft Excel to Google Sheets. Both are powerful tools for data analysis and management, but Google Sheets has the advantage of being web-based, which makes it ideal for collaboration. Here's how you can easily convert your Excel spreadsheets to Google Sheets.
Why Move from Excel to Google Sheets?

Before we jump into the conversion process, let’s look at why you might want to make the switch:
- Cloud Access: Google Sheets is cloud-based, so you can work on your files from anywhere with an internet connection.
- Real-Time Collaboration: Multiple users can work on the same file simultaneously, seeing changes as they happen.
- Automatic Updates: No need to install updates; everything is updated automatically online.
- Integration with Other Google Services: Google Sheets integrates seamlessly with other Google apps like Drive, Docs, and Forms.
Step-by-Step Conversion Guide

1. Prepare Your Excel File

Ensure your Excel file is properly formatted:
- Check for any formulas or references outside the current workbook, as these might not translate correctly.
- Remove any macro-enabled content, as Google Sheets does not support macros natively.
- Save the file in a .xls, .xlsx, or .xlsm format.
⚠️ Note: If your file contains complex charts or advanced features like pivot tables, some elements might not convert perfectly.
2. Upload to Google Drive

To start the conversion, follow these steps:
- Go to Google Drive.
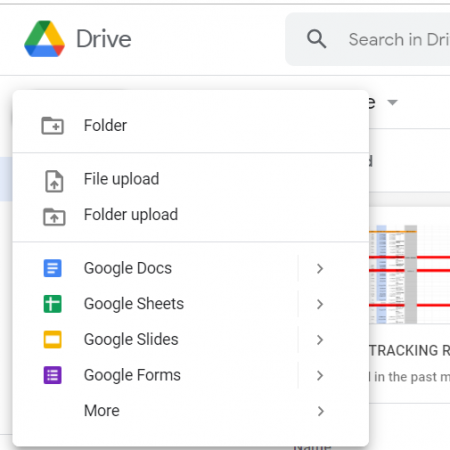
- Click on “New” and then “File Upload”.
- Select your Excel file from your computer.

3. Convert the File

Once the upload is complete:
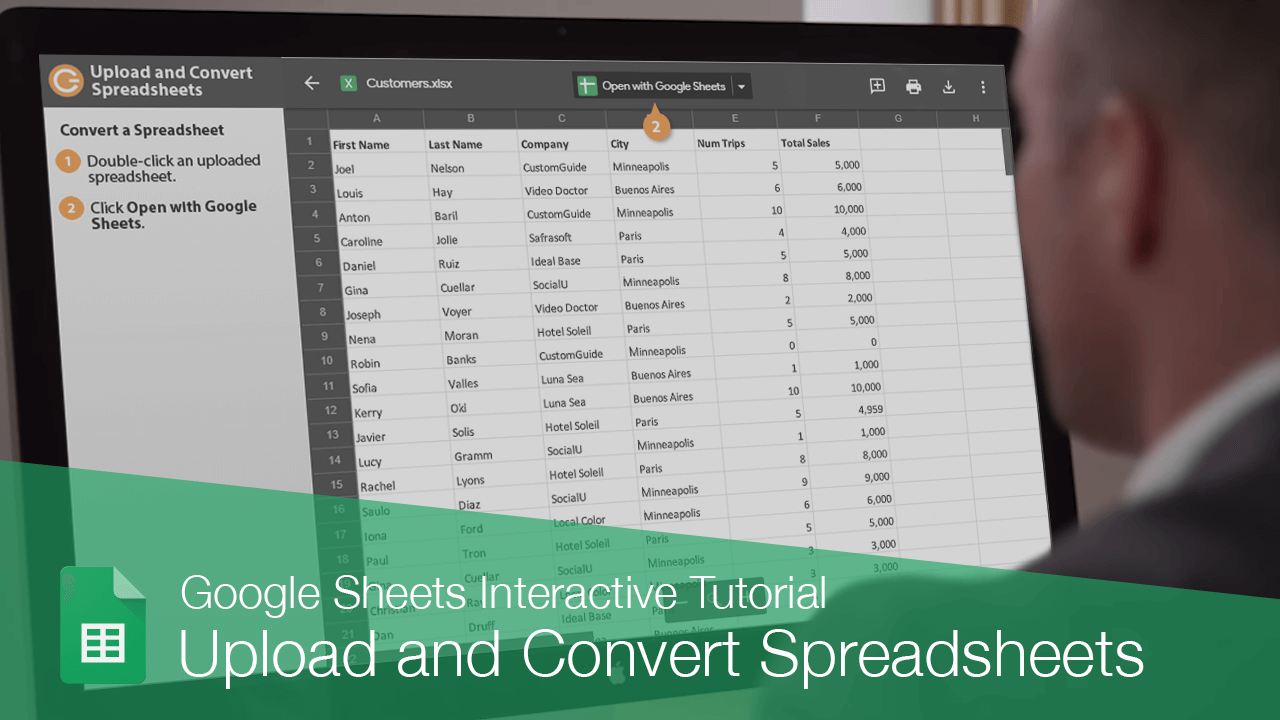
- Double-click the uploaded Excel file to open it in Google Sheets.
- From the “File” menu, select “Save as Google Sheets.”
- A new Google Sheets file will be created, preserving your original Excel file.
4. Review and Edit

After conversion, take the following steps:
- Check the data integrity, especially formulas, to ensure everything translated correctly.
- Look over charts and conditional formatting to see if adjustments are needed.
- If there are any compatibility issues, address them within Google Sheets.
5. Share and Collaborate

Now that your file is in Google Sheets, you can:
- Share the file with others by clicking on “Share” and entering their email addresses.
- Set permissions for viewing, editing, or commenting on the document.
6. Backup Your Work

Always maintain a backup:
- Save a copy of your Google Sheets file back to Excel or in other formats by choosing “File” > “Download”.
By following these steps, you've successfully converted your Excel spreadsheets into Google Sheets, opening up a world of collaborative possibilities and cloud-based convenience. You now have a file that can be easily accessed and modified from any device with internet connectivity, making teamwork and data management much more efficient.
Can I still use my Excel formulas in Google Sheets?

+
Most Excel formulas will work in Google Sheets, but some functions might differ or have different names. Check Google’s documentation for specifics.
Will my conditional formatting remain intact during the conversion?

+
Basic conditional formatting should transfer over, but complex rules might need adjustments or reapplication in Google Sheets.
How do I convert multiple Excel files at once?

+
You can select multiple Excel files for upload in Google Drive. However, you’ll need to convert each file individually to Google Sheets.