Combine Excel Sheets Into One Worksheet Easily

Need to combine data from various Excel sheets but daunted by the process? Whether you're dealing with inventory logs, financial reports, or client records, merging multiple Excel files into one cohesive worksheet is a common yet often cumbersome task. However, with the right techniques, you can streamline this process effectively, saving time and ensuring data integrity.
Preparatory Steps Before Merging Excel Files

Before diving into the actual merging process, it's crucial to prepare your data:
- Verify the data structure: Ensure all files have consistent column headings, data types, and formats to avoid mismatches during consolidation.
- Backup your data: Always keep a copy of your original files to prevent data loss in case something goes wrong during the merge.
- Check for duplicates: Identify and decide how you will handle duplicate entries to maintain data accuracy.
💡Note: Use Excel's in-built functions like VLOOKUP or MATCH to check for duplicates if needed.
Methods to Combine Excel Sheets

Here are several approaches to merging Excel files:
1. Using Excel's Built-In Consolidate Feature

The Consolidate feature in Excel allows you to summarize data from multiple sheets into one:
- Open a new or existing Excel file where you want the combined data.
- Navigate to Data > Consolidate.
- Select your source ranges from different sheets.
- Choose the operation (Sum, Average, etc.), and click OK.
💡Note: This method works best for numerical data where you want a function to be applied during the merge.
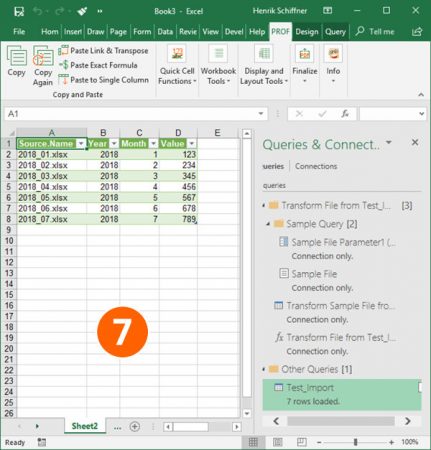
2. Power Query for Advanced Merging

Power Query, part of Excel 2013 and later versions, provides robust data manipulation capabilities:
- Launch Power Query: Go to Data > From Other Sources > From File > From Workbook.
- Import data: Select the Excel files or sheets you want to combine.
- Combine queries: Use Home > Append Queries to combine files. Then, choose Merge Queries for more complex operations.
💡Note: Power Query is ideal for large datasets or when you need to apply transformations before merging.
3. VBA Scripting for Custom Merge

For more control over the merge process, VBA scripting can be employed:
Sub CombineExcelFiles()
    Dim fileName As String, path As String
    Dim ws As Worksheet, combinedSheet As Worksheet
    Dim wbSource As Workbook
    Dim lastRow As Long, i As Long

    path = "C:\YourExcelFilesFolder\"
    fileName = Dir(path & "*.xlsx")
    Set combinedSheet = ThisWorkbook.Worksheets("CombinedData")

    Do While fileName <> ""
        Set wbSource = Workbooks.Open(Filename:=path & fileName)
        Set ws = wbSource.Sheets(1)

        lastRow = combinedSheet.Cells(combinedSheet.Rows.Count, 1).End(xlUp).Row
        ws.UsedRange.Copy combinedSheet.Cells(lastRow + 1, 1)

        wbSource.Close False
        fileName = Dir()
    Loop
End Sub
💡Note: This script assumes all source files are in one folder. Ensure to modify the script for specific needs like different sheet names or merge criteria.
4. Using Third-Party Tools

If the above methods are too complex or time-consuming, consider using software designed to merge Excel files:
- Merge Excel Files by Josh Madison: A simple, free tool.
- Excel File Consolidator: Allows for more advanced merging options.
- AutomateExcel.com: Provides online Excel file merging services.
Final Touches and Data Validation

Once your data is merged, perform the following checks:
- Reconcile Data: Ensure that the data from each source aligns with the combined worksheet.
- Data Cleaning: Look for any formatting issues, blank cells, or unexpected data.
- Update Formulas: If there are formula references in your data, make sure they update correctly after merging.
💡Note: Always use functions like IF, ISERROR, or IFERROR to handle errors post-merge.
Having completed these steps, you're well on your way to successfully merging your Excel sheets. Each method has its advantages, depending on the complexity of your data, the need for automation, or the frequency with which you need to merge files. Select the most appropriate method based on your requirements, keeping in mind the need for accuracy and efficiency in your data handling processes. Remember, data integrity is paramount; verify your merged data thoroughly to ensure the consistency and accuracy of your final output.
How can I ensure no data is lost when merging Excel files?

+
Always make a backup of your original files before merging. Use techniques like Power Query or VBA scripts where you can see the steps involved in the merging process, allowing you to catch any errors in time.
What if my Excel sheets have different structures or column names?

+
You’ll need to standardize your data structure before merging. Use Power Query to transform and match columns from different sources. You can manually adjust or rename columns in VBA or through third-party tools to ensure consistency.
Can I automate this process?

+
Yes, automation can be achieved through VBA scripting or by setting up a Power Query that pulls data from multiple files automatically. You could also use third-party tools that support automation for Excel merging.
How often should I merge Excel files?

+
It depends on your data workflow. For weekly reports, a weekly merge might be necessary. If your data changes frequently or you need to see a continually updated dataset, consider setting up an automated system that can merge files in real-time or at regular intervals.
Are there any Excel versions that do not support merging files?

+
The basic Consolidate feature has been available since Excel 2003, but advanced features like Power Query require Excel 2013 or later versions. Ensure all users have a compatible version when sharing merged files.