Change Excel Sheet 1 Title When Printing Easily

Introduction to Excel Sheet Title Modification

Excel is an incredibly versatile tool that millions of individuals and organizations rely on for data management and analysis. One of the practical features Excel offers is the ability to change the title of a sheet when printing. This might seem like a minor detail, but it can significantly enhance the clarity and professionalism of your documents. In this comprehensive guide, we’ll explore how to change the title of an Excel sheet when printing without altering the sheet name within your workbook.
Why Change Sheet Titles During Printing?

Before diving into the technical steps, let’s consider why you might want to alter the title of an Excel sheet when printing:
- Clarity: Ensure the printed document is easily identifiable when separated from the workbook.
- Professionalism: Tailor the title to reflect the specific content or context of the document.
- Tracking: If different sheets are printed at different times or for various purposes, unique titles can aid in tracking and organization.
Steps to Change the Excel Sheet Title When Printing

Here’s a detailed walk-through of the steps to modify your Excel sheet’s title during the printing process:
- Prepare Your Excel Workbook:
Before you start, ensure your workbook is up to date. Check that all data is entered correctly, and you’re ready to print.
Access the Print Options:
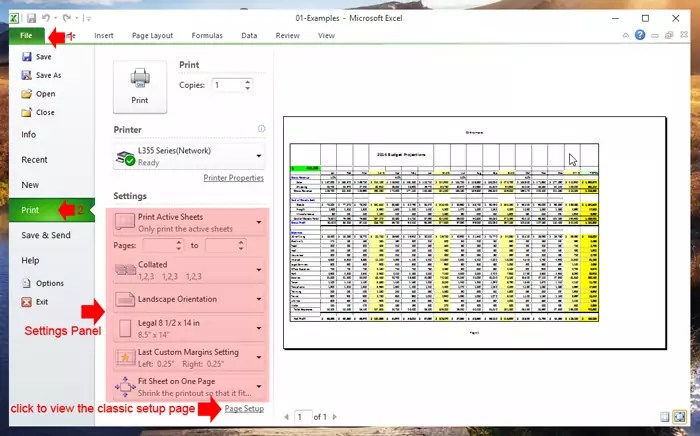
- Navigate to the File tab in the top left corner of your Excel ribbon.
- Click Print, or use the shortcut
Ctrl + Pon Windows orCommand + Pon a Mac.
Modify the Header or Footer:
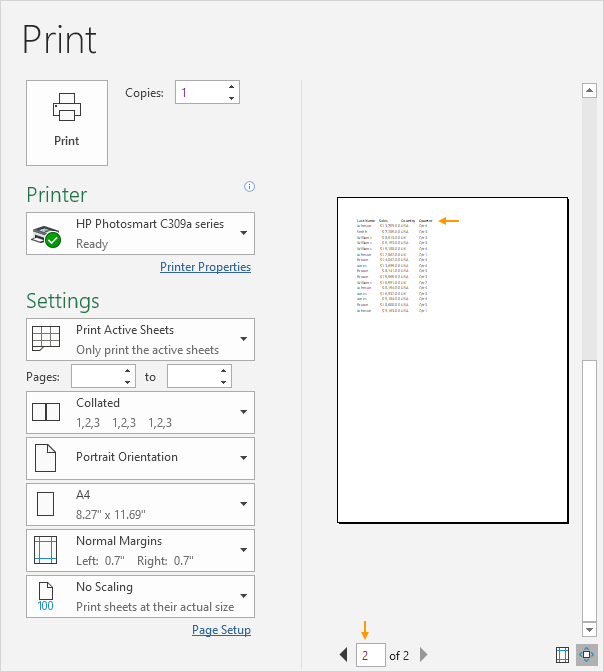
- In the Print settings, find the Page Setup link under Settings. Click on it.
- A new dialog box will appear; choose the Header/Footer tab.
Customize the Header:
- Here, you can choose a predefined header, customize it, or start from scratch.
- Click Custom Header to insert a new header or modify the existing one.
Insert a Custom Title:
- In the Header section, use the text box to enter your desired sheet title. For example, “Q2 Financial Report.”
- You can also insert date, time, page numbers, or other details alongside your custom title.
   <table border="1">
      <tr>
         <th>Header Section</th>
         <th>Purpose</th>
      </tr>
      <tr>
         <td>Left Section</td>
         <td>For the sheet title</td>
      </tr>
      <tr>
         <td>Center Section</td>
         <td>Often used for logos or company names</td>
      </tr>
      <tr>
         <td>Right Section</td>
         <td>Typically contains page numbers or the date</td>
      </tr>
   </table>
Apply Changes and Preview:
- Click OK to apply your changes, then Print Preview to see how your document will look.
- Ensure the title appears as you intended in the print preview.
📍 Note: The modified title will only appear on printed versions or the print preview. Your actual Excel sheet name remains unchanged within the workbook.
Print Your Document:
- Once you’re satisfied with the preview, go ahead and print your sheet or save it as a PDF for digital distribution.
By following these steps, you can now personalize your Excel sheets for printing without affecting the workbook’s internal organization.
Advanced Customizations

For those looking to push further:
- Insert Images: You can insert a logo or any other image in the header/footer by using the Picture button in the Header/Footer setup.
- Formatting: Utilize Excel’s formatting tools to change the font, size, and style of your custom title.
- Page Layout: Explore additional page setup options like orientation, margins, and scale to optimize your document for printing.
🎨 Note: Be mindful of how additional customizations might impact the overall readability and presentation of your printed document.
Key Considerations When Changing Titles

- Title Length: Ensure your custom title isn’t too long, as it may not fit in the header or footer area.
- Version Control: If you frequently print the same sheets, consider including the version or revision date in the title to maintain version control.
- Consistency: If you’re printing multiple sheets, try to maintain a consistent title format for professional presentation.
In this guide, we’ve demystified how to change the title of an Excel sheet when printing. With these skills, you can tailor your Excel outputs to match specific printing needs while keeping your workbook organized. This technique not only aids in document management but also contributes to creating a more professional-looking document for presentations, reports, or any other external communication.
To recap:
- Changing the title allows for better document clarity and tracking.
- Customization of headers and footers gives you control over the printed output without altering the workbook.
- Additional considerations like title length, version control, and consistency enhance the effectiveness of your printed materials.
With practice, you’ll find this process straightforward and a valuable addition to your Excel toolkit.
Will Changing the Print Title Affect My Original Sheet Name?

+
No, changing the print title affects only the printed version or print preview. Your original sheet name in the Excel workbook remains unchanged.
Can I Change the Sheet Title for Multiple Sheets at Once?

+
Unfortunately, Excel does not provide a direct way to change the print title for multiple sheets simultaneously. You’d need to change each sheet individually.
What If My Custom Title Is Too Long?

+
If the title is too long, it might not fit. You can either shorten the title or adjust the header’s font size to accommodate it, but ensure readability is not compromised.