Optimize Excel Print Layout: Easy Steps for Best Results

How to Adjust Print Layout in Excel for Best Results

If you've ever tried to print a spreadsheet from Microsoft Excel, you'll know that getting your layout just right can be a bit tricky. What looks perfect on your screen might not translate well on paper. In this comprehensive guide, we'll walk through the essential steps to optimize your Excel print layout for the best results, making sure your data is presented clearly and professionally.
Understanding Print Settings in Excel

Before we dive into the specifics, it's important to understand the basic print settings in Excel:
- Page Layout: Controls margins, orientation, and scaling.
- Print Area: Defines which cells will be printed.
- Print Titles: Specifies rows or columns to repeat on every printed page.
- Page Setup: Configures headers/footers and sheet options.
📝 Note: Familiarity with these settings will streamline the process of preparing your document for print.
Step-by-Step Guide to Optimize Excel Print Layout

1. Setting the Page Layout

Begin by adjusting the page setup:
- Go to the Page Layout tab on the Ribbon.
- Click on Margins to choose predefined margins or customize them according to your needs. Remember, standard margins are often 1 inch on all sides, but this can vary.
- Select Orientation - Portrait or Landscape depending on the shape of your data.
- Adjust Scaling if your data is too large or too small for the selected paper size.
Image illustrating the Page Layout tab
2. Define Your Print Area

To ensure only the data you need is printed:
- Select the range of cells you want to print.
- Go to the Page Layout tab and click Print Area, then Set Print Area.
- If you need to include multiple ranges, use Ctrl + Click to select non-adjacent ranges.
📝 Note: Removing the print area can be done by selecting "Clear Print Area."
3. Configure Print Titles

For documents that span multiple pages, you might want headers or labels to repeat:
- On the Page Layout tab, select Print Titles.
- Specify which rows or columns should be repeated. For instance, the first row containing headers or the first column with row labels.
4. Customize Page Setup

Here you can adjust headers, footers, and other printing options:
- Click on Page Setup in the Page Layout tab.
- Use the Header/Footer tab to add dynamic content like page numbers, date, or custom text.
- The Sheet tab allows you to change settings like gridlines, row/column headings, or black and white printing.
Additional Tips for Print Quality

After setting up the basics, here are some additional tips to ensure your printouts are of the highest quality:
- Gridlines: To make your data easier to read, print with gridlines. Navigate to Page Layout > Sheet Options and select Gridlines.
- Row and Column Headings: Similarly, print row and column headings for better reference. These settings are also found in Sheet Options.
- Color Printing: If your printer supports it, consider whether you should print in color or black and white. Large spreadsheets with color might take longer to print.
- Manual Adjustments: Sometimes manual adjustments are necessary. Resize columns and rows or align text to improve readability when printed.
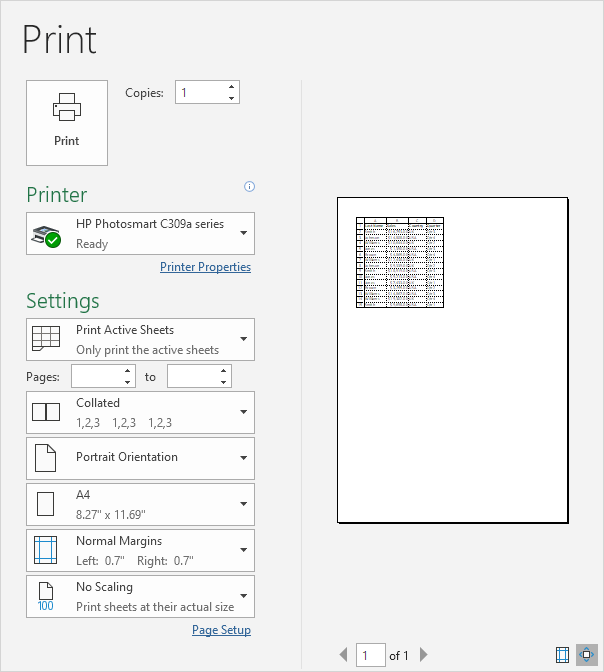
- Print Preview: Always check the print preview to catch any last-minute issues before printing. Go to File > Print to see the preview.
📝 Note: If possible, review a test print on a lower-quality setting before printing the final version to save ink/toner.
The result of a well-optimized print layout in Excel can be strikingly professional. By following these steps, you can ensure that your documents are not only clear and readable but also represent your data accurately. The key is to:
- Understand the basic print settings in Excel.
- Adjust the page layout, print area, and print titles to suit your needs.
- Utilize additional options like gridlines, headings, and color printing.
- Always preview your work before sending it to the printer.
The precision and care you put into preparing your Excel sheets for print will reflect in the quality of your printed output, making your presentations or reports stand out in meetings or for your clients.
Can I print only selected cells in Excel?

+
Yes, you can print only selected cells by setting the print area. Select your cells and go to the Page Layout tab, choose ‘Set Print Area’.
How do I repeat row and column headings on every page?

+
Use the Print Titles feature under Page Layout. Set the rows or columns you want to repeat on each page.
What is the best way to manage margins?

+
Go to Page Layout > Margins, and either select predefined margin settings or customize them to fit your document’s needs.