5 Ways to Transform Vertical Excel Data to Horizontal

Excel, one of the most widely used tools for data analysis and management, often presents data in ways that are not optimal for all tasks. Sometimes, you might find your data in vertical columns when you need it in horizontal rows. This scenario is common when you're dealing with datasets from surveys, databases, or when you're preparing data for reports or charts. Let's explore five effective ways to transform vertical data into horizontal format within Excel, ensuring your workflow remains efficient.
Method 1: Using Paste Special

The simplest method to transpose data from vertical to horizontal is by using Excel’s Paste Special feature. Here’s how:
- Select the vertical range of data you want to convert.
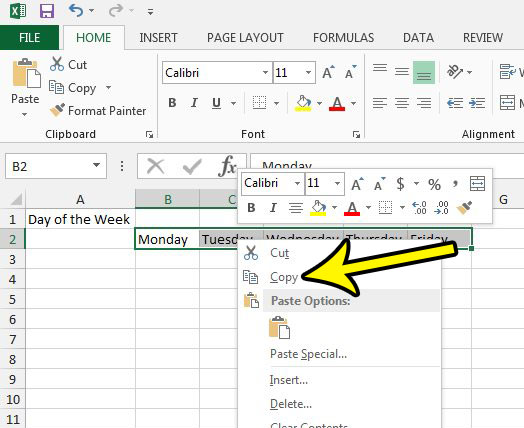
- Copy the data by pressing Ctrl + C or right-click and select Copy.
- Right-click on the cell where you want to place the horizontal data. Choose Paste Special from the context menu.
- In the Paste Special dialog box, check the box labeled Transpose, and click OK.
This method instantly transforms your selected vertical data into horizontal rows at the destination you chose.
📌 Note: This technique will only transpose the actual values, not the cell formatting or formulas.
Method 2: Using Transpose Function

If you want to keep a dynamic link between your original data and the transposed version, consider using Excel’s TRANSPOSE function:
- Select a range that matches the size of your original data but horizontally.
- Type =TRANSPOSE(A1:A10) assuming your data starts at A1 and ends at A10, then press Ctrl + Shift + Enter to enter the array formula.
This method creates a dynamic array that updates if the original data changes.
Method 3: With Power Query

Power Query offers powerful data transformation capabilities including transposing data:
- Go to the Data tab and select Get & Transform Data, then From Table/Range.
- If your data isn’t formatted as a table, Excel will prompt you to convert it; click OK.
- Select Home > Transform > Transpose.
- After transposing, load the query back to Excel by clicking Close & Load.
🗒 Note: Power Query is only available in Excel 2010 and later versions.
Method 4: VBA Macro

For repetitive tasks, a VBA macro can automate the process:
- Open the VBA editor by pressing Alt + F11.
- Create a new module by right-clicking on any of the objects in the Project Explorer, selecting Insert, then Module.
- Type or copy-paste the following VBA code:
Sub TransposeData() Dim SourceRange As Range Dim DestRange As Range Set SourceRange = Selection Set DestRange = Application.InputBox(“Select the destination range for transposed data:”, Type:=8) SourceRange.Copy DestRange.Select Selection.PasteSpecial Paste:=xlPasteAll, Operation:=xlNone, SkipBlanks:=False, Transpose:=True Application.CutCopyMode = False End Sub - Close the VBA editor and run the macro by selecting Macros from the Developer tab or by pressing Alt + F8.
- Paste Special is quick and simple, ideal for static data.
- Transpose Function provides a dynamic connection, useful for ongoing data analysis.
- Power Query offers transformation options beyond just transposing, beneficial for complex data manipulation.
- VBA Macros automate repetitive tasks, enhancing efficiency.
- INDEX and MATCH provide a highly flexible solution for dynamic data transformation.
🖥 Note: Running a macro requires the Developer tab to be enabled in Excel.
Method 5: Using INDEX and MATCH Functions

Although more complex, using the INDEX and MATCH functions together provides a dynamic solution:
| Steps | Description |
|---|---|
| Enter Formula | Use the formula =INDEX(SourceRange, MATCH(1, 0/(ROW(1:10)=Column(SourceRange)), 0)) in the first cell of your destination range. |
| Copy Down and Across | Drag the formula down and across to fill your horizontal range. |
| Adjust for Data Range | Modify the formula to match the size of your data range. |

This method creates a dynamic link, ensuring that any changes in the source data are reflected in the transposed data.
Each method has its strengths:
To summarize, transforming vertical data to horizontal in Excel can be done in various ways, each suited to different needs. Whether you're dealing with one-time data restructuring or need a dynamic link between datasets, Excel provides the tools to make your data management tasks more efficient. Adapting these methods to your workflow can significantly enhance your productivity when working with datasets.
Can you transpose data with formatting intact?

+
Yes, the Paste Special method with ‘Paste All’ and ‘Transpose’ will retain both the data and the cell formatting.
What should I do if my data doesn’t fit in the destination range when transposing?

+
Ensure the destination range matches the transposed dimensions. For large datasets, you might need to manually adjust the range or use Power Query to handle this dynamically.
Can I automate the transposing process?

+
Yes, using VBA macros can automate the process of transposing data, especially useful for repetitive tasks.
Is there a way to transpose data that updates in real-time?

+
Yes, by using the TRANSPOSE function, you can create a dynamic link where changes in the source data will automatically reflect in the transposed data.