5 Ways to Adjust Column Widths Across Excel Sheets Simultaneously

How to Master Excel’s AutoFit Feature for Multiple Sheets

Microsoft Excel is an indispensable tool for data analysis and management, allowing users to organize, analyze, and report on data with unmatched efficiency. One common task that users often encounter is adjusting column widths. While manually adjusting the width of each column can be tedious, Excel provides a feature known as AutoFit that can streamline this process, especially when dealing with multiple sheets. Here’s how you can harness Excel’s AutoFit feature to adjust column widths across multiple sheets simultaneously.
Step-by-Step Guide to AutoFit Across Multiple Sheets

1. Select Multiple Sheets
To apply changes across several sheets:
- Right-click on one of the sheet tabs at the bottom of the Excel window.
- Choose “Select All Sheets” from the menu if you wish to apply to all sheets. Alternatively, hold down the Ctrl key and click on the tabs you want to include.
💡 Note: Selecting multiple sheets means that any formatting change applied will affect all selected sheets.
2. Apply AutoFit to Multiple Columns
Once your sheets are selected:
- Highlight the columns or rows you want to adjust. For whole column adjustment, click on the header above the columns.
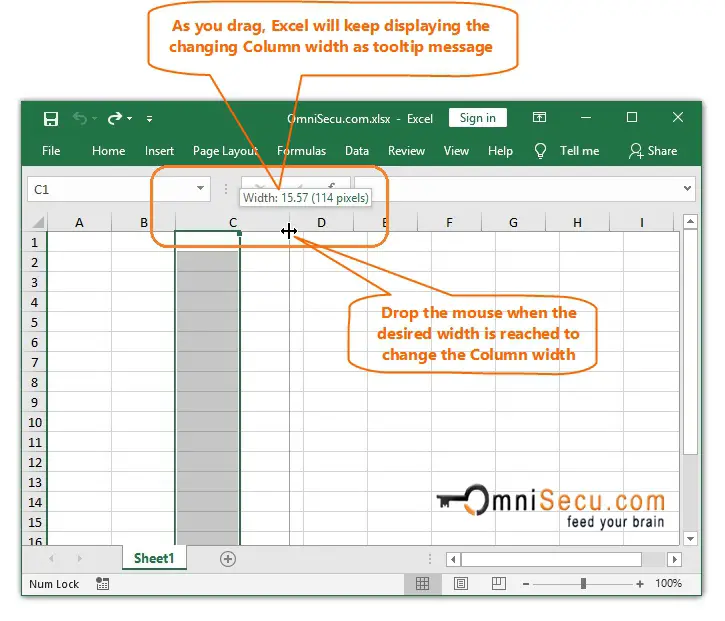
- Double-click the right border of any column header, or right-click on any column header and select “AutoFit Column Width” from the context menu.
Excel will automatically adjust the column widths in all selected sheets to fit the widest entry, ensuring that all data is visible and easily readable without manual adjustments.
Advanced AutoFit Techniques

Using the Format Tool
Instead of double-clicking:
- Select the relevant cells or columns.
- Go to the “Home” tab on the Ribbon.
- Under the “Cells” group, click on “Format” then choose “AutoFit Column Width” or “AutoFit Row Height.”
Using VBA for Greater Control
For more complex scenarios, you can use Visual Basic for Applications (VBA) to automate AutoFit:
- Open the VBA editor by pressing Alt + F11.
- Insert a new module and type in a script like the following to adjust columns A to E:
Sub AutoFitMultipleSheets()
    Dim ws As Worksheet
    For Each ws In ThisWorkbook.Sheets
        ws.Columns(“A:E”).AutoFit
    Next ws
End Sub
Running this macro will auto-fit columns A through E on every sheet in your workbook.
When to Use AutoFit

- Consistent Data Entry: If your data entry across sheets follows a consistent format, AutoFit ensures uniformity in readability.
- Improving Presentation: Before sharing or printing your workbook, use AutoFit to clean up the layout.
- Dynamic Workbooks: For workbooks that evolve with changing data, AutoFit can be set to automatically adjust as data is added or removed.
⚠️ Note: AutoFit adjusts columns based on the visible content. If text is hidden due to filtering, it won’t be considered in the width calculation.
Wrapping Up

Excel’s AutoFit feature offers a swift method to ensure your data is presented in the best possible way across multiple sheets, saving time and reducing manual effort. Whether you’re working with a small or large dataset, AutoFit can make your workbooks more efficient and user-friendly. Remember, while AutoFit is excellent for most standard tasks, there might be situations where manual adjustment provides finer control over presentation, especially in charts or for aesthetic purposes.
What if AutoFit is not adjusting correctly?

+
If AutoFit isn’t working as expected, check for hidden columns, merge cells, or oversized cell content. Manual adjustment might be necessary in such cases.
Can AutoFit be used for rows as well?

+
Yes, AutoFit can also adjust row heights. The process is identical to column width adjustment.
Is there a way to apply AutoFit automatically every time I enter new data?

+
Excel does not have an automatic trigger for AutoFit on data entry, but you can set up a VBA macro to run AutoFit periodically or on specific events.
What’s the difference between AutoFit and manually adjusting column width?

+
AutoFit automatically adjusts column widths based on the widest entry, ensuring all content is visible. Manual adjustment lets you set specific widths, which might be useful for design or when precise control is needed.