5 Easy Steps to Insert Photos in Excel

Inserting photos into Excel spreadsheets can transform mundane data presentations into visually appealing reports. This guide will provide you with a comprehensive walkthrough on how to seamlessly incorporate images into your Excel sheets. Whether you're looking to illustrate data points, add company logos, or enhance your presentations, these steps will help you achieve your goals with ease.
Step 1: Open Your Excel Workbook

Start by opening your Excel workbook or creating a new one where you intend to insert the photos. Ensure your Excel software is up-to-date to avoid compatibility issues.
- Launch Excel
- Open an existing workbook or create a new one
Step 2: Navigate to the ‘Insert’ Tab

Once your workbook is ready:
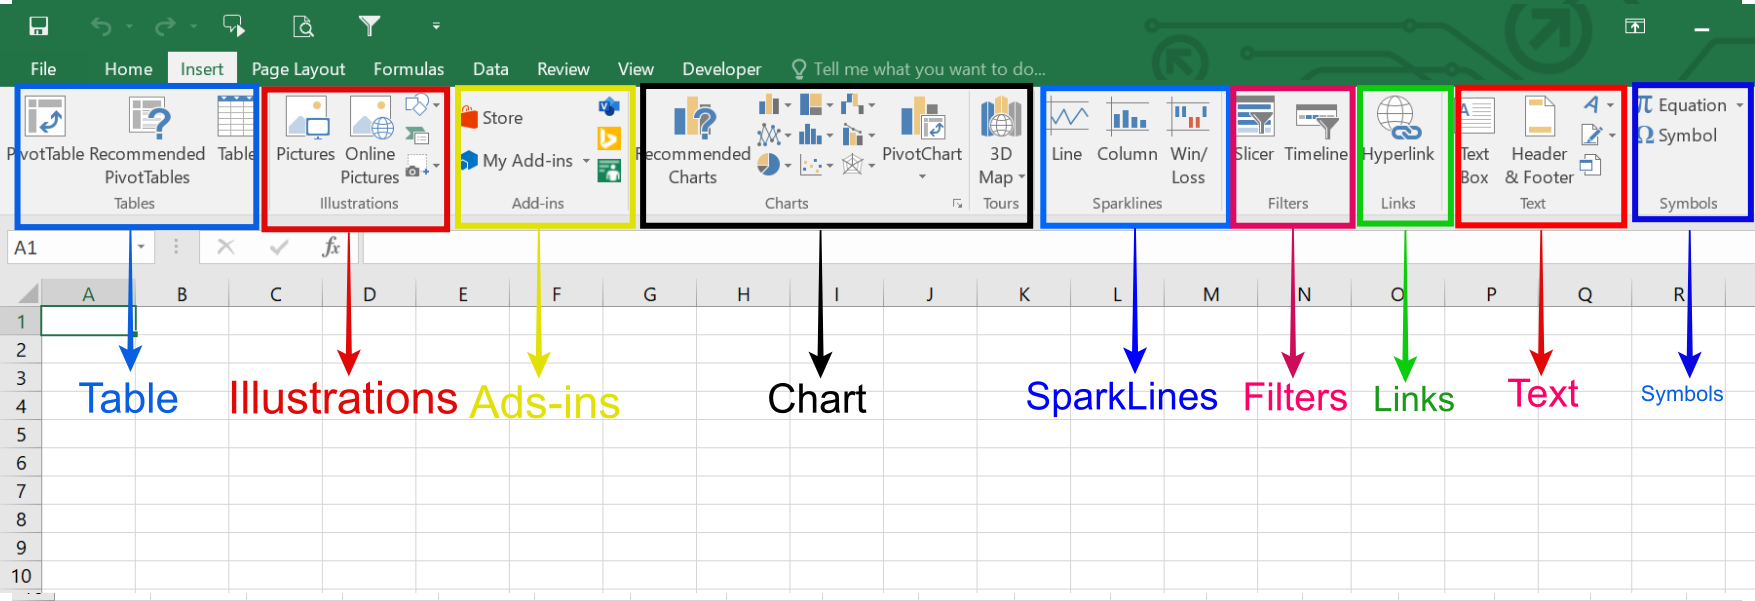
- Click on the ‘Insert’ tab at the top of Excel’s interface. Here you’ll find options for inserting different elements into your worksheet.

Step 3: Choose Your Insertion Method

Excel offers several ways to insert photos. Here’s how you can do it:
- From File: Click on ‘Pictures’ under the ‘Insert’ tab. This opens a dialog box where you can browse and select the photo you want to add from your local or network drive.
- From Online: If you prefer an online source, click on ‘Online Pictures’ or ‘From Photos’ depending on your Excel version. This allows you to search and insert images from Bing or your Microsoft OneDrive.
- Pasting: You can also copy an image from another application or a webpage, then paste it into Excel by selecting your cell and pressing
Ctrl + V.
Step 4: Adjust Photo Properties

After inserting the photo:
- Resize: Click and drag the photo’s corners to resize it. Hold ‘Shift’ to keep the aspect ratio intact.
- Position: Click and drag the photo to your desired position. Excel uses cell alignment as a reference.
- Format: Use the ‘Picture Format’ tab to enhance your image with effects, borders, or cropping tools.

Step 5: Link or Embed Images

You have the choice between embedding images directly into your Excel file or linking to external sources:
- Embed: The image becomes part of your Excel file, increasing its size. Choose this if the workbook will be used without internet access or if sharing is not required.
- Link: Inserting a link to the image keeps the Excel file smaller. However, the image’s location on your computer or online must remain unchanged. Use this when collaboration or frequent updates are necessary.
⚠️ Note: If you link an image and move or delete it from its original location, Excel will display a placeholder indicating the image cannot be found.
In conclusion, integrating images into your Excel spreadsheets can significantly enhance your data's visual impact. By following these five simple steps, you can transform your spreadsheets into dynamic and informative documents. Remember to adjust image properties for best fit and decide whether to link or embed images based on your presentation needs. With these tools at your disposal, your Excel documents will not only be functional but also engaging.
Can I resize an image after inserting it into Excel?

+
Yes, once you insert an image, you can resize it by clicking and dragging the image’s corners. Holding ‘Shift’ while resizing will maintain the aspect ratio.
Will adding images slow down my Excel workbook?

+
Large numbers of high-resolution images can slow down Excel, especially if they are embedded. Consider using external links or lower resolution images for better performance.
Can I insert images directly from the internet into Excel?

+
Yes, through the ‘Online Pictures’ feature, you can search and insert images directly from Bing into your Excel sheet.