5 Simple Ways to Password Protect Your Excel Sheets

Securing your data in Microsoft Excel is crucial, especially if you're dealing with sensitive information. Excel provides several ways to protect your spreadsheets, whether you're looking to keep your colleagues from making changes, safeguarding your data from accidental edits, or preventing unauthorized access altogether. In this blog, we'll explore five straightforward methods to password protect your Excel sheets, providing you with peace of mind and control over your valuable data.
Why Password Protect Excel Sheets?

Before diving into the methods, let’s quickly discuss why you might want to password protect your Excel sheets:
- Privacy: To ensure that only authorized individuals can view or modify sensitive data.
- Data Integrity: To prevent accidental or unauthorized changes to formulas or data.
- Compliance: For businesses, securing data might be a requirement for compliance with regulations like GDPR or HIPAA.
1. Workbook Protection with Passwords


Excel allows you to protect the entire workbook with a password. Here’s how:
- Open your Excel workbook.
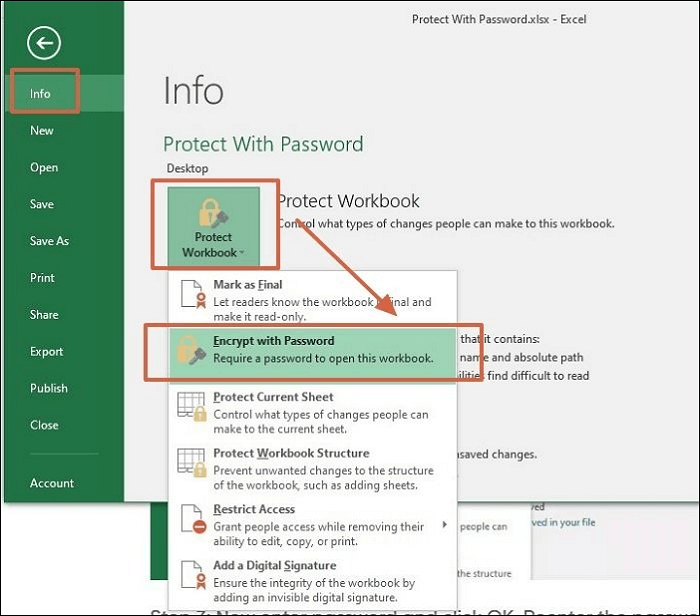
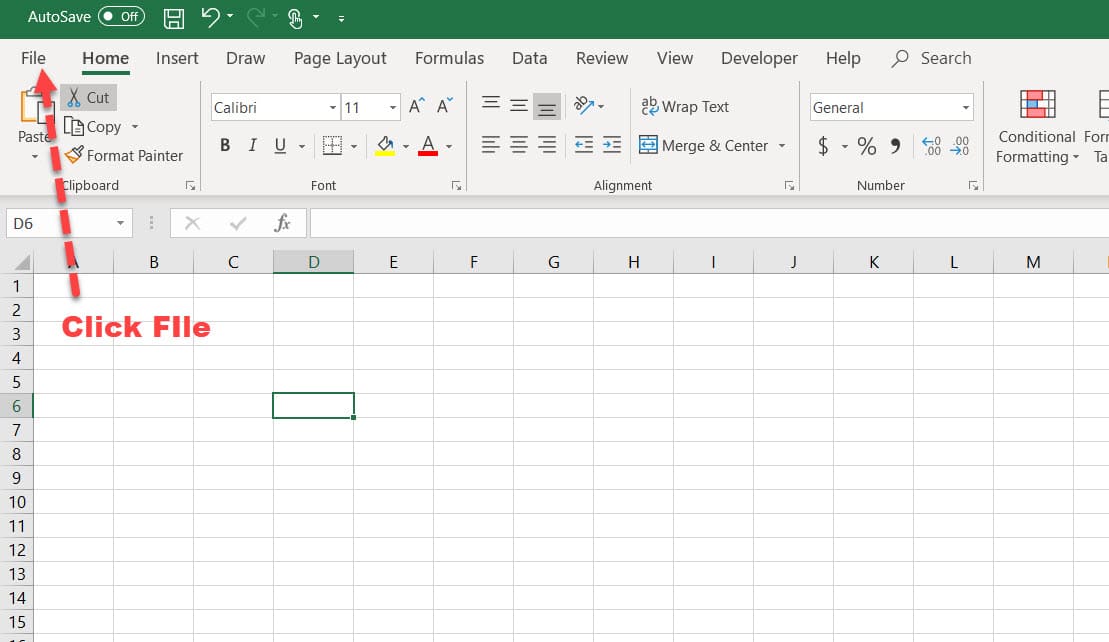
- Go to the File tab and click on Info.
- Under ‘Protect Workbook’, choose Encrypt with Password.
- In the dialog box that appears, enter a strong password and confirm it. Be careful, as you can’t retrieve a forgotten password!
- Save your workbook, and your Excel file will now require a password to open.
2. Worksheet Protection


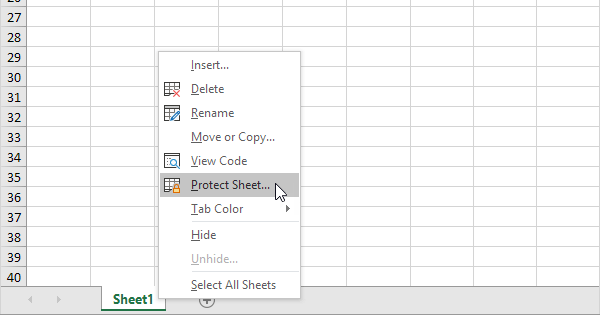
To safeguard individual worksheets from unauthorized edits, follow these steps:
- Select the worksheet you wish to protect.
- Go to the Review tab, and click on Protect Sheet.
- In the ‘Protect Sheet’ dialog, you can choose what users can and cannot do, like selecting locked cells or formatting cells. Set a password if needed.
- Click OK after setting your options.
🔐 Note: If you're protecting cells, remember that Excel has two cell states: locked (default, users can't change) and unlocked (users can edit if the sheet isn't protected).
3. Password-Protected Shared Workbook

When sharing an Excel file and wanting to limit editing rights, here’s what you can do:
- Go to the Review tab.
- Click on Share Workbook.
- Under the ‘Editing’ tab, tick ‘Allow changes by more than one user at the same time. This also allows workbook merging’.
- Then, select Protect Workbook, set a password, and confirm it.
4. Cell Level Protection

Excel offers the ability to protect specific cells from editing while allowing changes to others:
- Select the cells or range you wish to protect.
- Right-click, choose Format Cells, and go to the Protection tab.
- Uncheck Locked if you want users to edit these cells, or leave it checked to prevent changes.
- Protect the sheet as outlined in the “Worksheet Protection” section above.
💡 Note: Locked cells only prevent changes when the sheet is protected. Before protecting the sheet, ensure the cells you want to allow editing on are set to unlocked.
5. Using VBA for Advanced Protection


For a more advanced level of protection, you can use Visual Basic for Applications (VBA):
- Press Alt + F11 to open the VBA Editor.
- Insert a new module by right-clicking any object in the Project Explorer window, selecting Insert > Module.
- Input the following code:
Sub PasswordProtectWorksheet() Dim ws As Worksheet Dim password As String password = InputBox("Please enter the password", "Password Required") If password = "YourPasswordHere" Then For Each ws In ThisWorkbook.Worksheets ws.Protect DrawingObjects:=True, Contents:=True, Scenarios:=True, Password:="YourPasswordHere" Next ws Else MsgBox "Invalid Password" End If End Sub - Close the VBA editor and run the macro by pressing Alt + F8, selecting ‘PasswordProtectWorksheet’, and clicking Run.
Password protecting your Excel sheets is about maintaining control, ensuring data integrity, and complying with privacy requirements. Each method listed provides a different layer of protection:
- Workbook level encryption for ultimate security.
- Worksheet protection for restricted editing.
- Sharing options with password protection for collaborative work.
- Cell-level protection to fine-tune data access.
- VBA for custom, tailored security measures.
Remember that while these methods enhance security, they are not foolproof. Users with enough Excel knowledge might find ways around some protections. Hence, keep your passwords secure and complex, and regularly back up your data to mitigate risks.
Can I recover a lost Excel password?

+
No, if you forget the password you set to protect an Excel file, there is no recovery method available through Excel itself. Use a password manager or keep your passwords in a secure place.
What happens if someone changes a locked cell?

+
Excel will prevent the user from making changes to locked cells if the worksheet is protected. An error message will appear indicating the sheet is protected.
Is it possible to protect only specific cells or parts of the sheet?

+
Yes, you can selectively protect cells or ranges within an Excel sheet by unchecking the ‘Locked’ option in cell formatting before protecting the sheet.
What is the difference between protecting a workbook and protecting a worksheet?

+
Protecting a workbook encrypts the file with a password, making it unreadable without the password. Protecting a worksheet, however, limits what users can do within a sheet, like editing or formatting, but the workbook can still be opened.