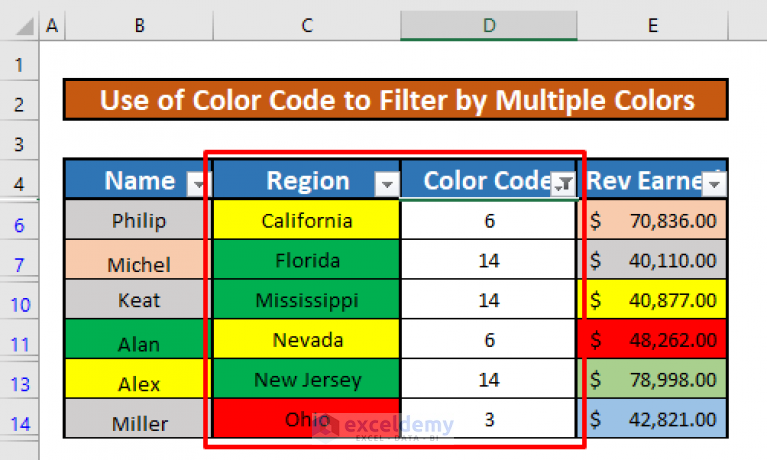
Master Excel Filters: Quick and Easy Guide

Filtering data in Microsoft Excel is a crucial skill for any professional dealing with large datasets. Whether you're an accountant sorting through financial records, a marketer analyzing customer data, or simply someone who needs to organize personal information, mastering Excel's filtering capabilities can save you a tremendous amount of time and effort. This guide will take you through the process of using Excel filters, from the basics to more advanced techniques, ensuring you can quickly and effectively manage your data.
Getting Started with Basic Filters

Before diving into the advanced features, understanding the basics is essential. Here’s how you can start using filters in Excel:
- Select Your Data Range: Click anywhere within your dataset or select the entire range you wish to filter.
- Activate Filter: Go to the “Data” tab, then click on “Filter” (or press Ctrl+Shift+L on Windows or Cmd+Shift+L on Mac). This action will add drop-down arrows in the header row of your dataset.
- Apply a Filter: Click the drop-down arrow in the column you wish to filter. You can choose to filter text, numbers, or dates based on various criteria like equals, contains, or greater than.
Using Text Filters

Excel allows for detailed text filtering, which can be very useful:
- Contains: Filters the column for entries that contain specific text.
- Does Not Contain: Shows only those entries that do not include the specified text.
- Begins With/Ends With: Useful for filtering names, addresses, or any field with known beginnings or endings.
💡 Note: Remember that text filters are case-sensitive. If you need to ignore case, use the “Text Filters” submenu to select options like “contains” or “does not contain,” where case sensitivity can be adjusted.
Number and Date Filters

Excel’s ability to filter numbers and dates opens up numerous possibilities for data analysis:
- Equals, Does Not Equal: Filter for exact matches or exclude specific numbers/dates.
- Greater Than/Less Than: Ideal for filtering out data based on thresholds like sales figures or deadlines.
- Between: Filter data within a specific range, perfect for date ranges or numerical thresholds.
Advanced Filtering Techniques

Once you’re comfortable with basic filtering, here are some advanced techniques:
Custom AutoFilter

Create complex filters with multiple conditions:
- Select “Custom Filter” from the drop-down menu.
- Choose your conditions from the list (e.g., “is greater than” or “equals to”).
- Add more conditions using “And” or “Or” to combine filters.
Using Filters with Formulas

Leverage Excel formulas to filter dynamically:
- Use formulas like IF, AND, and OR to create dynamic filters that update with your data.
- For instance, to filter all sales greater than 1000 but less than 5000, you could use:
=AND(A2>1000, A2<5000)
Advanced Filter for Multiple Criteria

When simple filters are not enough, Excel’s Advanced Filter feature comes into play:
- Set Up Criteria: Create a separate range with headers matching your data table, and list your criteria below each header.
- Invoke Advanced Filter: Go to “Data” > “Advanced Filter”, choose to filter the list in place or copy to another location, then specify your criteria range.
| Criteria | Value |
|---|---|
| Sales | ≥1000 |
| <5000 |

🔍 Note: Advanced Filter allows for complex filtering operations like partial matches, which isn’t possible with standard filtering methods.
Filtering with Wildcards

Wildcards are symbols that can stand for unknown characters:
- Asterisk (*): Represents any number of characters.
- Question Mark (?): Represents one character.
Example: Filtering names that begin with “J” and have “h” as the third character would look like this: “Jh”.
Visual Filters

Excel also offers visual tools to filter data:
- Slicers: For PivotTables and Tables, slicers provide an interactive way to filter data with a click.
- Timeline: If your data has a date column, the Timeline slicer lets you filter by time periods with ease.
Summing Up the Excel Filtering Journey

By now, you’re well-versed in the various methods to filter data in Excel. From basic text and number filters to advanced techniques like using formulas, wildcards, and visual tools, you’ve explored a wide range of options to manage and analyze your data efficiently. Whether for sorting through financial data, customer records, or personal projects, these filtering skills will help streamline your work and reveal insights that would otherwise be hidden in the sheer volume of information.
Can I filter data in a column based on multiple criteria?

+
Yes, using the Custom AutoFilter feature, you can apply multiple conditions to a single column or combine filters using the Advanced Filter option.
What’s the difference between standard and advanced filters?

+
Standard filters are straightforward, allowing for basic text, number, or date filtering. Advanced filters provide the ability to use complex criteria across multiple columns or with logical functions like AND/OR.
How do I quickly remove all applied filters?

+
To clear all filters, click “Filter” again from the Data tab or press Ctrl+Shift+L (Windows) or Cmd+Shift+L (Mac) to toggle filters off.
Can I filter data from other sheets or external sources?

+
Yes, by using the Advanced Filter and specifying the data range in another sheet or workbook, or by setting up connections to external data sources.