5 Easy Steps to Add Columns in Excel

Adding columns in Excel can significantly streamline your data management process. Whether you're a novice or an experienced Excel user, mastering this simple task can save time and enhance your ability to organize and analyze data effectively. Here's how you can do it in five easy steps:
Step 1: Open Your Excel Workbook

Start by opening Microsoft Excel on your computer. Navigate to the workbook containing the data where you wish to add columns. If you’re starting from scratch, open a new spreadsheet.

Step 2: Select the Column

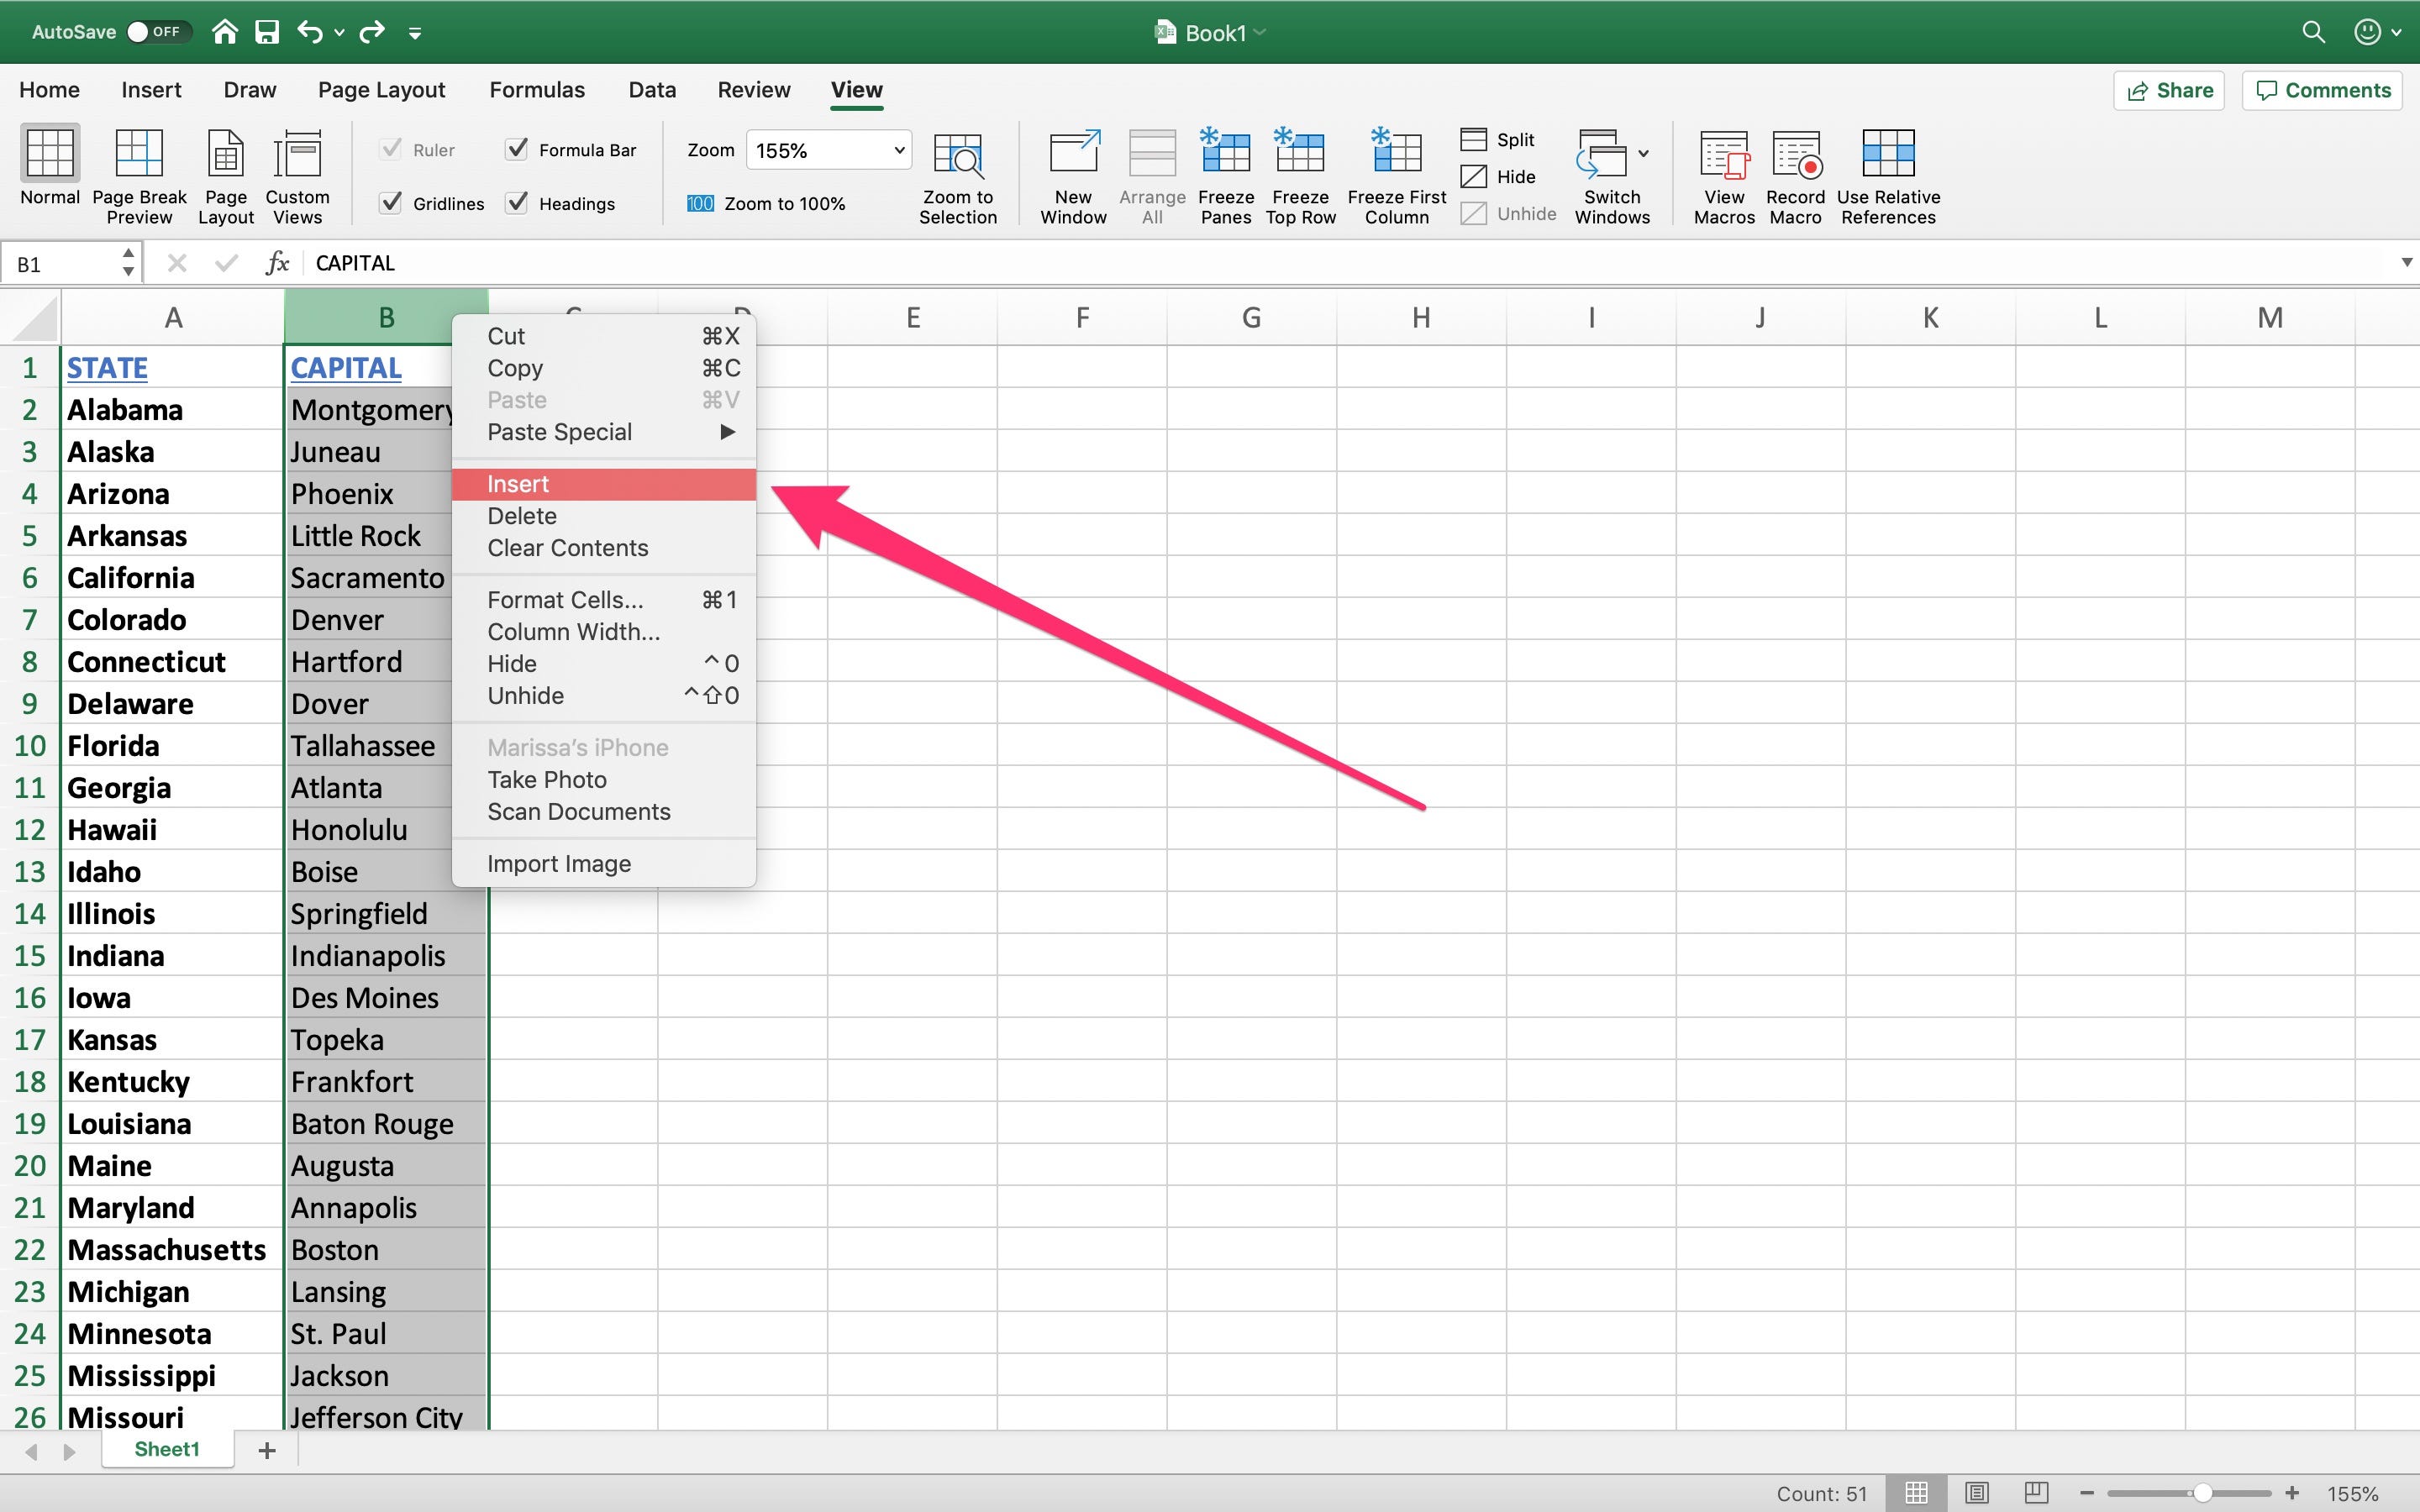
Decide where in your worksheet you want to insert a new column. Click on the letter at the top of the column immediately to the right of where you want the new column to appear. For example, if you want a new column between A and B, select column B.
Step 3: Insert a New Column

After selecting the desired column:
- Right-click to bring up the context menu.
- Choose “Insert” from the options.
- Excel will insert a new column to the left of your selected column.
Step 4: Adjusting Column Widths

Once you’ve inserted the new column, you might need to adjust its width:
- Move your cursor to the right edge of the column header until it turns into a double-sided arrow.
- Click and drag to resize the column to your desired width.
⚠️ Note: Ensure the new column’s width is sufficient to view the data clearly.
Step 5: Label the Column

Lastly, give your new column a descriptive label to ensure data clarity:
- Type a header name in the first cell of your newly inserted column.
- If needed, format this label to make it stand out (e.g., bold, center alignment, background color).
In summary, adding columns in Excel is a straightforward process that involves selecting the correct location, inserting a column, adjusting the width, and labeling it. This ability to modify your worksheet on the fly provides flexibility for expanding and organizing your data set for better analysis.
How do I insert multiple columns at once?

+
You can insert multiple columns by selecting multiple columns before using the insert function. For example, if you select columns B to D, three new columns will be inserted before B.
Can I undo adding a column if I make a mistake?

+
Yes, simply press Ctrl + Z or go to the “Undo” option under the “Edit” menu to revert your last action.
How can I ensure all data in a column is visible?

+
After inserting the column, you can adjust the column width by double-clicking the right edge of the column header, which will automatically adjust the width to fit the longest piece of data in the column.