5 Ways to Lock Your Excel Sheets from Editing

Whether you're a business professional, an educator, or an individual managing personal finances, securing your Excel sheets can be crucial to maintain the integrity of your data. Here are five effective methods to lock your Excel sheets, ensuring unauthorized users cannot edit the information contained within.
1. Protecting the Workbook Structure

To safeguard the structure of your workbook, which includes adding, deleting, hiding, or moving sheets, follow these steps:
- Open your Excel workbook.
- Go to the ‘Review’ tab and click on ‘Protect Workbook’.
- Check the ‘Structure’ box in the ‘Protect Structure and Windows’ dialog box.
- Enter a password and confirm it.
🔐 Note: Make sure to remember or securely store the password as it will be required to make changes to the workbook structure later.
2. Protecting the Sheet

This method protects the content on individual sheets:
- Select the worksheet you want to protect.
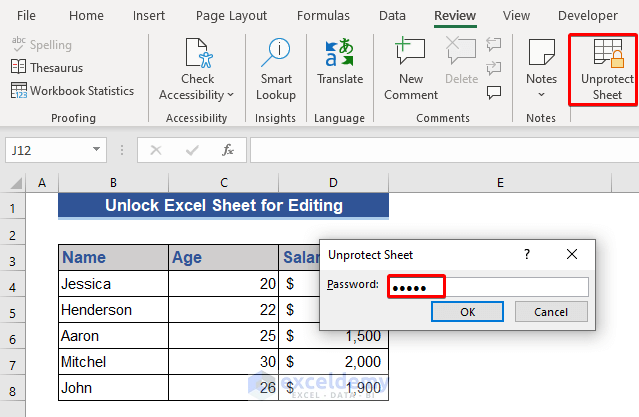
- Navigate to ‘Review’ > ‘Protect Sheet’.
- In the ‘Protect Sheet’ dialog, specify what users can do when the sheet is protected, like selecting locked cells or formatting cells.
- Set a password and confirm it.
3. Using Cell Locking and Sheet Protection

This is a more granular approach where you can lock specific cells while allowing others to be edited:
- Select the cells you do not want edited and press Ctrl+1 to open Format Cells.
- Go to the ‘Protection’ tab and uncheck ‘Locked’ if you want users to edit these cells.
- Then go back to ‘Review’ > ‘Protect Sheet’ and protect the sheet as described above.
| Step | Action |
|---|---|
| 1 | Uncheck ‘Locked’ for cells you want editable |
| 2 | Protect Sheet |

4. Hiding Formulas in Locked Cells

Protecting formulas from being viewed or altered is essential for data privacy:
- Go to ‘Home’ > ‘Cells’ > ‘Format’ > ‘Format Cells’.
- In the ‘Protection’ tab, check ‘Hidden’ for formula cells.
- After locking cells as explained earlier, formulas will not be visible when cells are protected.
5. Password-Protecting the Excel File

This is an additional layer of security:
- Go to ‘File’ > ‘Info’ > ‘Protect Workbook’.
- Choose ‘Encrypt with Password’.
- Enter a password to open the file.
🔑 Note: Password protection at the file level adds significant security, but remember, this password must be shared carefully as losing it means data can become inaccessible.
By implementing these security measures, you ensure that your sensitive data within Excel sheets remains untouched by unauthorized users. Protecting workbooks and sheets, locking cells, and even encrypting the file itself provide various levels of security, allowing you to control who can view, edit, or change your data. These steps not only safeguard your information but also maintain the trust of colleagues or clients who rely on the accuracy of the data you share.
Can I lock specific cells without protecting the entire sheet?

+
Yes, you can lock specific cells while leaving others editable by first unlocking the cells you want to edit, then protecting the sheet. The cells previously unlocked will remain editable even when the sheet is protected.
What if I forget the password to unlock the sheet?

+
Unfortunately, if you forget the password used to protect a sheet in Excel, there is no straightforward way to recover it. However, you can try online password recovery tools, though they might not always work. Always back up your files and keep track of passwords securely.
Is there a way to unlock multiple sheets at once?

+
Excel does not have a built-in feature to unlock multiple sheets simultaneously. You would need to unlock each sheet individually by entering the correct password or using VBA code if you know how to script in Excel.