5 Simple Steps to Split Excel Sheets

Mastering Microsoft Excel is crucial for efficient data management, and one of the most valuable skills you can acquire is splitting your Excel sheets into multiple files. Whether for organizing data, simplifying sharing or enhancing processing, dividing a workbook into smaller, manageable segments is a game changer. In this guide, we'll explore five simple steps to split Excel sheets, allowing you to manage and manipulate your data effectively.
Step 1: Preparing Your Excel Workbook

Before you begin splitting your Excel workbook, it's imperative to ensure that your data is well-organized:
- Name your sheets: Assign unique and descriptive names to your sheets. This ensures that when you split the workbook, each new file retains meaningful titles.
- Organize your data: Verify that each sheet contains data that can stand independently or make sense when separated.
- Remove unwanted elements: Clear out any hidden sheets, charts, or macros that you might not need in the split files.
🛑 Note: Always keep a backup of your original workbook to avoid data loss.
Step 2: Utilizing VBA for Sheet Splitting

Excel's Visual Basic for Applications (VBA) can automate the process of splitting sheets. Here's how you can do it:
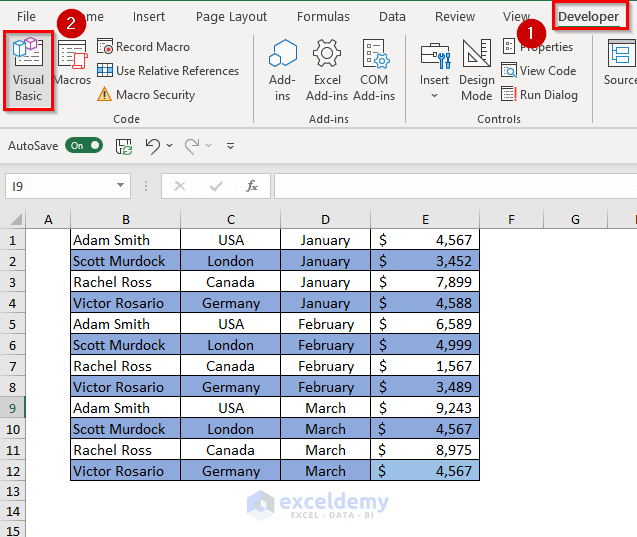
- Open the Visual Basic Editor by pressing Alt + F11.
- Click Insert > Module to create a new module.
- Paste the following VBA code:
Sub SplitWorkbook()
    Dim wb As Workbook
    Dim ws As Worksheet
    Dim NewWB As Workbook
    Dim StrName As String
    Dim NewPath As String

    Set wb = ThisWorkbook
    NewPath = wb.Path

    For Each ws In wb.Worksheets
        ws.Copy
        Set NewWB = ActiveWorkbook
        StrName = ws.Name
        NewWB.SaveAs Filename:=NewPath & "\Backup\" & StrName
        NewWB.Close
    Next ws
End Sub
Then:
- Run the macro by pressing F5.
- Ensure you've created a folder named "Backup" in the same location as your original workbook, or modify the path in the macro to suit your needs.
🔄 Note: If you're not familiar with VBA, consider running this macro in a separate workbook to avoid affecting your original data.
Step 3: Manual Sheet Extraction

For those who prefer a hands-on approach without VBA:
- Right-click on the sheet tab you want to extract and select Move or Copy...
- In the dialog box, select (new book) under "To book" and ensure the Create a copy box is checked.
- Click OK to create a new workbook with the selected sheet.
- Save this new workbook with an appropriate name.
Step 4: Splitting Sheets with Power Query

Power Query, a powerful tool in Excel, can also be used to split your workbook:
- Go to Data > Get & Transform Data > Get Data > From Other Sources > Blank Query.
- Open the Advanced Editor by right-clicking on the query and choosing Advanced Editor.
- Input the following code to load all sheet names:
let
    Source = Excel.Workbook(File.Contents("C:\Path\To\Your\Workbook.xlsx"), null, true),
    SheetNames = Source{[Item="Sheets",Kind="Table"]}[Data]
in
    SheetNames
Then:
- Use the list to reference and split each sheet into a new Excel file.
- Save each resulting query as a separate Excel file.
Step 5: Ensuring Data Integrity Post-Split

After splitting your Excel workbook, ensure the following to maintain data integrity:
- Check formulas: Ensure that any cell references are updated correctly in the new files to avoid #REF! errors.
- Link Integrity: If your workbook had links to other Excel files or external data, ensure these links are preserved in the new workbooks.
- Formatting: Ensure that all cell formatting, conditional formatting, and themes are carried over to the new workbooks.
💡 Note: External data connections will need to be reestablished in each split file.
In this detailed guide, we’ve navigated through five simple steps to split Excel sheets to help you manage and organize your data more efficiently. This method not only streamlines workflows but also improves data handling, sharing, and collaboration. With these steps, you can ensure that your data remains consistent and clean across all divided workbooks, enhancing your Excel proficiency.
Can I undo the split after separating my Excel workbook?

+
While there is no direct undo feature for splitting, you can manually combine the split files back into one workbook if needed. Keeping a backup of the original workbook before splitting is always a good practice.
Will the VBA macro work in any version of Excel?

+
The provided VBA macro is designed for modern versions of Excel (2010 and later). For older versions, you might need to adjust the code for compatibility.
How can I ensure the integrity of my data when using Power Query?

+
Power Query helps maintain data integrity by refreshing data sources automatically. However, always double-check that the connections and query definitions are correctly set up in each new workbook.