5 Steps to Create a Balance Sheet in Excel

Managing financial documents for a business is crucial for ensuring transparency, effective planning, and strategic decision-making. Excel, with its versatility and functionality, is a popular tool for creating balance sheets, financial statements that provide a snapshot of a company's financial position at a specific point in time. Here, we will guide you through the process of creating a balance sheet in Excel in five simple steps, ensuring accuracy, simplicity, and optimization for both human readers and search engines.
Step 1: Gathering Necessary Data

Before you can craft an effective balance sheet, you’ll need to collect all necessary financial data:
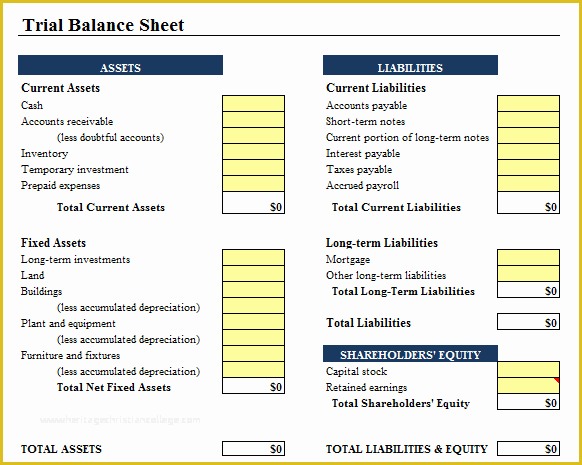
- Assets: Both current (cash, inventory, accounts receivable) and non-current (property, plant, equipment, long-term investments)
- Liabilities: Short-term (accounts payable, accrued expenses) and long-term (loans, bonds payable)
- Equity: Owner’s equity, retained earnings, stockholder’s equity
This data can be sourced from financial statements like the income statement, trial balance, or even directly from accounting records.
Step 2: Setting Up Your Excel Worksheet

Here’s how to set up your Excel worksheet for your balance sheet:
- Open Excel and create a new workbook.
- In the first row, type headers such as “Company Name,” “As of Date,” “Assets,” “Liabilities,” and “Equity.”
- Set up three columns for Assets, Liabilities, and Equity.
📝 Note: Ensure that your date format is consistent across your worksheet for clarity.
Step 3: Inputting Data into Excel

Follow these steps to input your data:
- Assets: List each asset type in a separate cell under the “Assets” column, ensuring you differentiate between current and non-current assets. Use the SUM function to calculate total assets.
- Liabilities: Follow a similar format for liabilities, categorizing into current and long-term liabilities.
- Equity: Enter owner’s equity, common stock, retained earnings, etc. The sum should automatically reflect in the Equity column.
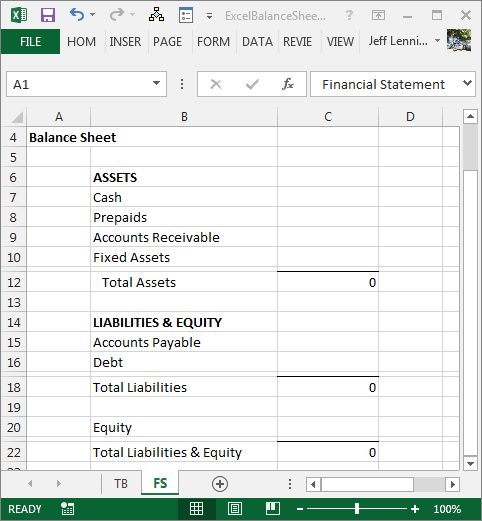
Here is a sample table structure you might use:
| Assets | Liabilities | Equity |
|---|---|---|
| Current Assets | Current Liabilities | Common Stock |
| Fixed Assets | Long-term Liabilities | Retained Earnings |
| Total Assets | Total Liabilities | Total Equity |

Step 4: Balancing Your Sheet

Ensure your balance sheet balances by following these steps:
- Total Liabilities plus Total Equity should equal Total Assets.
- If they do not match, verify your calculations, possibly using the =SUM() formula to ensure all figures are added correctly.
Step 5: Formatting and Analysis

Once your data is in place:
- Use conditional formatting to highlight key numbers or discrepancies for quick analysis.
- Add a bar or pie chart to visually represent the proportion of different asset classes.
- Format the balance sheet to make it professional-looking by adjusting column widths, font styles, and colors.
Now you have your balance sheet laid out in Excel, offering insights into the financial health of your business.
In summary, creating a balance sheet in Excel involves gathering relevant financial data, setting up your worksheet, inputting data, ensuring the figures balance, and finally formatting the document for readability and presentation. This not only aids in understanding your company's financial position but also enhances strategic planning and decision-making processes.
What should I do if my balance sheet does not balance?

+
Recalculate all figures, ensuring that all amounts are correctly entered. Check for transcription errors or missing accounts.
Can I create a balance sheet without Excel?

+
Yes, though Excel provides an automated calculation environment, balance sheets can be manually prepared using ledgers, calculators, or other accounting software.
How often should I update my balance sheet?

+
Updating your balance sheet at the end of each accounting period (monthly, quarterly, or annually) is common practice for financial reporting purposes.