How to Split an Excel Sheet Vertically in Seconds

When working with large datasets in Excel, it can become overwhelming to manage everything on a single worksheet. Splitting your Excel sheet vertically not only helps in organizing data more effectively but also improves readability and navigation within your spreadsheet. Here’s a step-by-step guide on how to achieve this efficiently.
Why Split Your Excel Sheet Vertically?

Before diving into the "how," understanding the "why" can be beneficial:
- Enhanced Readability: Smaller, vertical sections of your sheet can be easier to comprehend at a glance.
- Efficient Data Management: Grouping related information vertically can streamline your workflow.
- Quick Navigation: With vertical splits, users can jump from section to section more rapidly.
How to Split an Excel Sheet Vertically

Using the Split Tool

Excel provides a straightforward tool to split your worksheet:
- Open your Excel workbook.
- Select the column where you want the split to occur. For example, if you want to split at column D, click on any cell in column D.
- Go to the View tab on the ribbon.
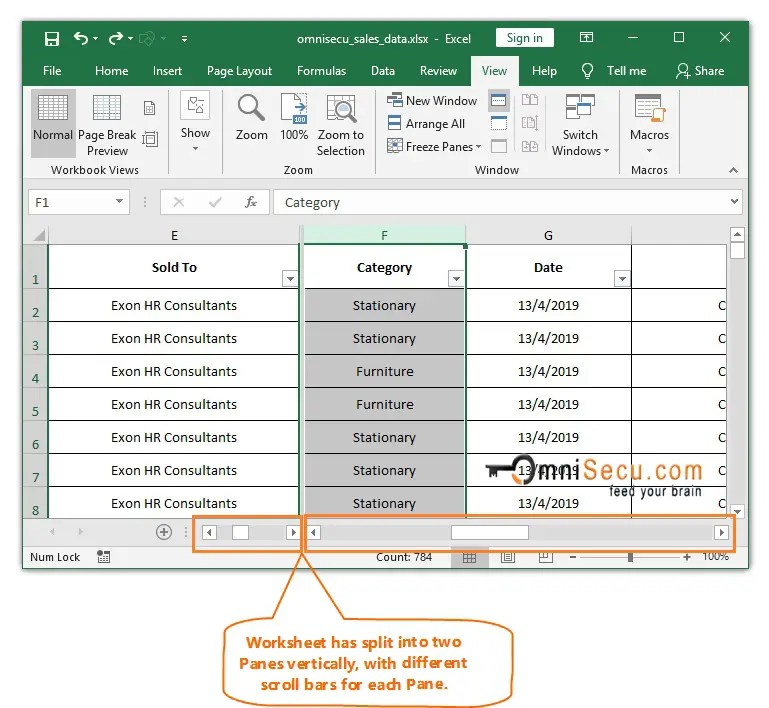
- Click on Freeze Panes, and from the dropdown, select Split.
Excel will split the screen vertically at the column you selected.
Notes:
⚠️ Note: If you choose to freeze panes instead, Excel will lock the columns to the left or top of the split, providing a different functionality.
Adjusting the Split

Once your sheet is split:
- Click and drag the vertical split line to adjust its position.
- If you wish to remove the split, go back to the View tab and click Split again.
Using the Window Function

Another method to achieve a vertical split is using the Window function:
- Go to the View tab.
- Click on New Window, which opens another instance of your current worksheet.
- Choose Arrange All from the same tab, select Vertical, and click OK.
- Both windows will now be side by side, creating a vertical split effect.
Optimizing Your Workflow with Split Sheets

Splitting your Excel sheet can be the key to enhancing your data management strategy:
- Parallel Comparison: View and compare different data sections or perform different calculations concurrently.
- Reduced Scrolling: Minimize the need to scroll horizontally, reducing eyestrain and increasing efficiency.
- Customization: Adjust each split independently to focus on specific data sets.
Understanding how to manipulate and optimize your workspace in Excel through vertical splitting can transform your approach to data analysis and presentation. With these techniques, you can manage large datasets with ease, make comparisons more straightforward, and ultimately enhance productivity.
Can I save my Excel file with vertical splits intact?

+
Yes, Excel retains the vertical split settings when you save and reopen the file, providing continuity in your work.
How do I know which column to split at?

+
Choose a column that logically separates your data. If your data has a clear division, like different categories, split at that point for optimal organization.
What if I need to split horizontally instead?

+
You can achieve horizontal splitting by selecting a row, going to View > Split, or using the same Window function but selecting Horizontal instead.
Are there limitations to splitting sheets?

+
While you can split sheets, excessive splitting might clutter your workspace, and remember that the function of freezing panes and splitting are distinct in Excel.