Upload Excel to Google Sheets: Simple Guide

When you need to take data that's been crunched in Microsoft Excel and want to share it or use it in a more collaborative environment like Google Workspace, Google Sheets becomes the natural choice. Uploading your Excel spreadsheets to Google Sheets has become almost second nature for many, but there are intricacies to making the process smooth, efficient, and aligned with what your project needs. Here's an in-depth look at how to upload Excel files to Google Sheets and maximize the collaboration features of Google's tool.
Understanding the Basics of Excel and Google Sheets

Excel and Google Sheets are both powerful spreadsheets tools, but they come with different features and user experiences:
- Offline vs. Online: Excel is primarily an offline tool, while Google Sheets is designed for cloud-based collaboration.
- File Formats: Excel supports .xls, .xlsx, and other formats, whereas Google Sheets uses its native format, but can open Excel files.
- Sharing and Collaboration: Excel has some sharing capabilities, but Google Sheets excels at real-time collaboration.
Step-by-Step Guide to Upload Excel Files to Google Sheets

Step 1: Sign in to Google Drive

Before anything else, ensure you’re signed into your Google Account. If you don’t have one, sign up for free.
Step 2: Navigate to Google Sheets

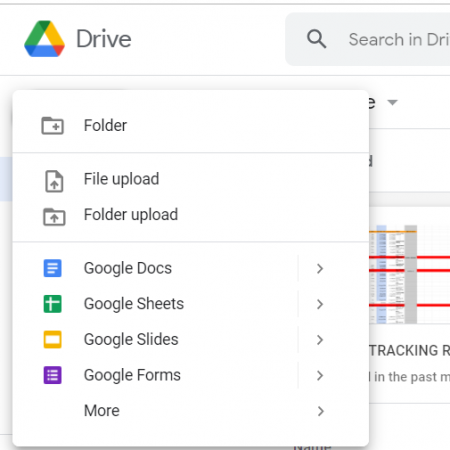
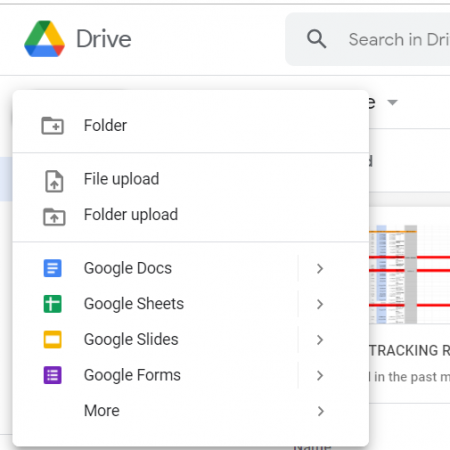
From Google Drive, locate and click the “New” button, then select “Google Sheets” from the dropdown menu. Alternatively, you can access Google Sheets directly from the Google Apps menu or by typing “sheets.new” in your browser’s address bar.
Step 3: Prepare Your Excel File

Ensure your Excel file is ready for upload. Remove any unnecessary data or features that aren’t supported in Google Sheets, like macros, as they can complicate the import process.
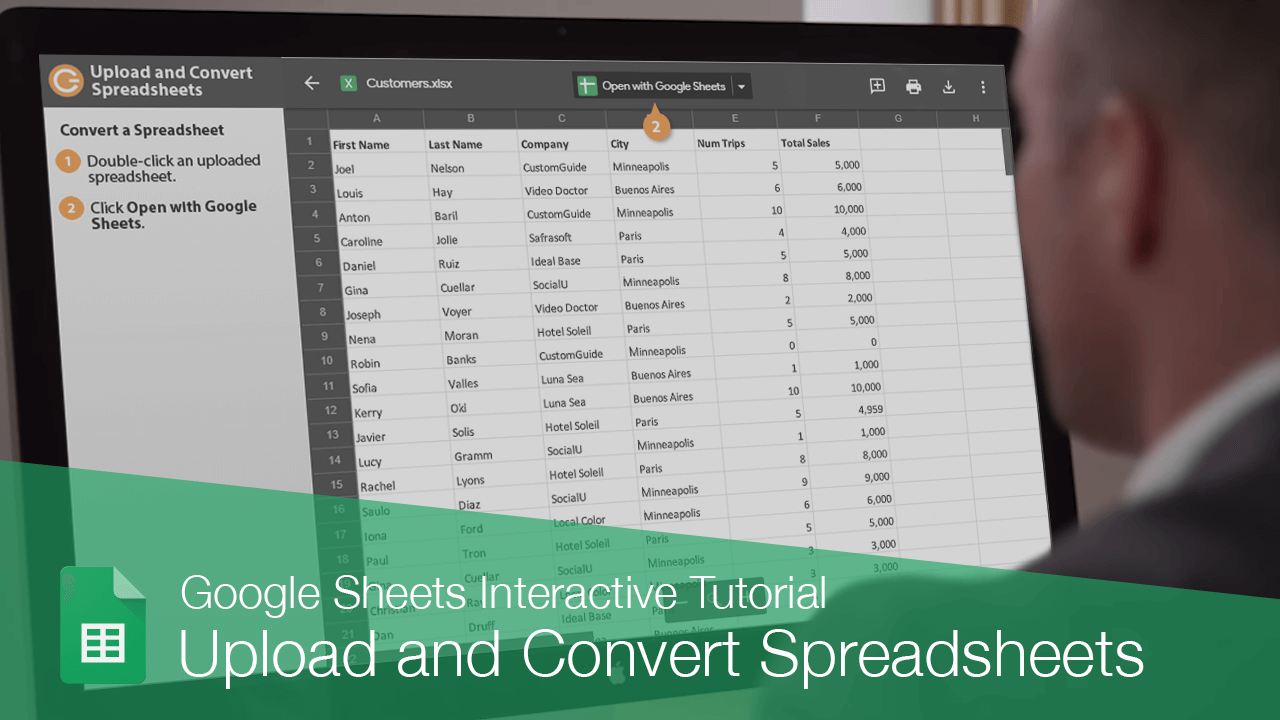
Step 4: Upload the Excel File

- In Google Sheets, click on File > Import.
- Choose Upload from the menu options.
- Select the Excel file from your computer or drag and drop it into the upload window.
Step 5: Configure the Import Settings

Upon upload, a dialog box will prompt you to choose the import options:
- Replace spreadsheet: Replace the current sheet with the uploaded Excel data.
- Insert new sheet(s): Each tab from your Excel file will become its own sheet in Google Sheets.
- Replace current sheet: Overwrites the current sheet with the data from your Excel file.
Additionally, you can choose whether to:
- Convert Excel-specific functions.
- Convert formulas to Google Sheets formulas.
- Use all Excel properties like links or named ranges.
🔍 Note: When you're importing Excel files with advanced features, Google Sheets may not support all functionalities or may import them in a basic manner, so be prepared for some manual adjustments.
Step 6: Import and View Your Data

After selecting the appropriate import options, click on Import data. Google Sheets will now convert your Excel file into its format. You’ll see a progress bar, and once complete, your data will appear in the Google Sheets interface.
Step 7: Verify the Import

Check the data for accuracy and formatting:
- Formulas should have been converted if you selected that option.
- Check for any data or formatting issues.
- Verify any charts, pivot tables, or other features are displayed correctly.
Collaboration and Sharing in Google Sheets

Once your Excel data is in Google Sheets, you can take advantage of the tool’s collaborative features:
- Share: Click the “Share” button to invite others to view or edit your spreadsheet.
- Comment: Add comments to discuss specific cells or ranges of data.
- Version History: Track changes and revert to previous versions if needed.
- Data Validation: Set rules for what data can be entered to maintain data integrity.
Pro Tips for Seamless Transition

- Prepare Your Excel Data: Clean and structure your data before the upload to minimize errors during conversion.
- Understand Limitations: Some features in Excel don’t have a direct equivalent in Google Sheets, so you might need to recreate them.
- Learn Google Sheets Functions: Google Sheets has a different set of functions. Familiarize yourself with them to use the platform effectively.
- Use Google Sheets Specific Features: Explore Google Sheets’ unique features like Google Forms integration or Apps Script for automation.
By following these steps, you've successfully transitioned your Excel data into a Google Sheets environment where collaboration and sharing are just a few clicks away. Remember, not all Excel functionalities will transfer perfectly, but with some adjustments, you can leverage Google Sheets' strengths to enhance your data's usability and accessibility.
Can I upload an Excel file with VBA macros to Google Sheets?

+
Google Sheets does not support VBA macros directly. You will need to recreate any functionality provided by macros using Google Apps Script.
What happens to Excel-specific functions when I upload my file to Google Sheets?

+
Google Sheets will attempt to convert Excel-specific functions to its own equivalents. If there isn’t a direct match, the function will either be translated to the closest available or left as an unsupported function, requiring manual editing.
Is there a limit to the size of an Excel file I can upload?

+
Yes, Google Drive has a file upload limit of 50MB, which also applies to Google Sheets. If your Excel file exceeds this size, you might need to split it into smaller files or consider alternative methods to manage the data.